CNC Milling Set Up
Rules of CNC Milling
- Do not leave the cut unattended.
- Wear ear and eye protection.
- Have a crew member check your files before running your first cut (or if you are unsure of success).
Sign In
Sign into the CNC milling computer using your UW net ID and password.
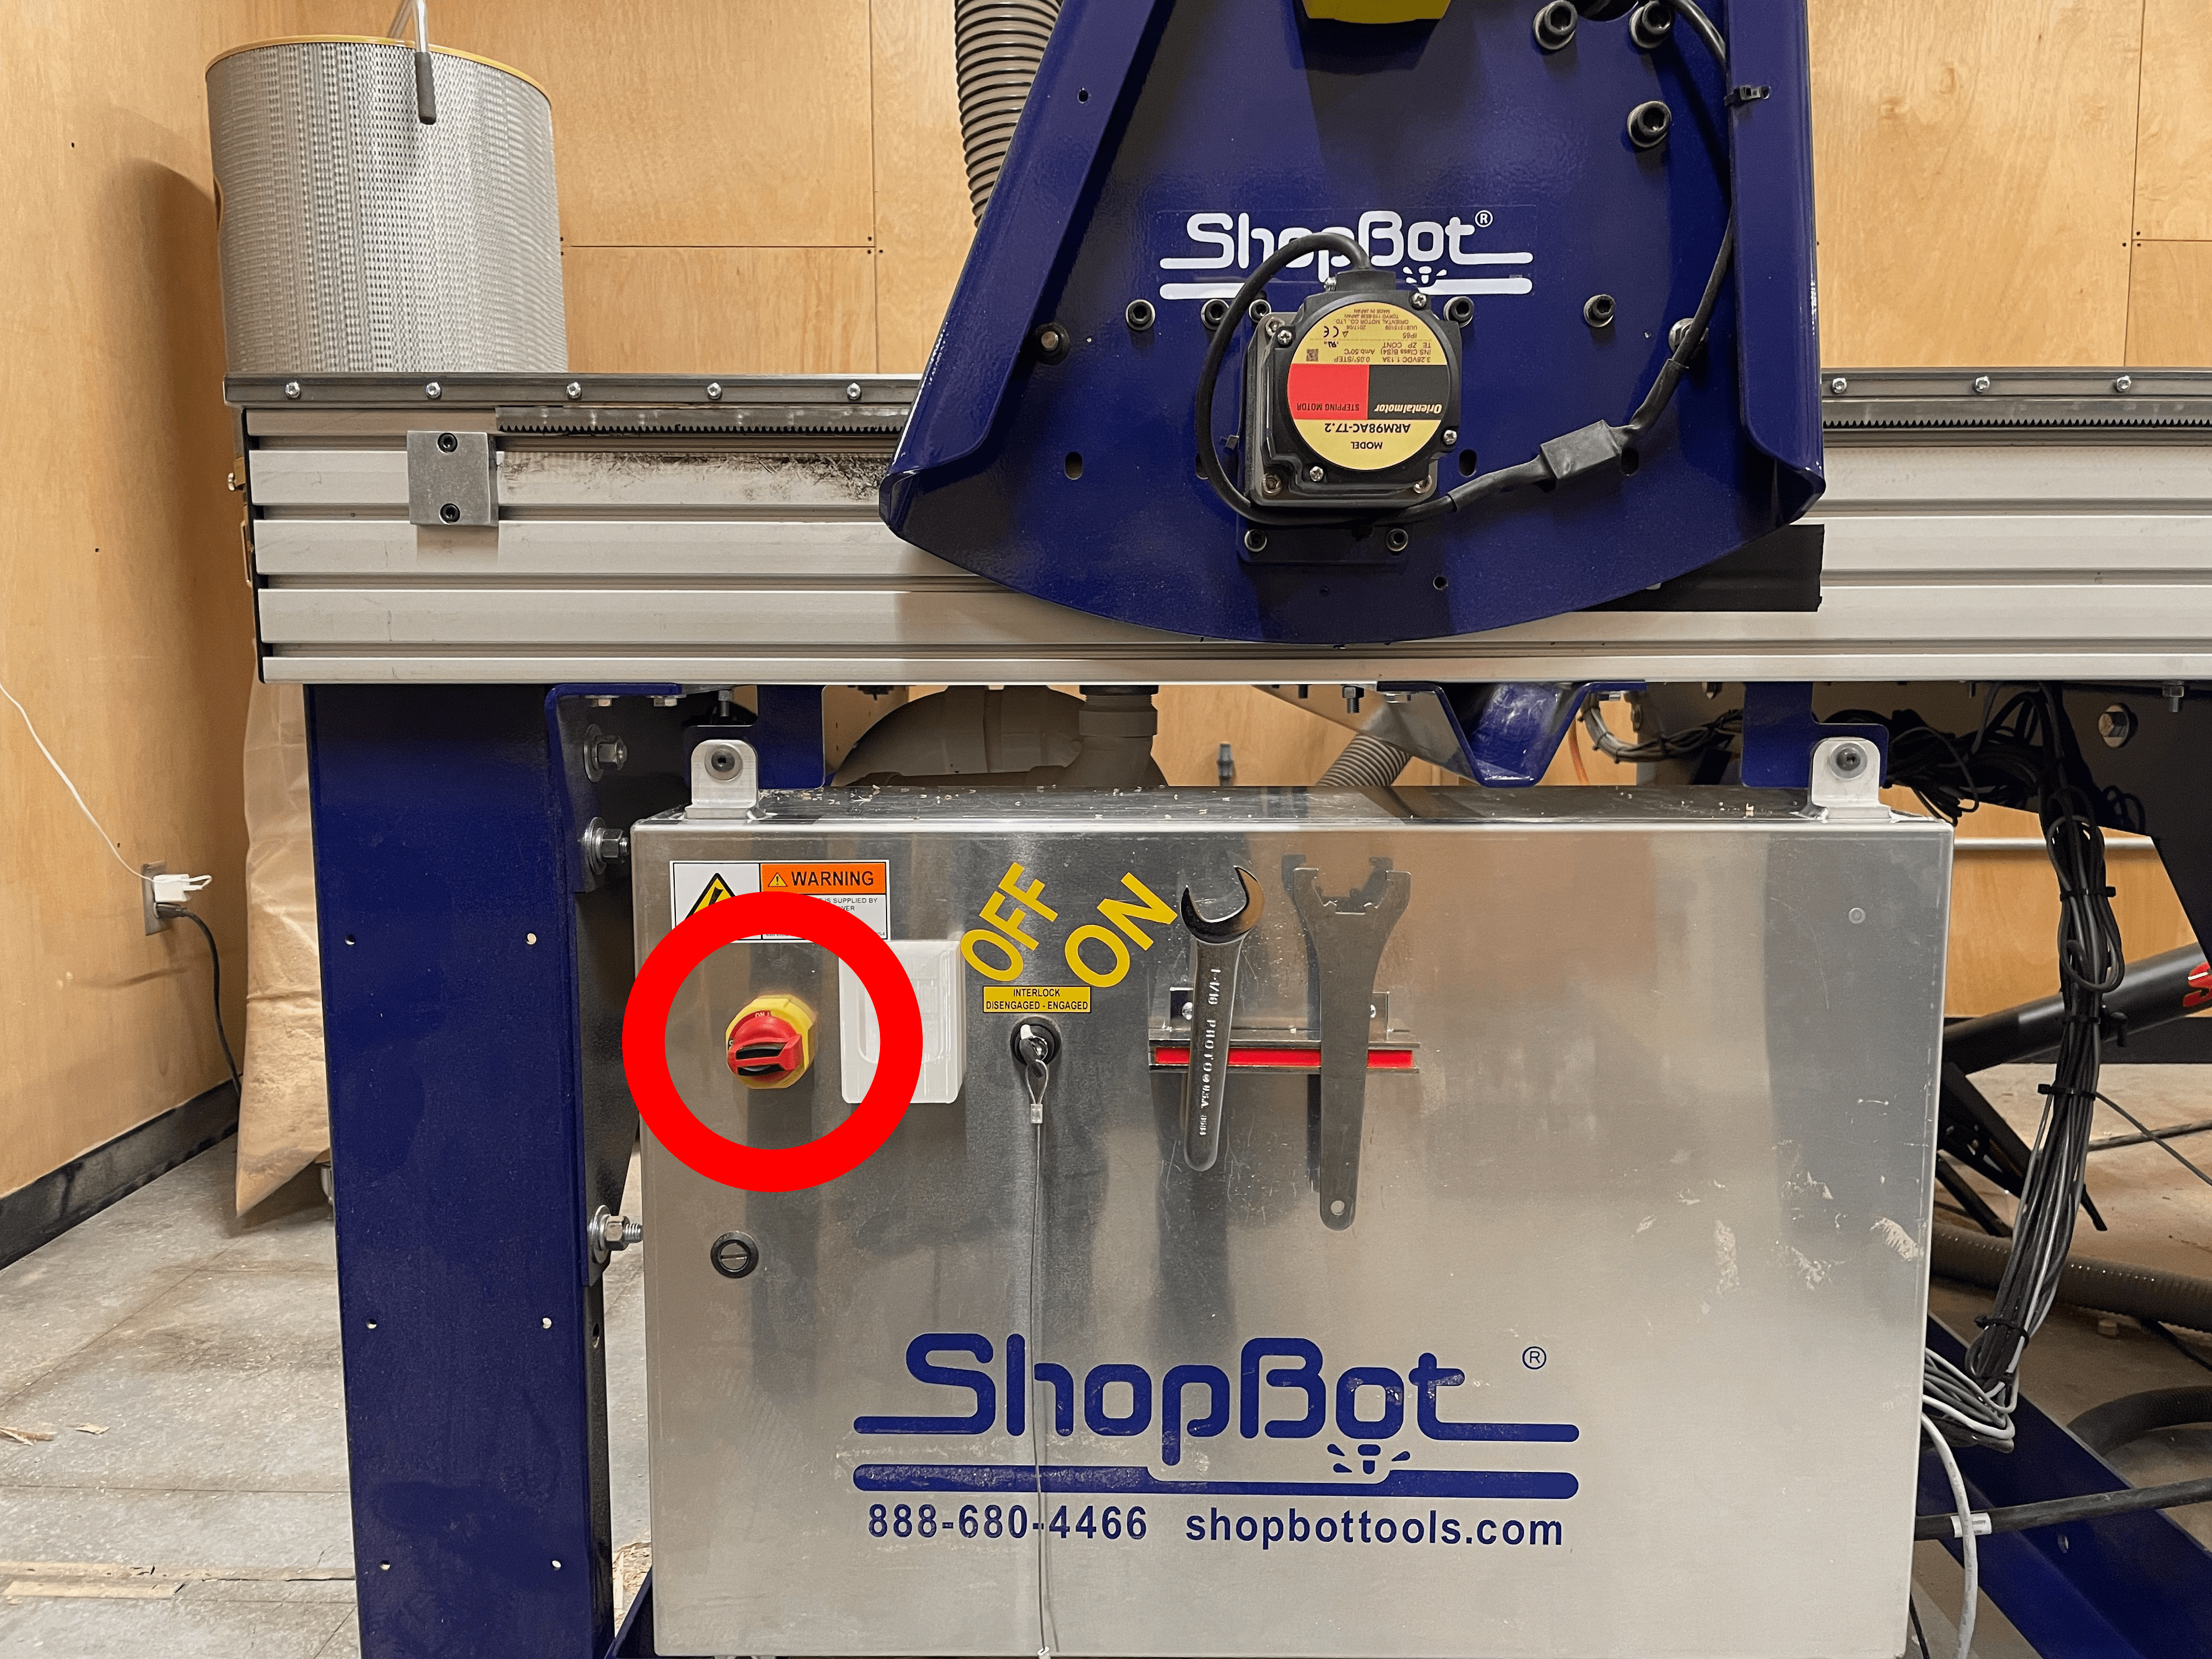
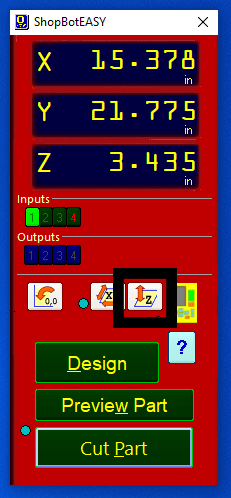
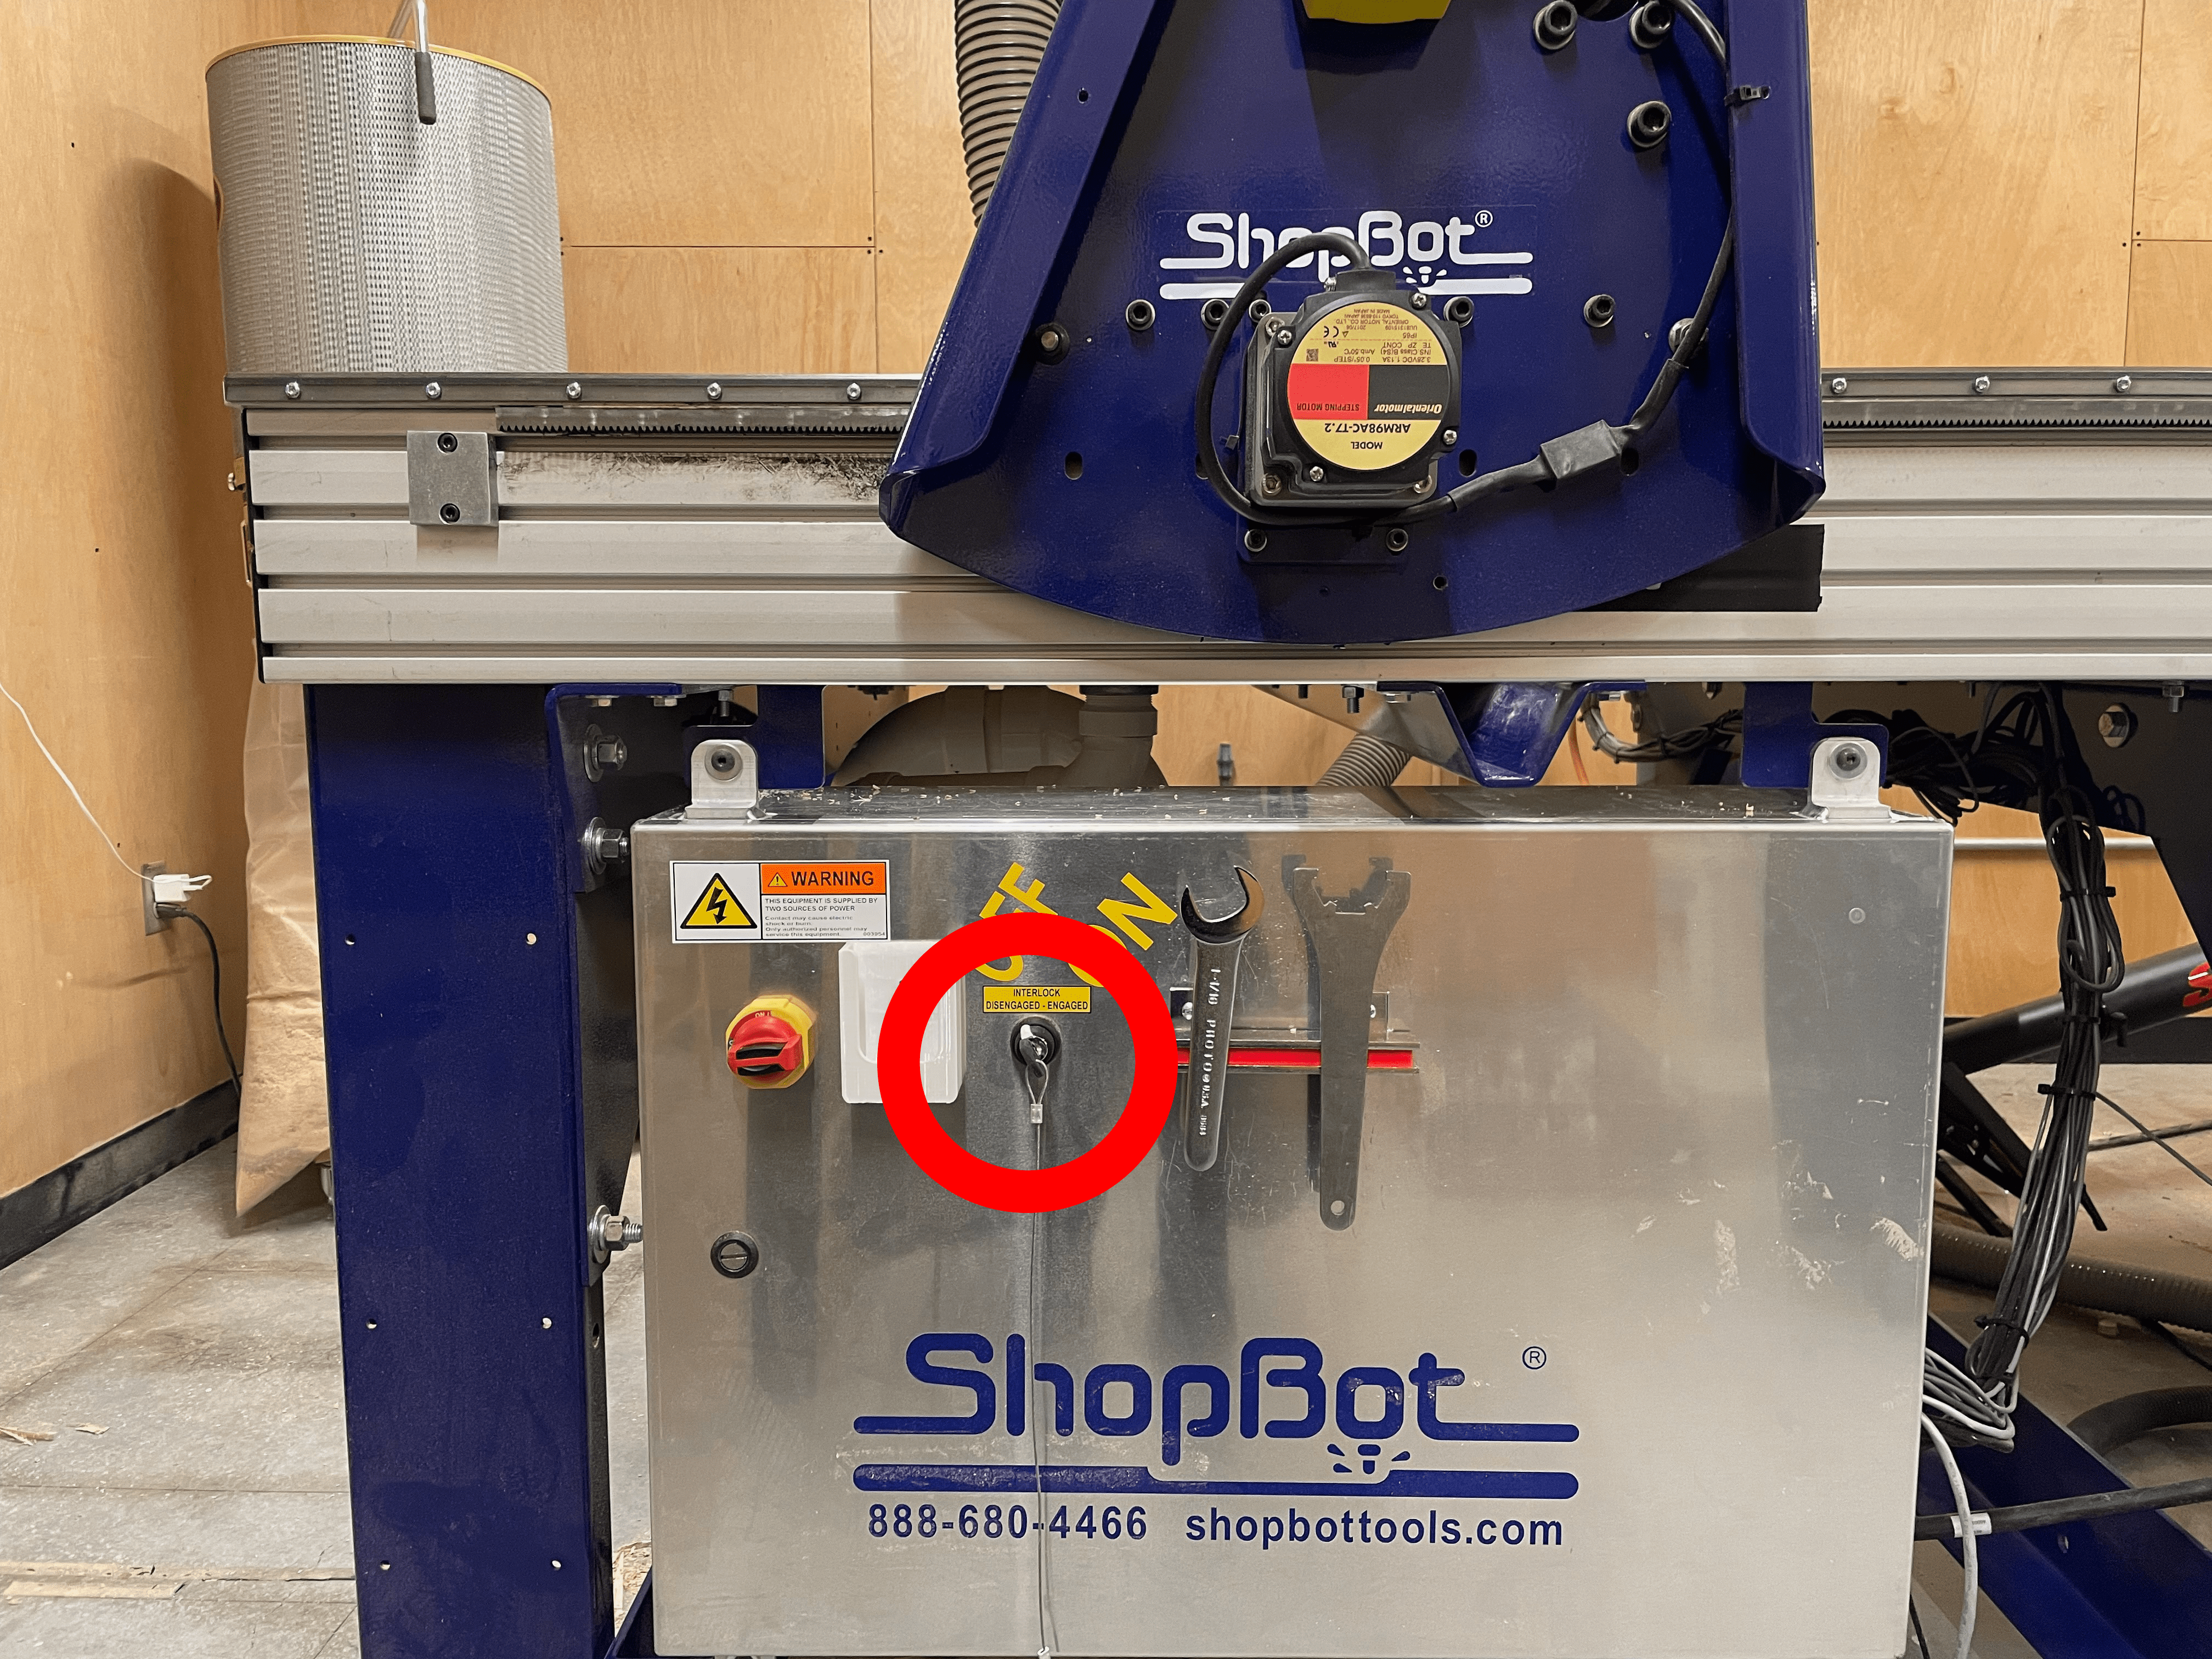
Turn on the machine, note: there are two power switches, one turns on the machine’s computer (the one shown in the red circle), one turns on the spindle (the one with key), wait to turn on the spindle until you are ready to cut. You should hear the fan above the spindle begin to make noise.
Open ShopBot 3.
If you get a pop-up that says ‘STOP Button is ON!’, Press the blue re-set button.
Make sure that the CNC milling table is clear so that the tool cannot run into anything.
If the tool is too low such that it would scrape the table while the machine moved, move the tool upwards a little by clicking the yellow ‘To Move Tool’.
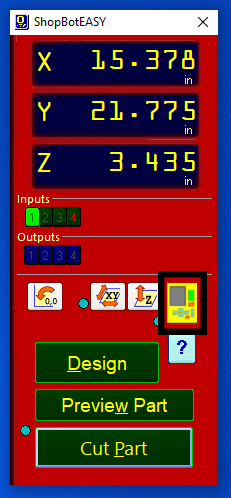
Then press the ‘UP Z’ button until it has enough clearance. You will need to exit this menu before continuing with the next steps.
Change the Router Bit
If there is a different router bit installed than the one you would like to use, you will need to switch the bit.
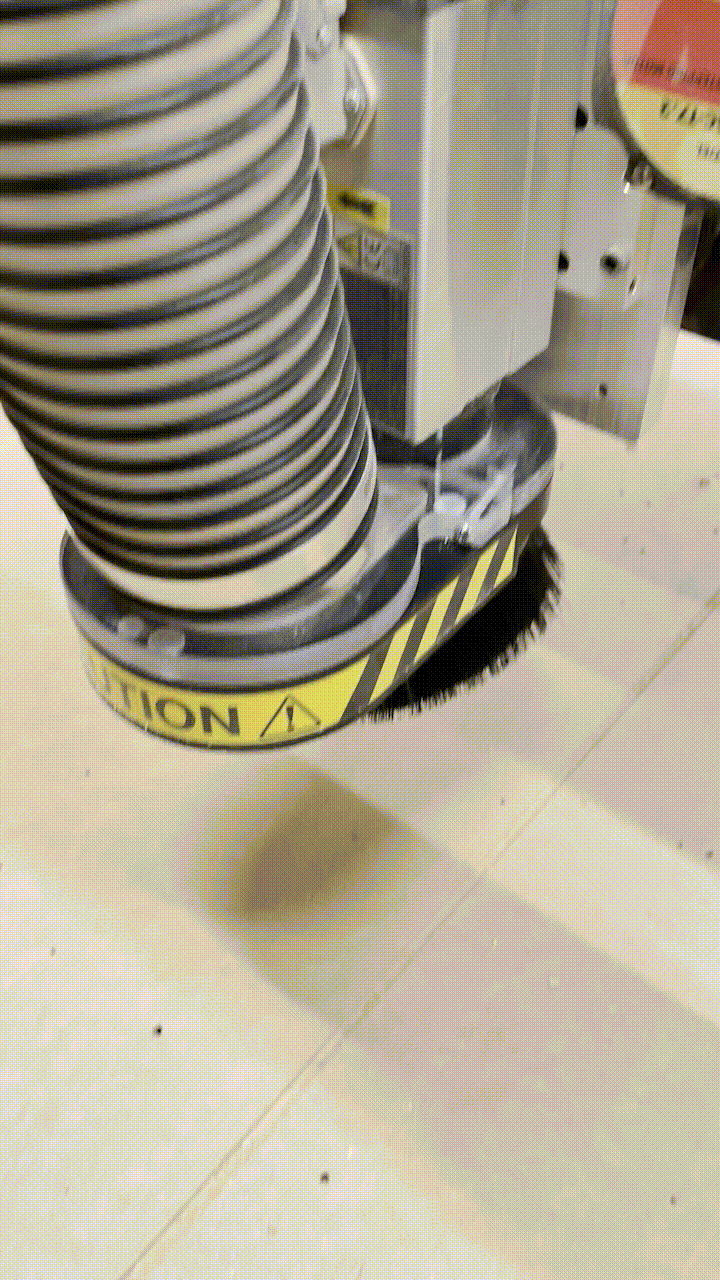
Take the vacuum brush off of the tool end, it is only secured with magnets.
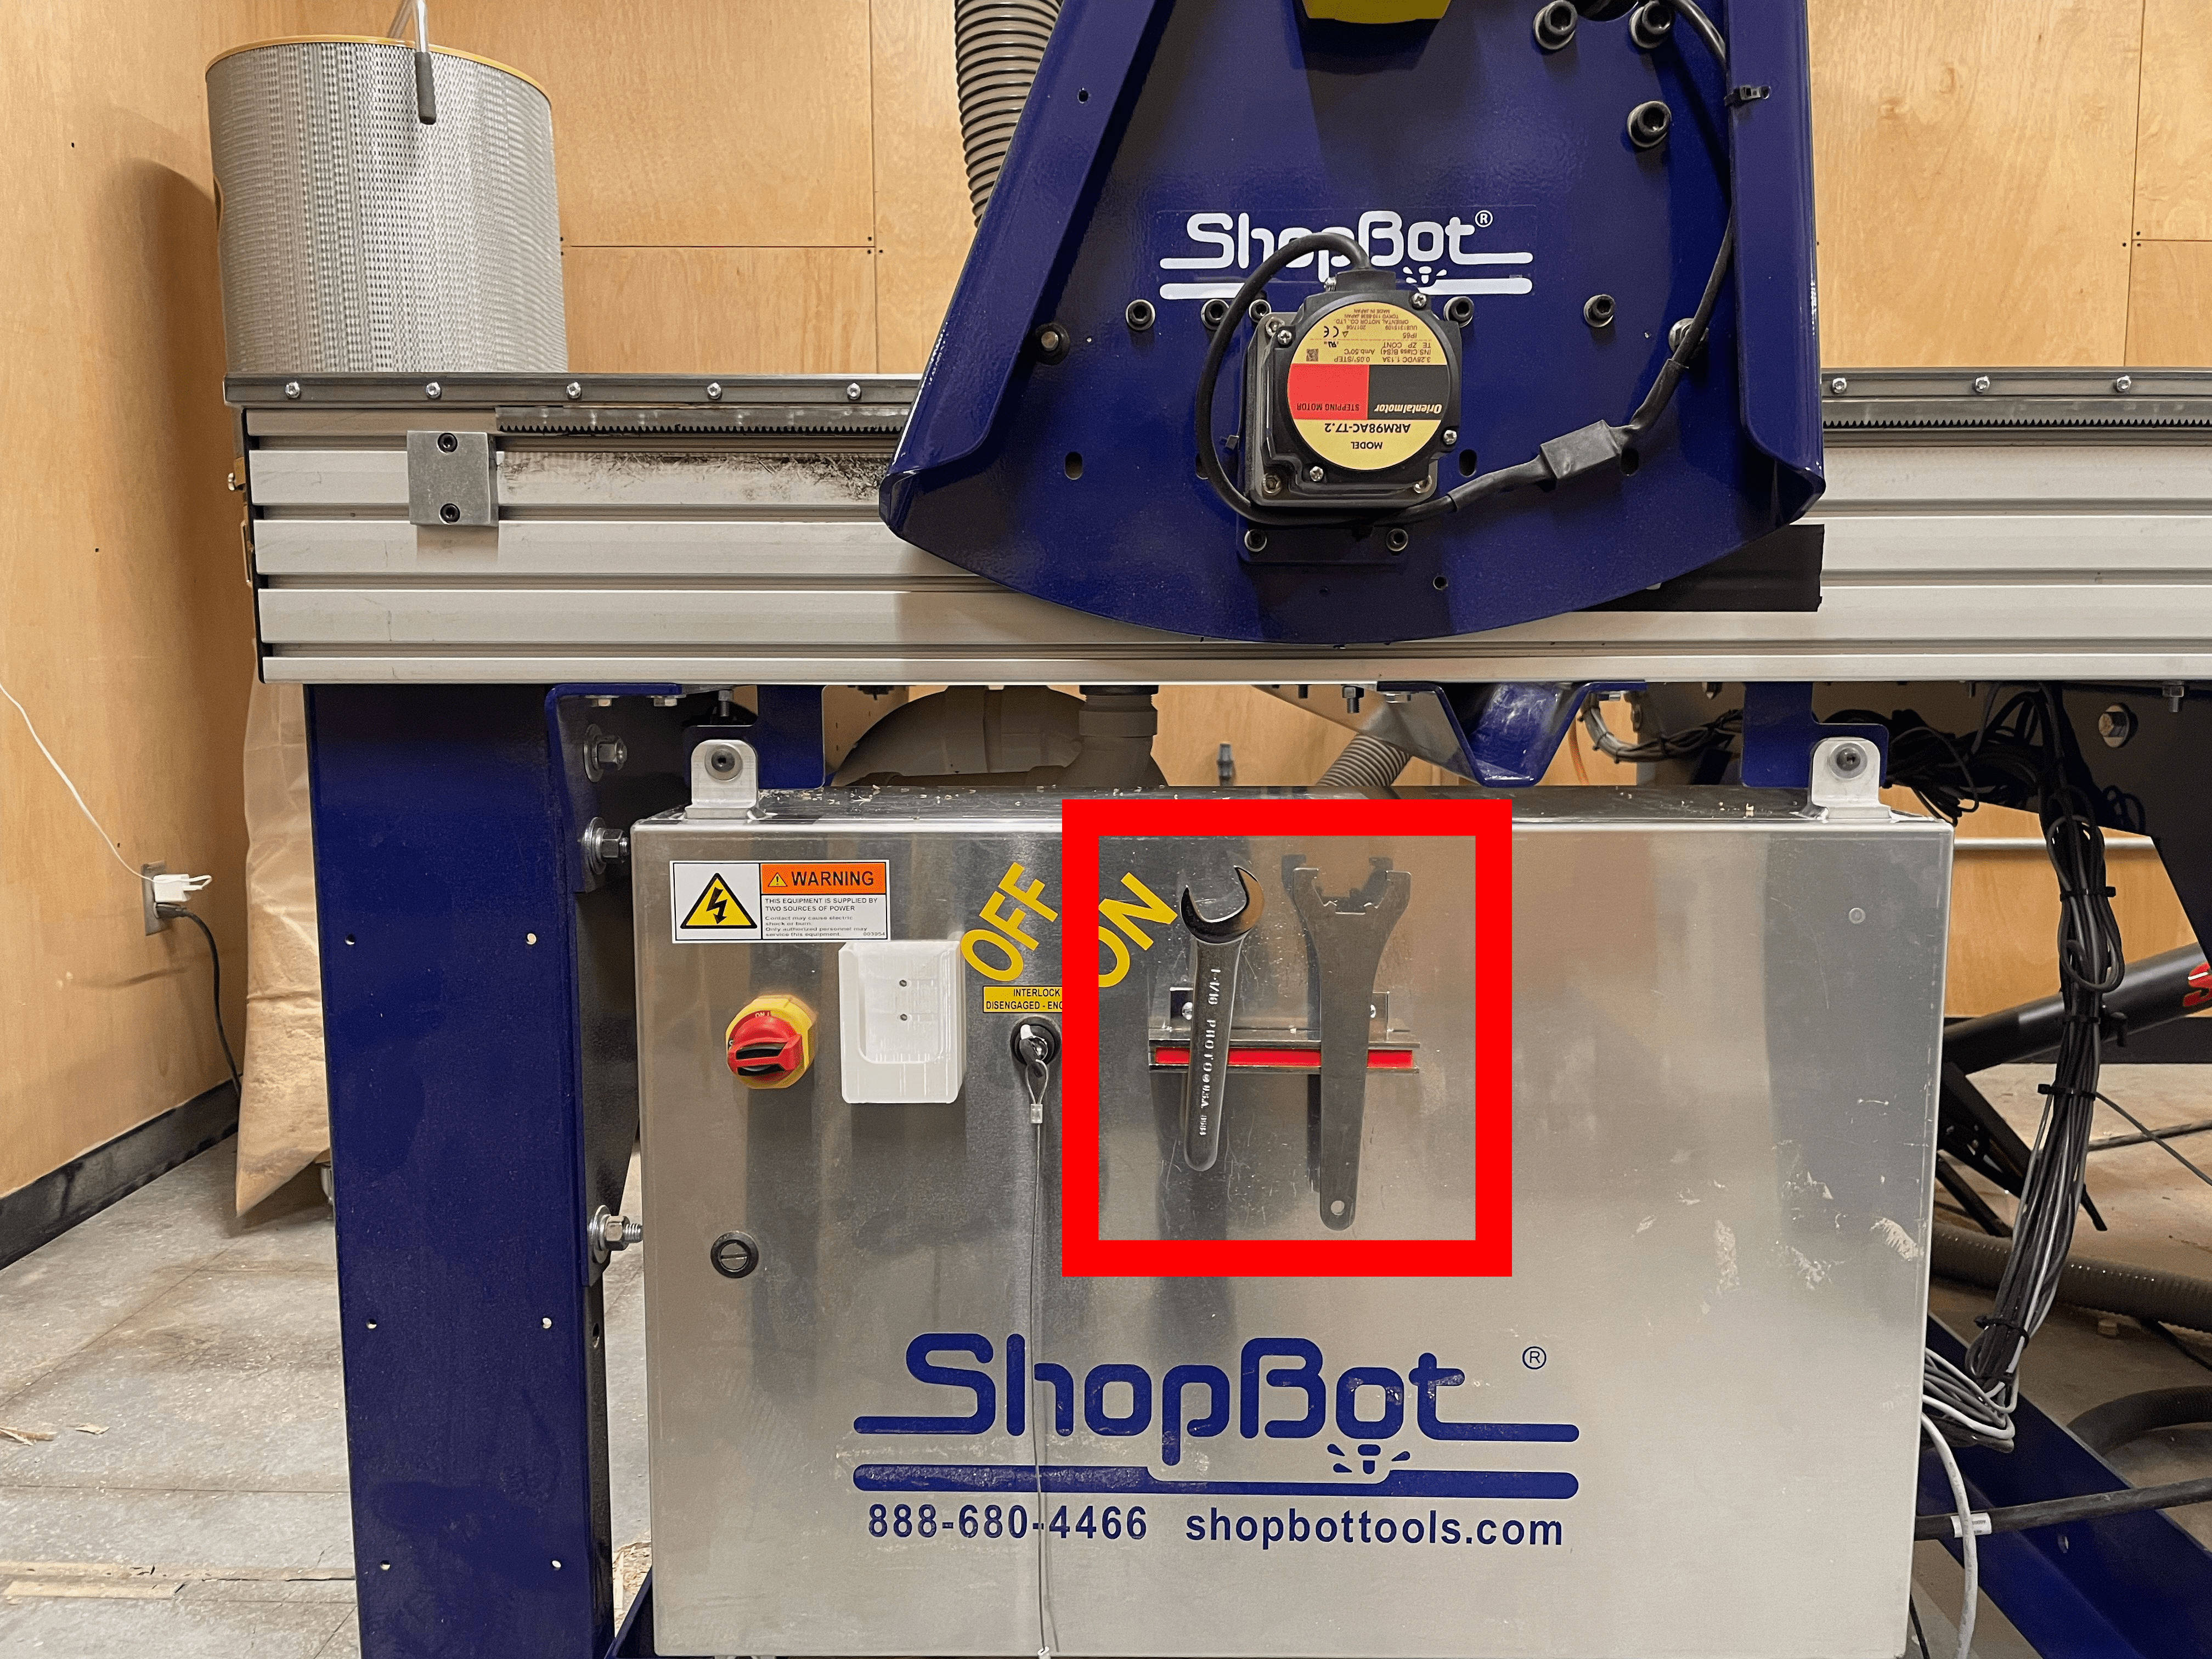
To remove the current bit, use the wrenches on the magnet holder on the side of the machine to loosen the tool.
Unscrew the tool the rest of the way, making sure not to let the current bit fall once it is loose.
Remove the bit from the collet. Remove the collet from the nut.
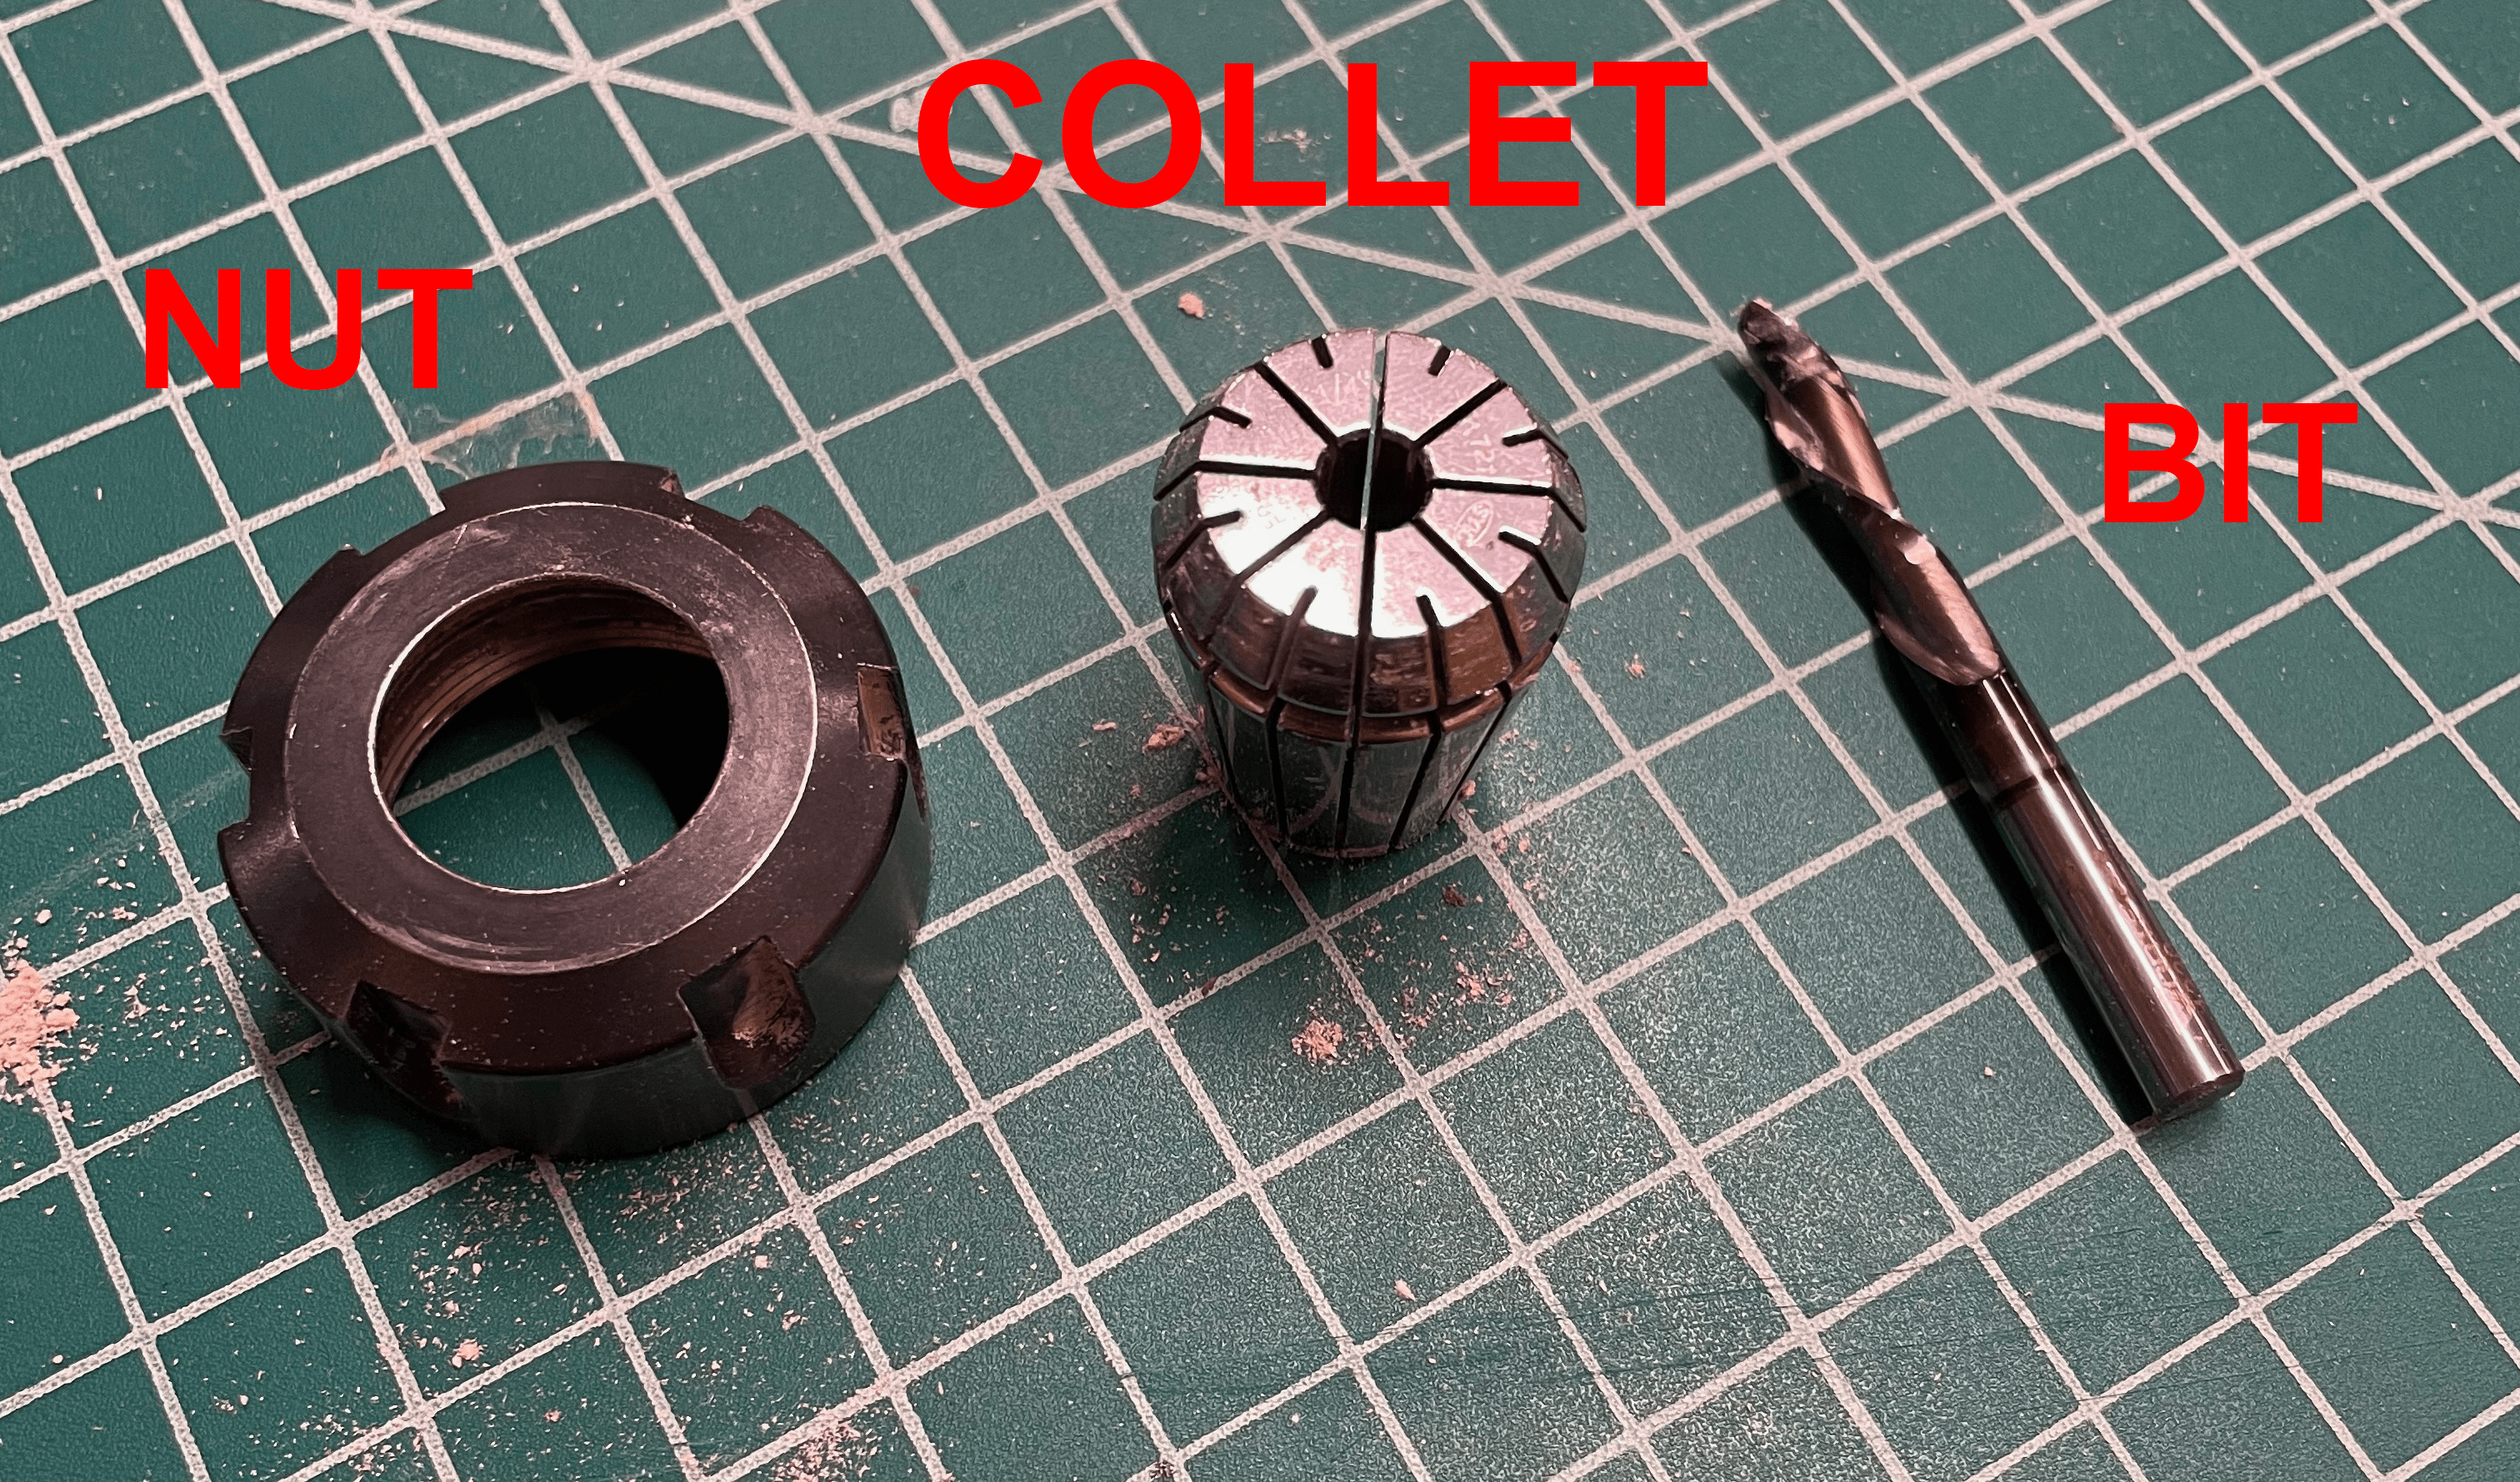
Install the correct size collet into the nut. It should click in.
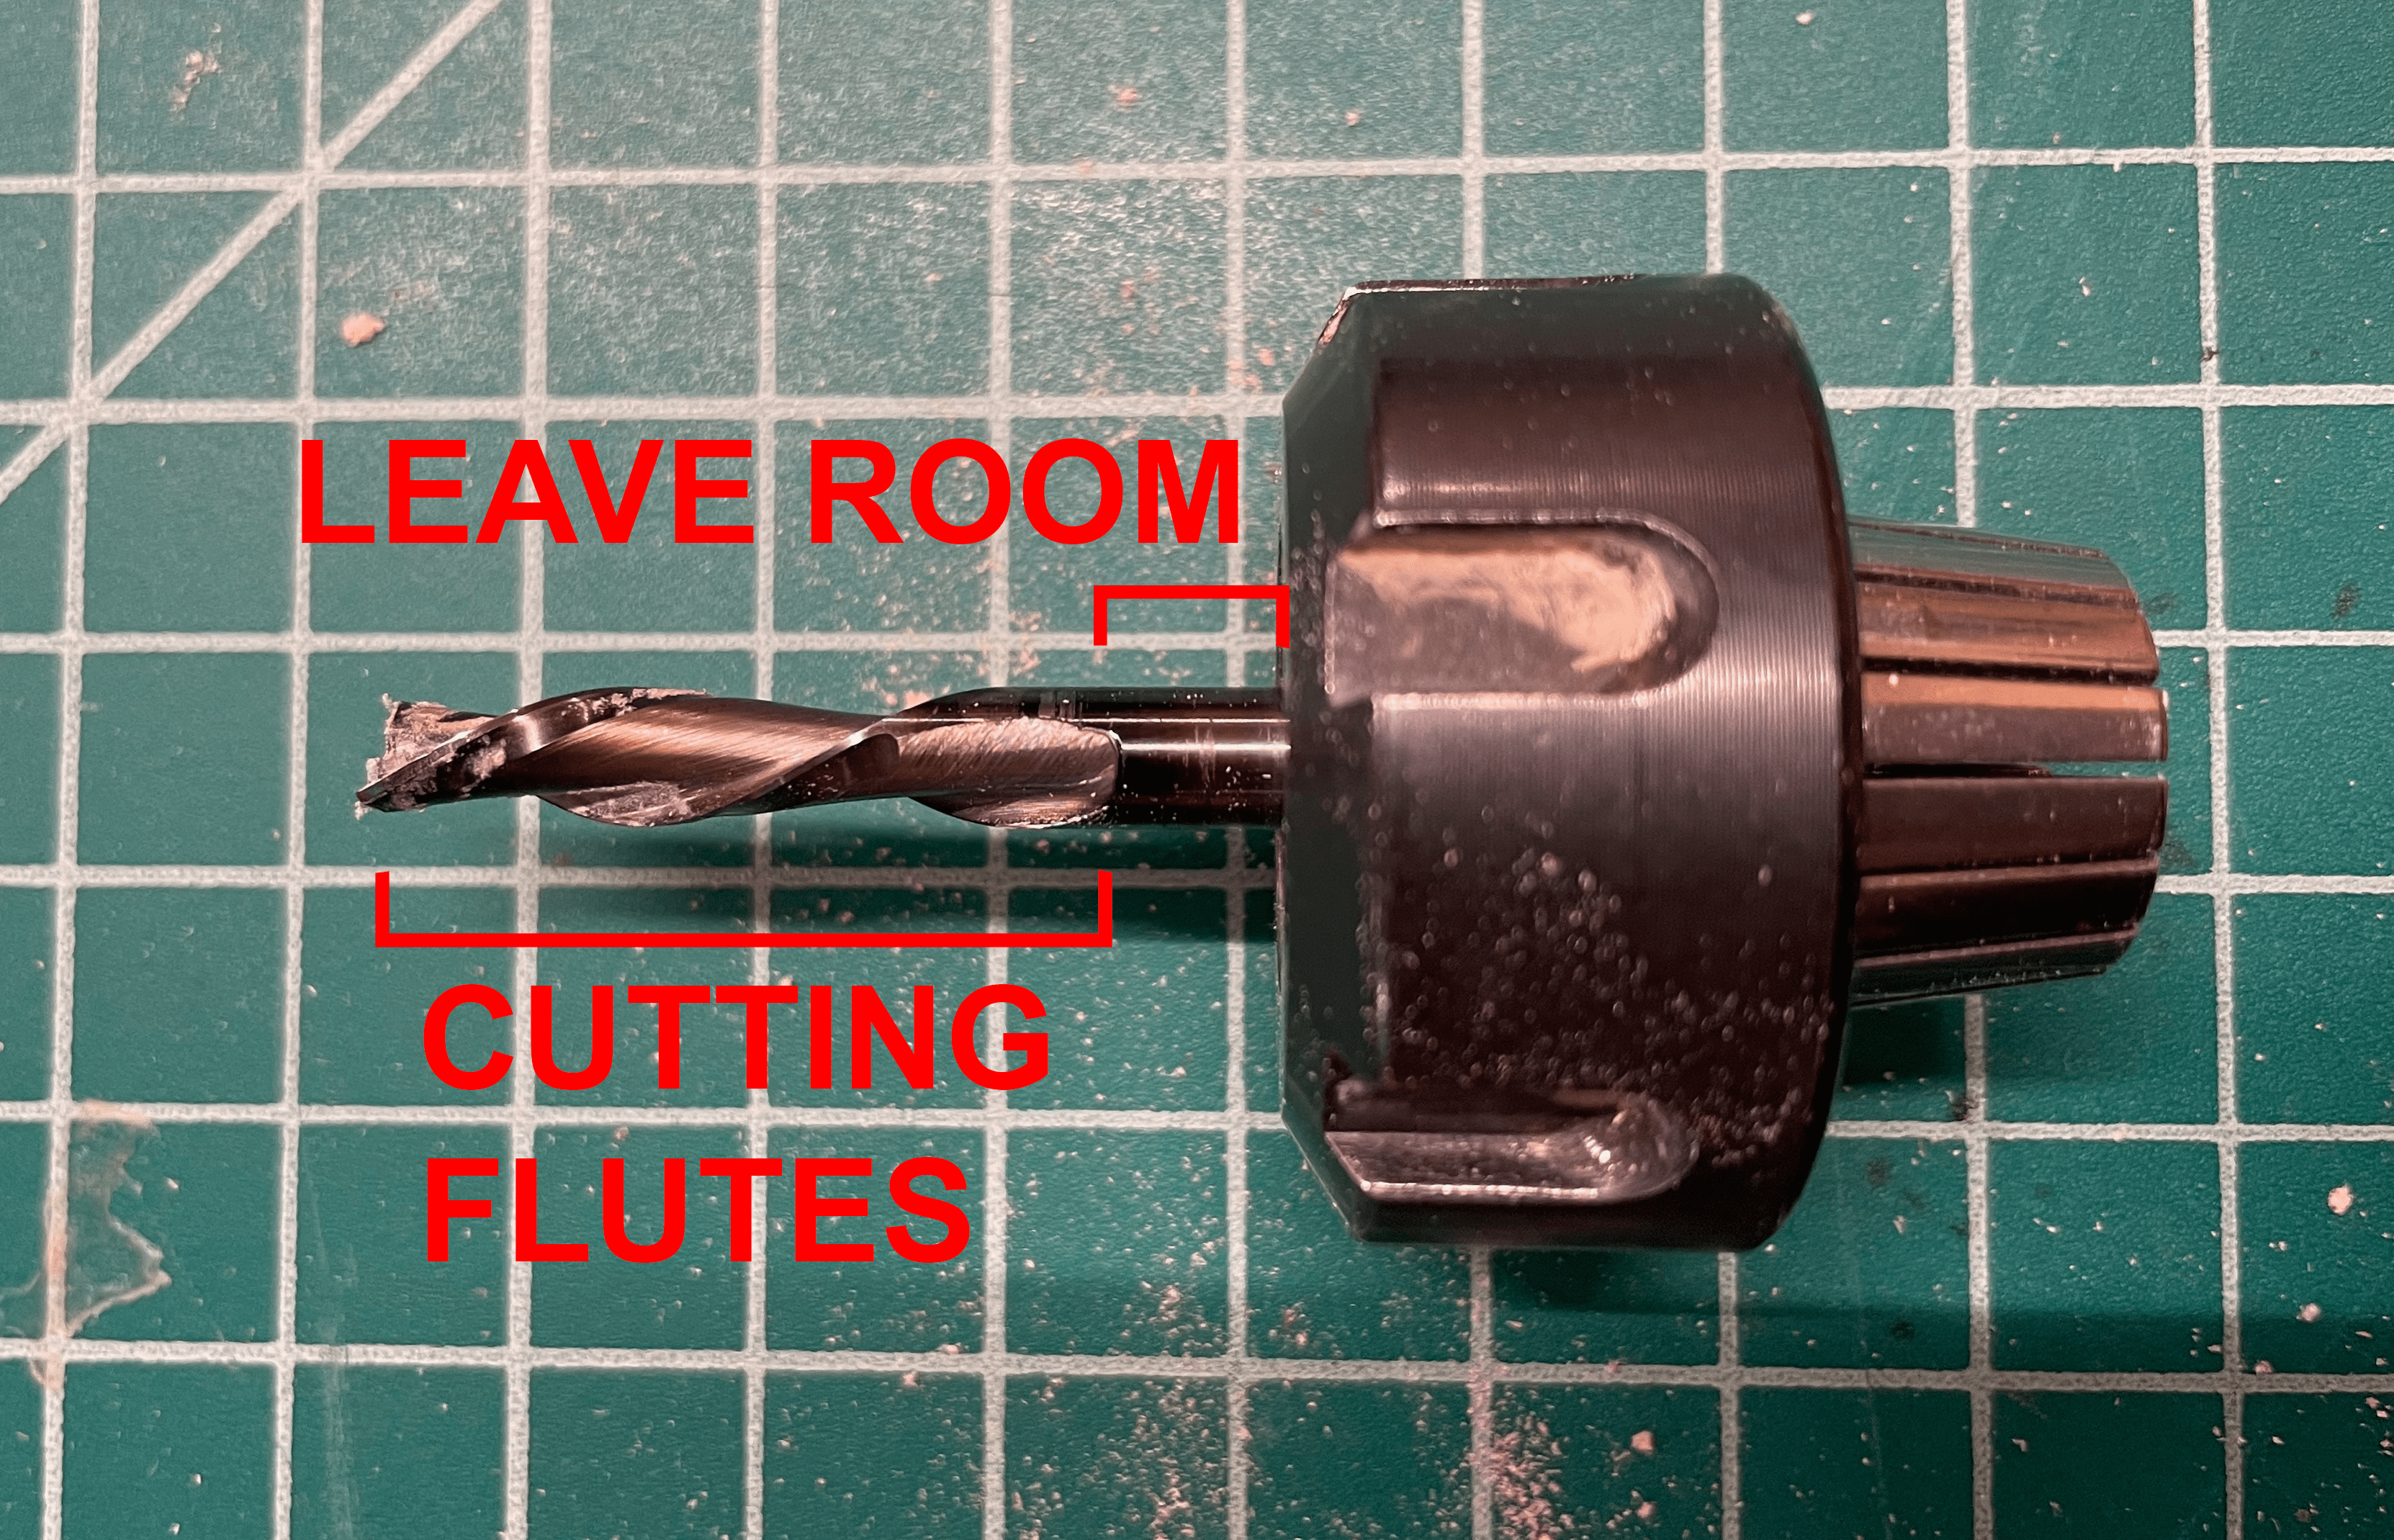
Install your bit into the collet. Do not push the bit deeper than the cutting flutes. Leave some room between the flutes and the collet.
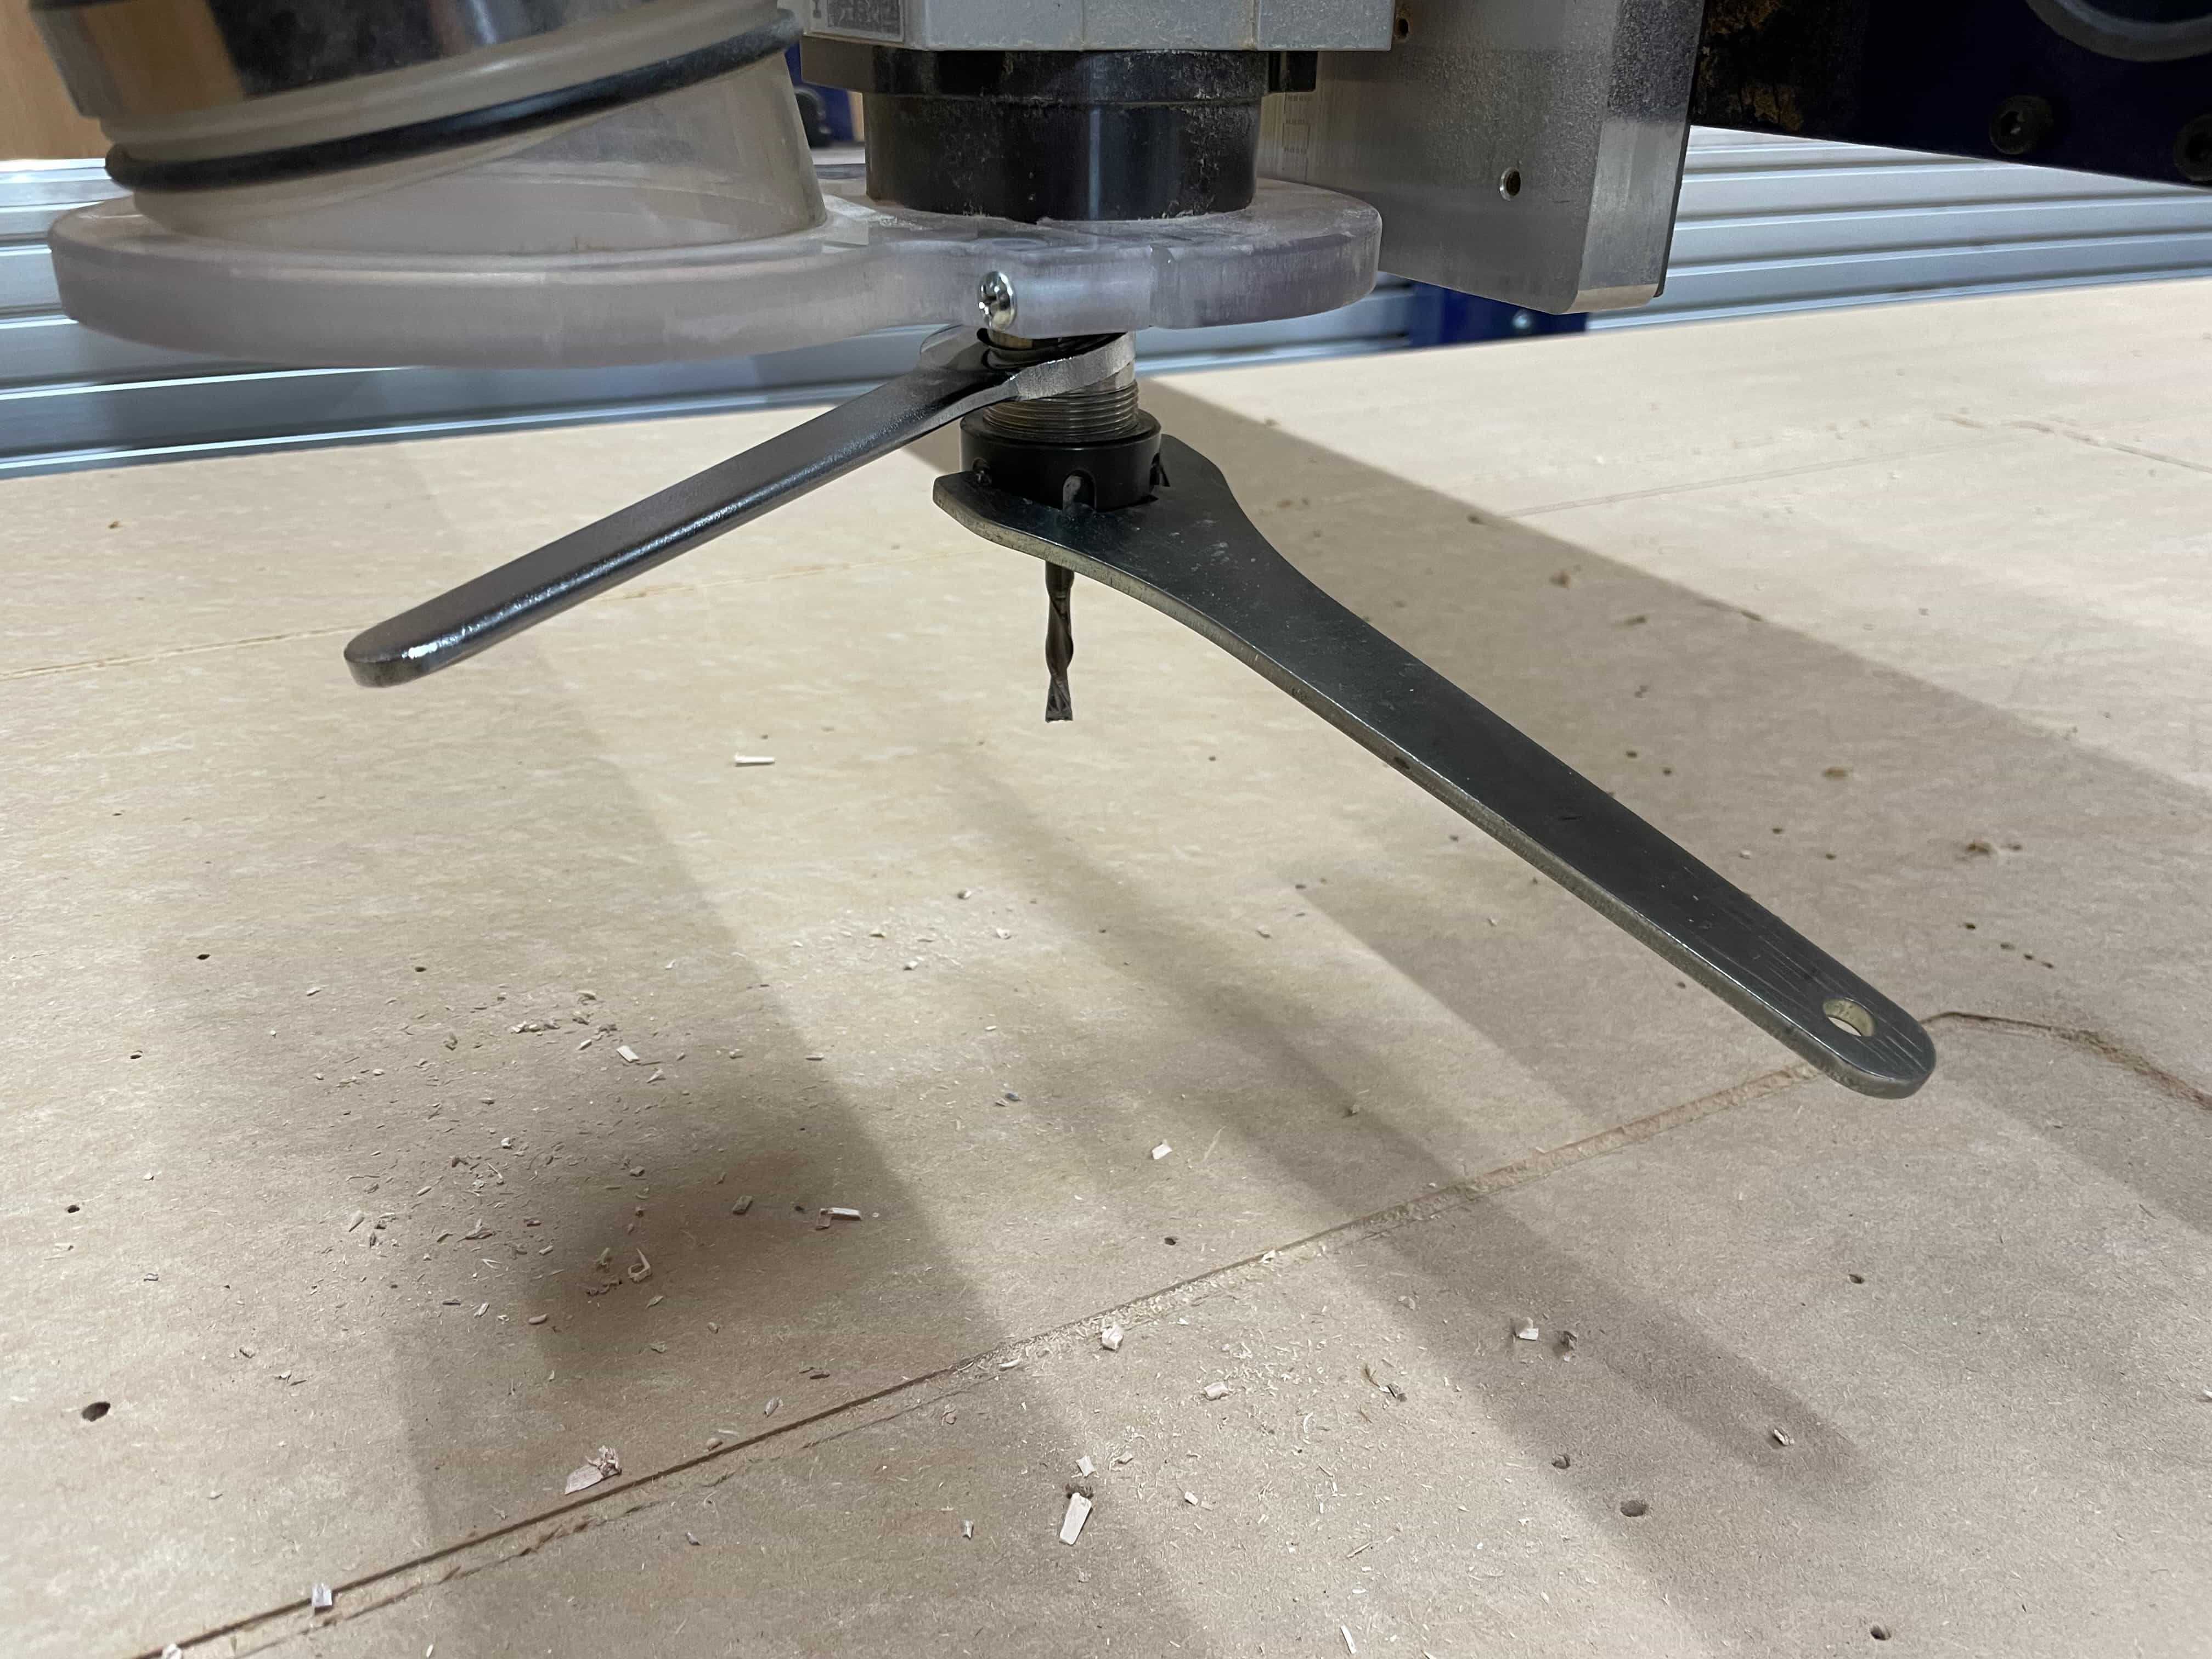
Hand tighten the chuck onto the machine.
Finish tightening the chuck with the wrenches.
Return the wrenches to the magnet holder on the side of the machine.
Home the Machine
Home the X and Y-axis by pressing the home x&y button. Stand back from the machine when it is moving.
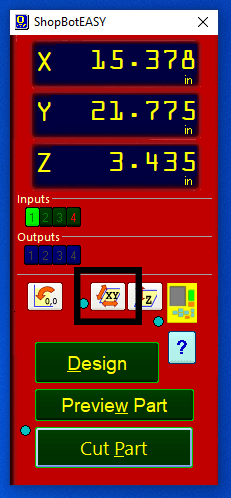
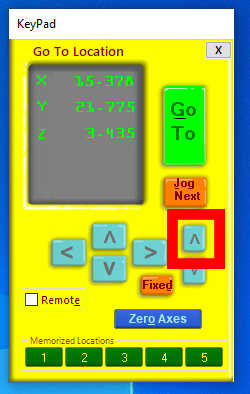
Press OK on the pop-up. Select the yellow ‘To Move Tool’.
Using the arrow buttons on the yellow ‘To Move Tool’ menu, position the tool approximately above the X and Y zero points of the stock, as indicated in the Fusion 360 model. You can adjust the Z-axis up and down to visually confirm that the tool is near the zero position. Be careful not to lower the Z-axis too much to avoid hitting the stock or bed.
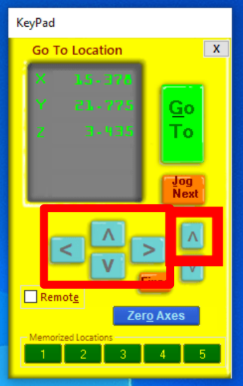
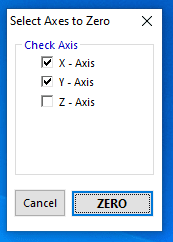
Press the blue ‘Zero Axes’ button and reset the machine’s X and Y zero-position to the current position.

Using the arrow buttons on the yellow ‘To Move Tool’ menu, move the tool above a clear, clean section of the table.
Make sure that the end of the router bit is clean.
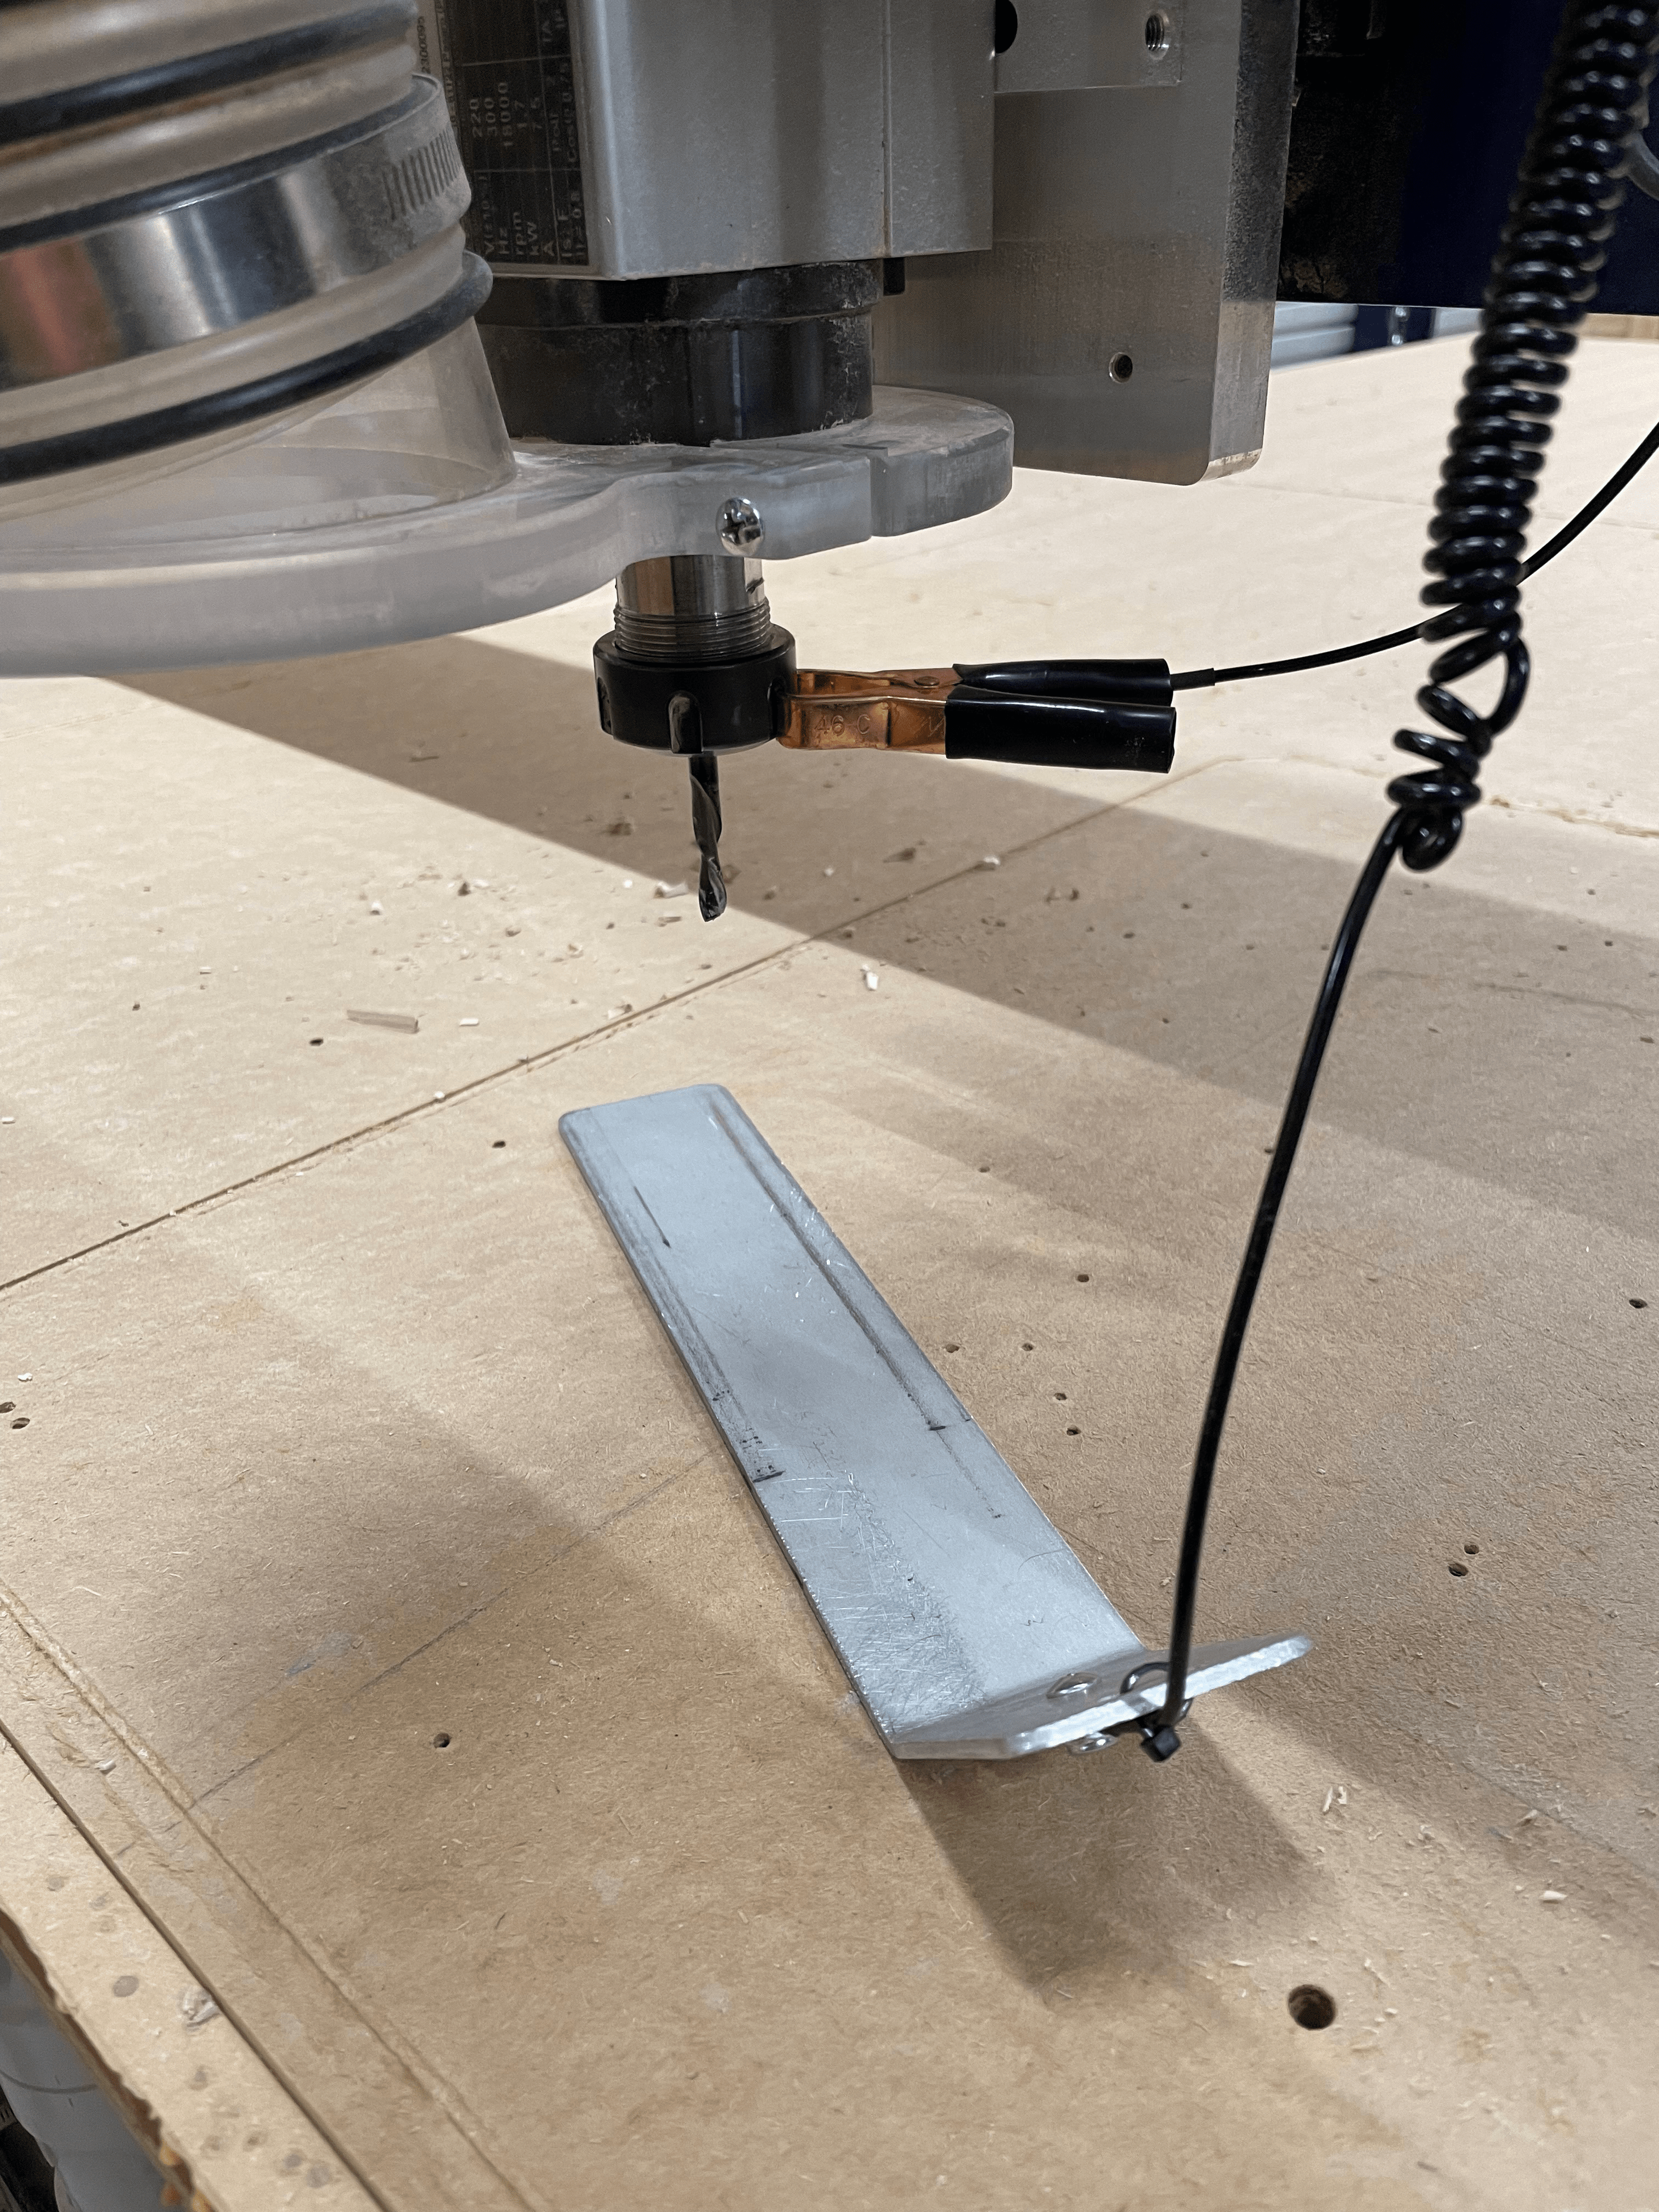
Take the Z-axis calibration plate from the machine and place it directly under the router bit.
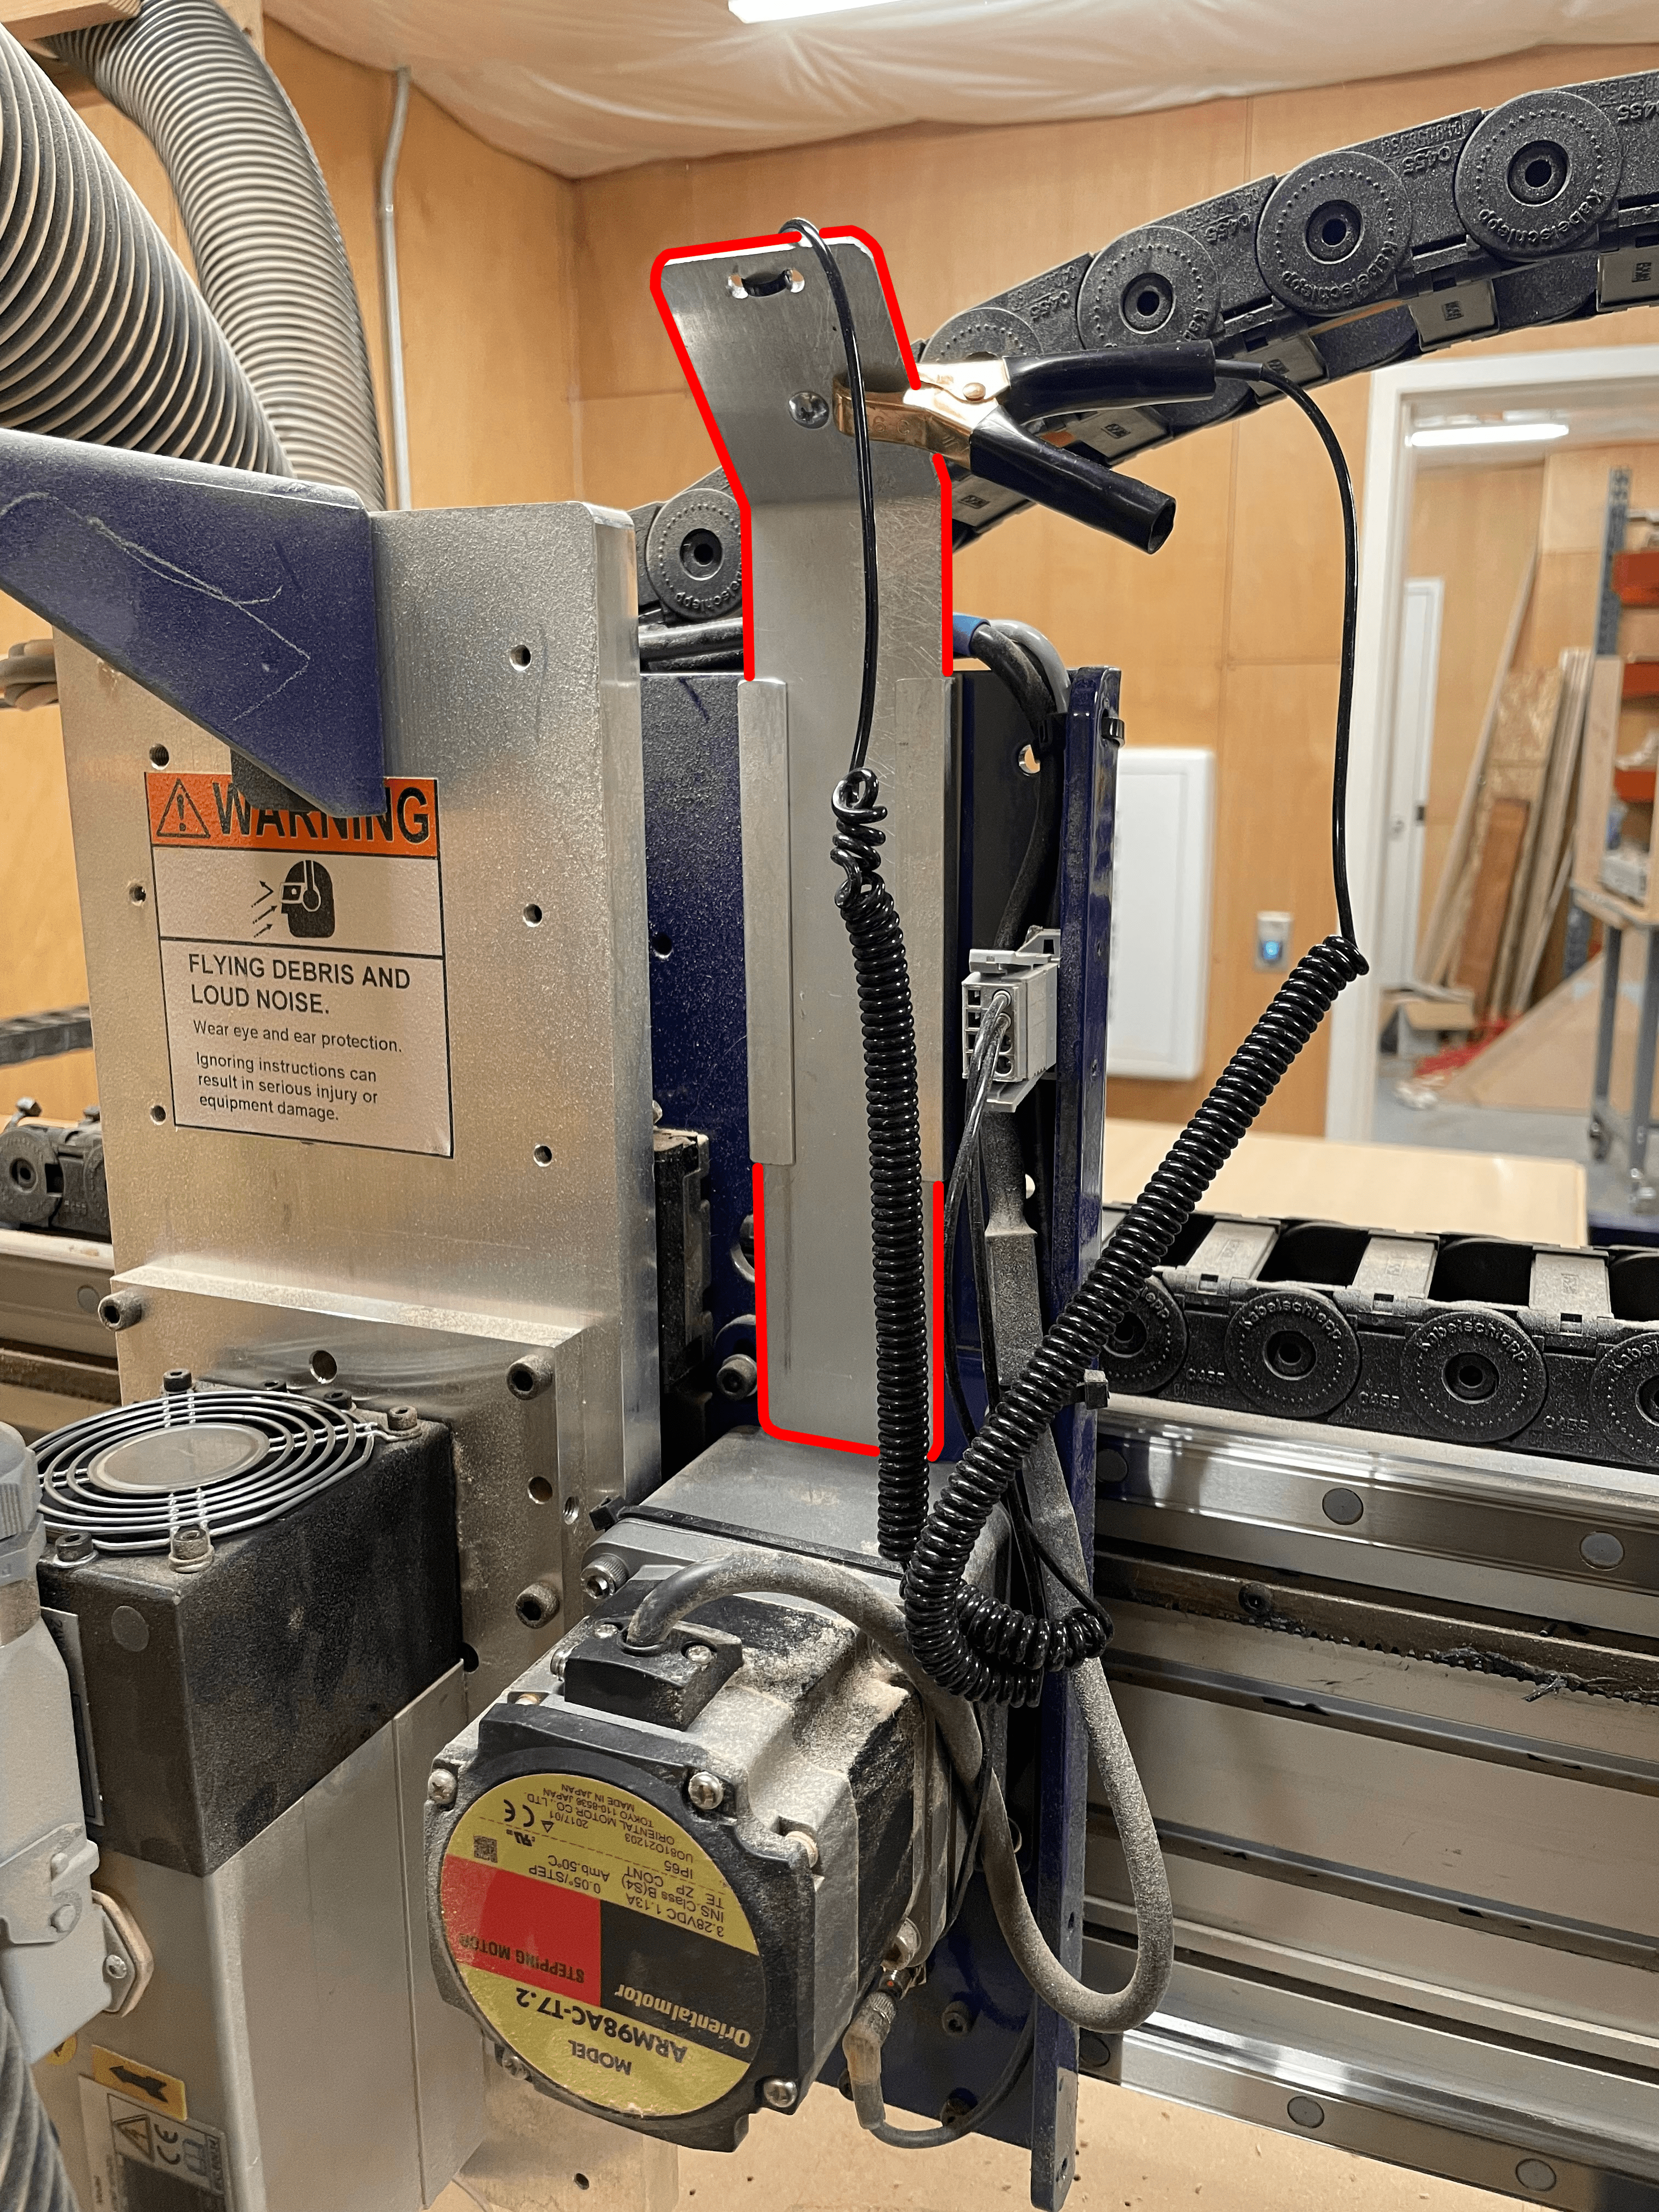
Clip the Z-axis calibration clip to the chuck.
Close the yellow ‘To Move Tool’ menu. Press the Z-axis calibration button and press ‘OK’ on the pop-up menu. Note: the tool will lower to touch the plate TWICE, don’t remove the plate after the first touch.
After the bit has touched the plate twice, press ‘OK’ on the pop-up menu, and replace the plate and the clip on the machine.
The machine is now homed.
Open the yellow ‘To Move Tool’ and raise the tool enough to replace the vacuum brush.
Prepare Your stock
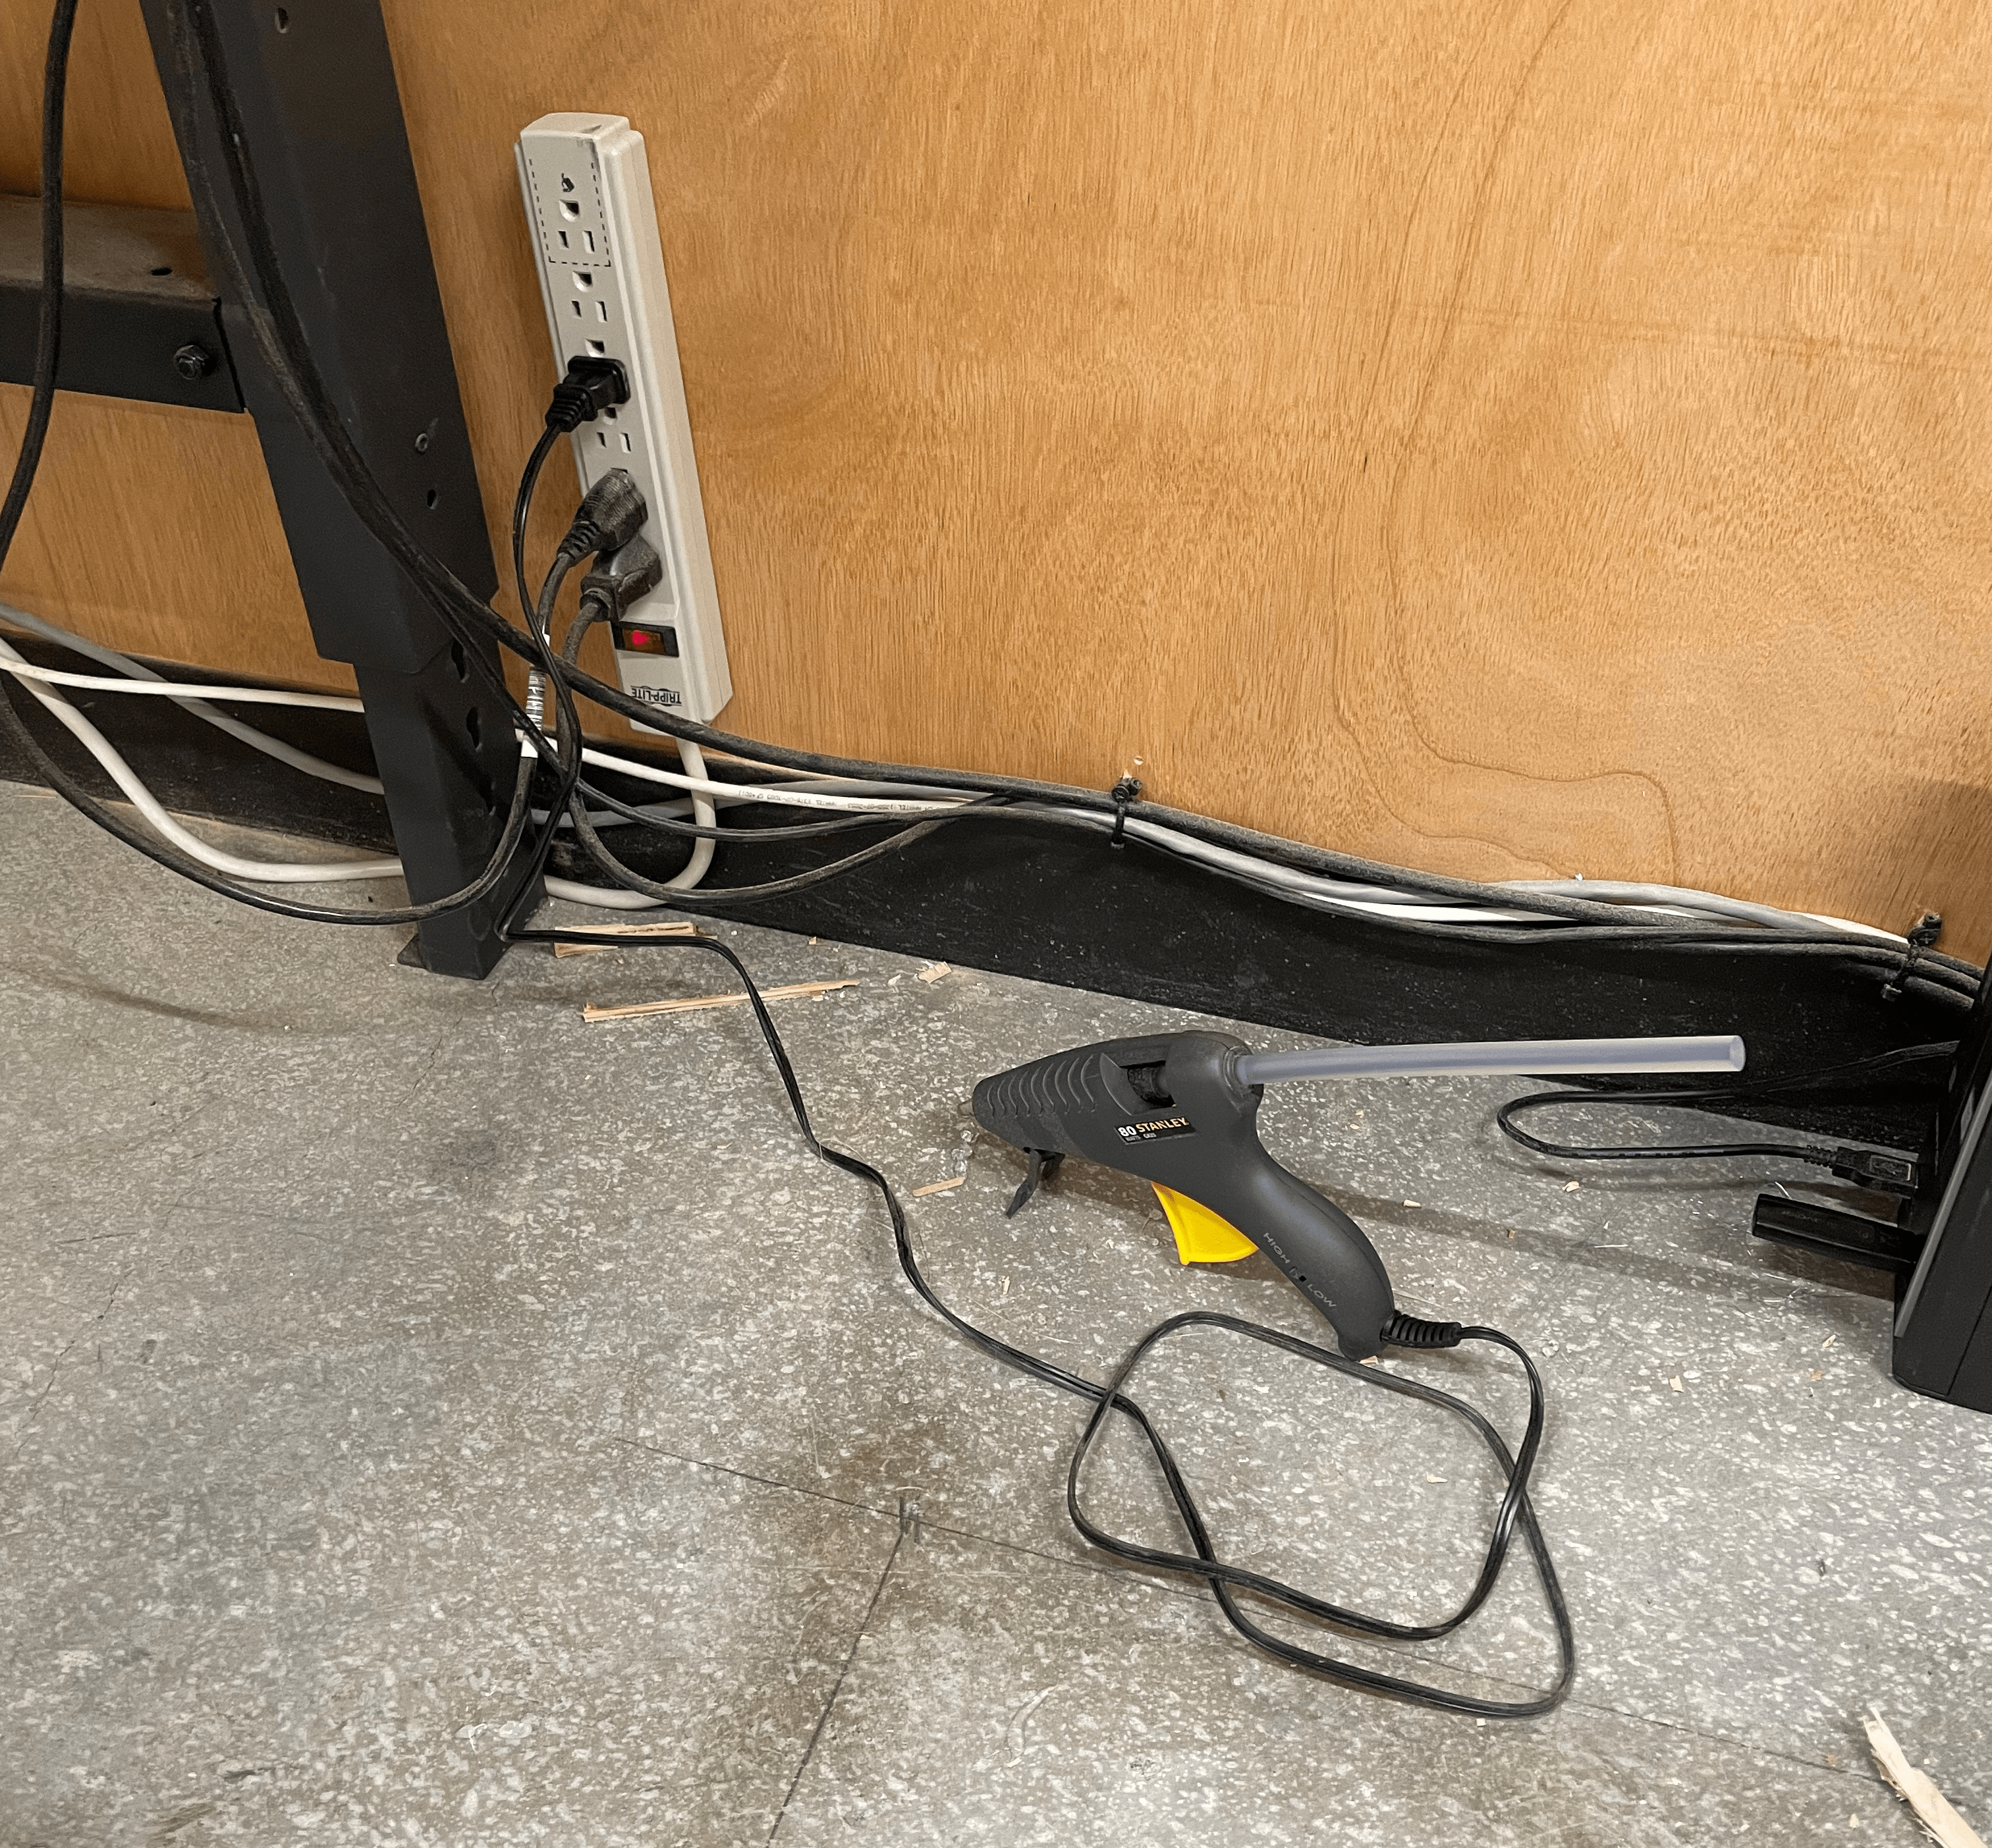
Plug in the glue gun next to the desk.
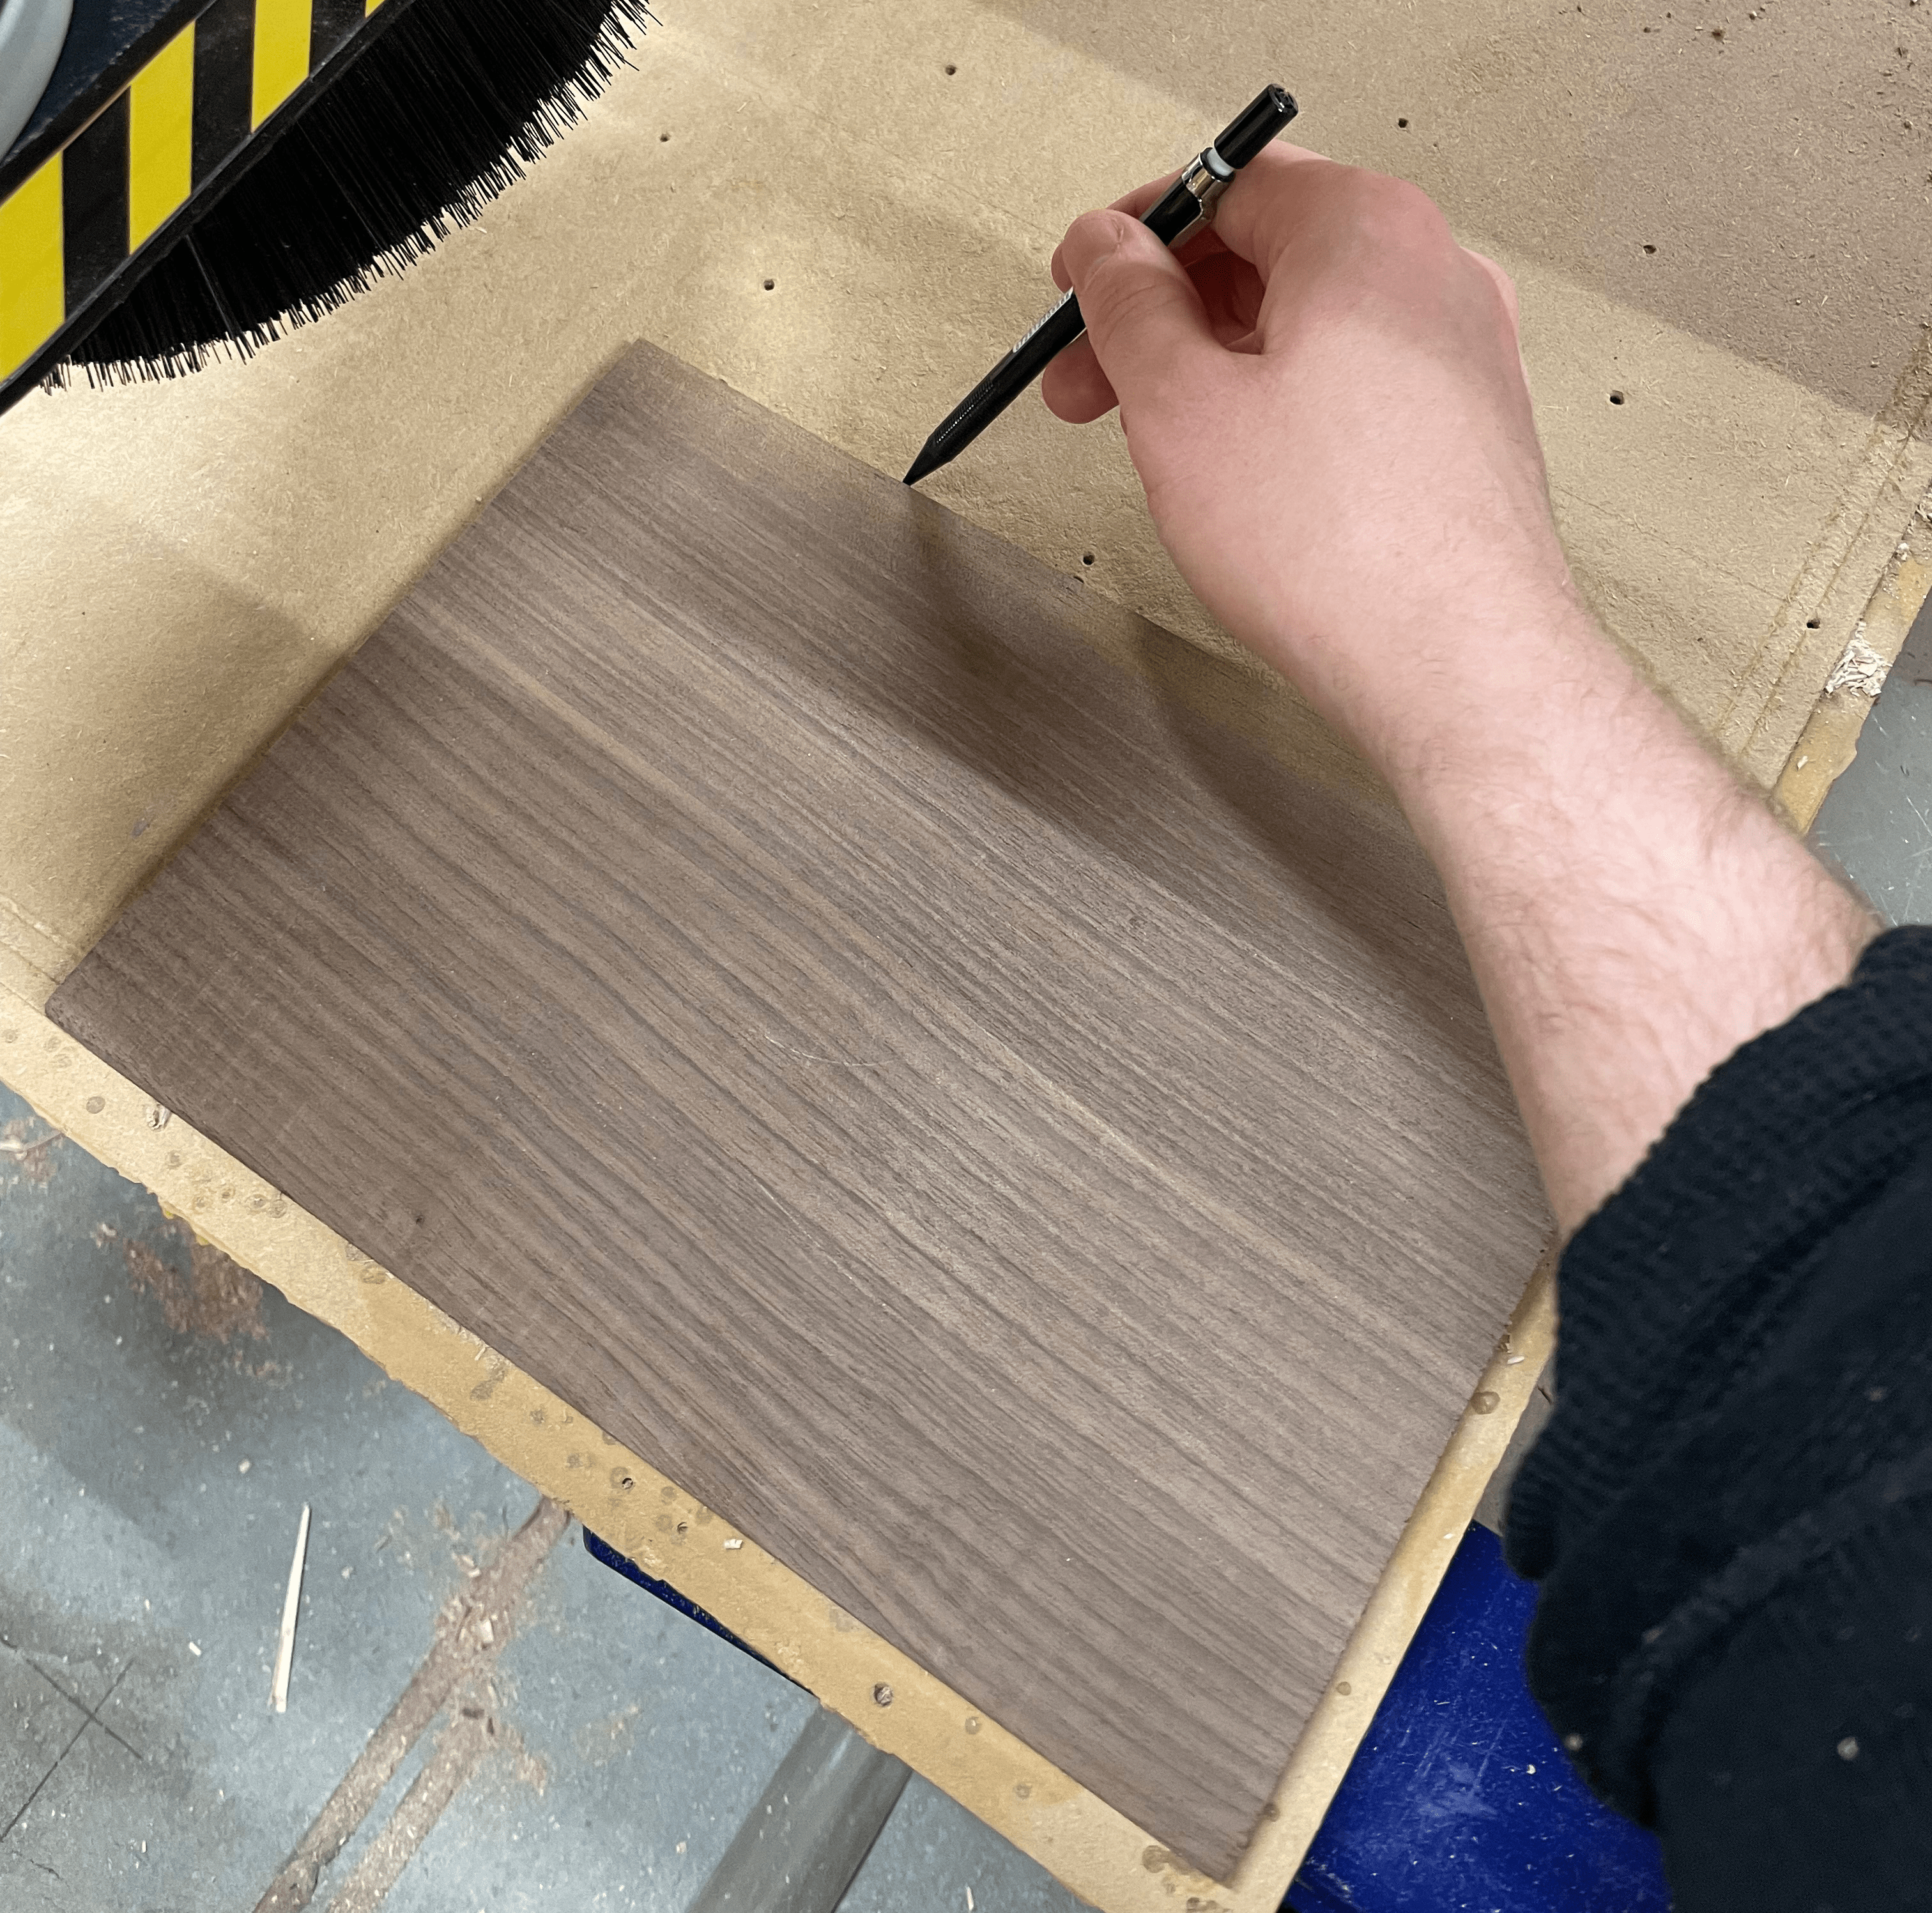
Make sure the table is clear and clean. Trace an outline of your stock on the corner of the table in the same orientation as it is modelled in Fusion360.
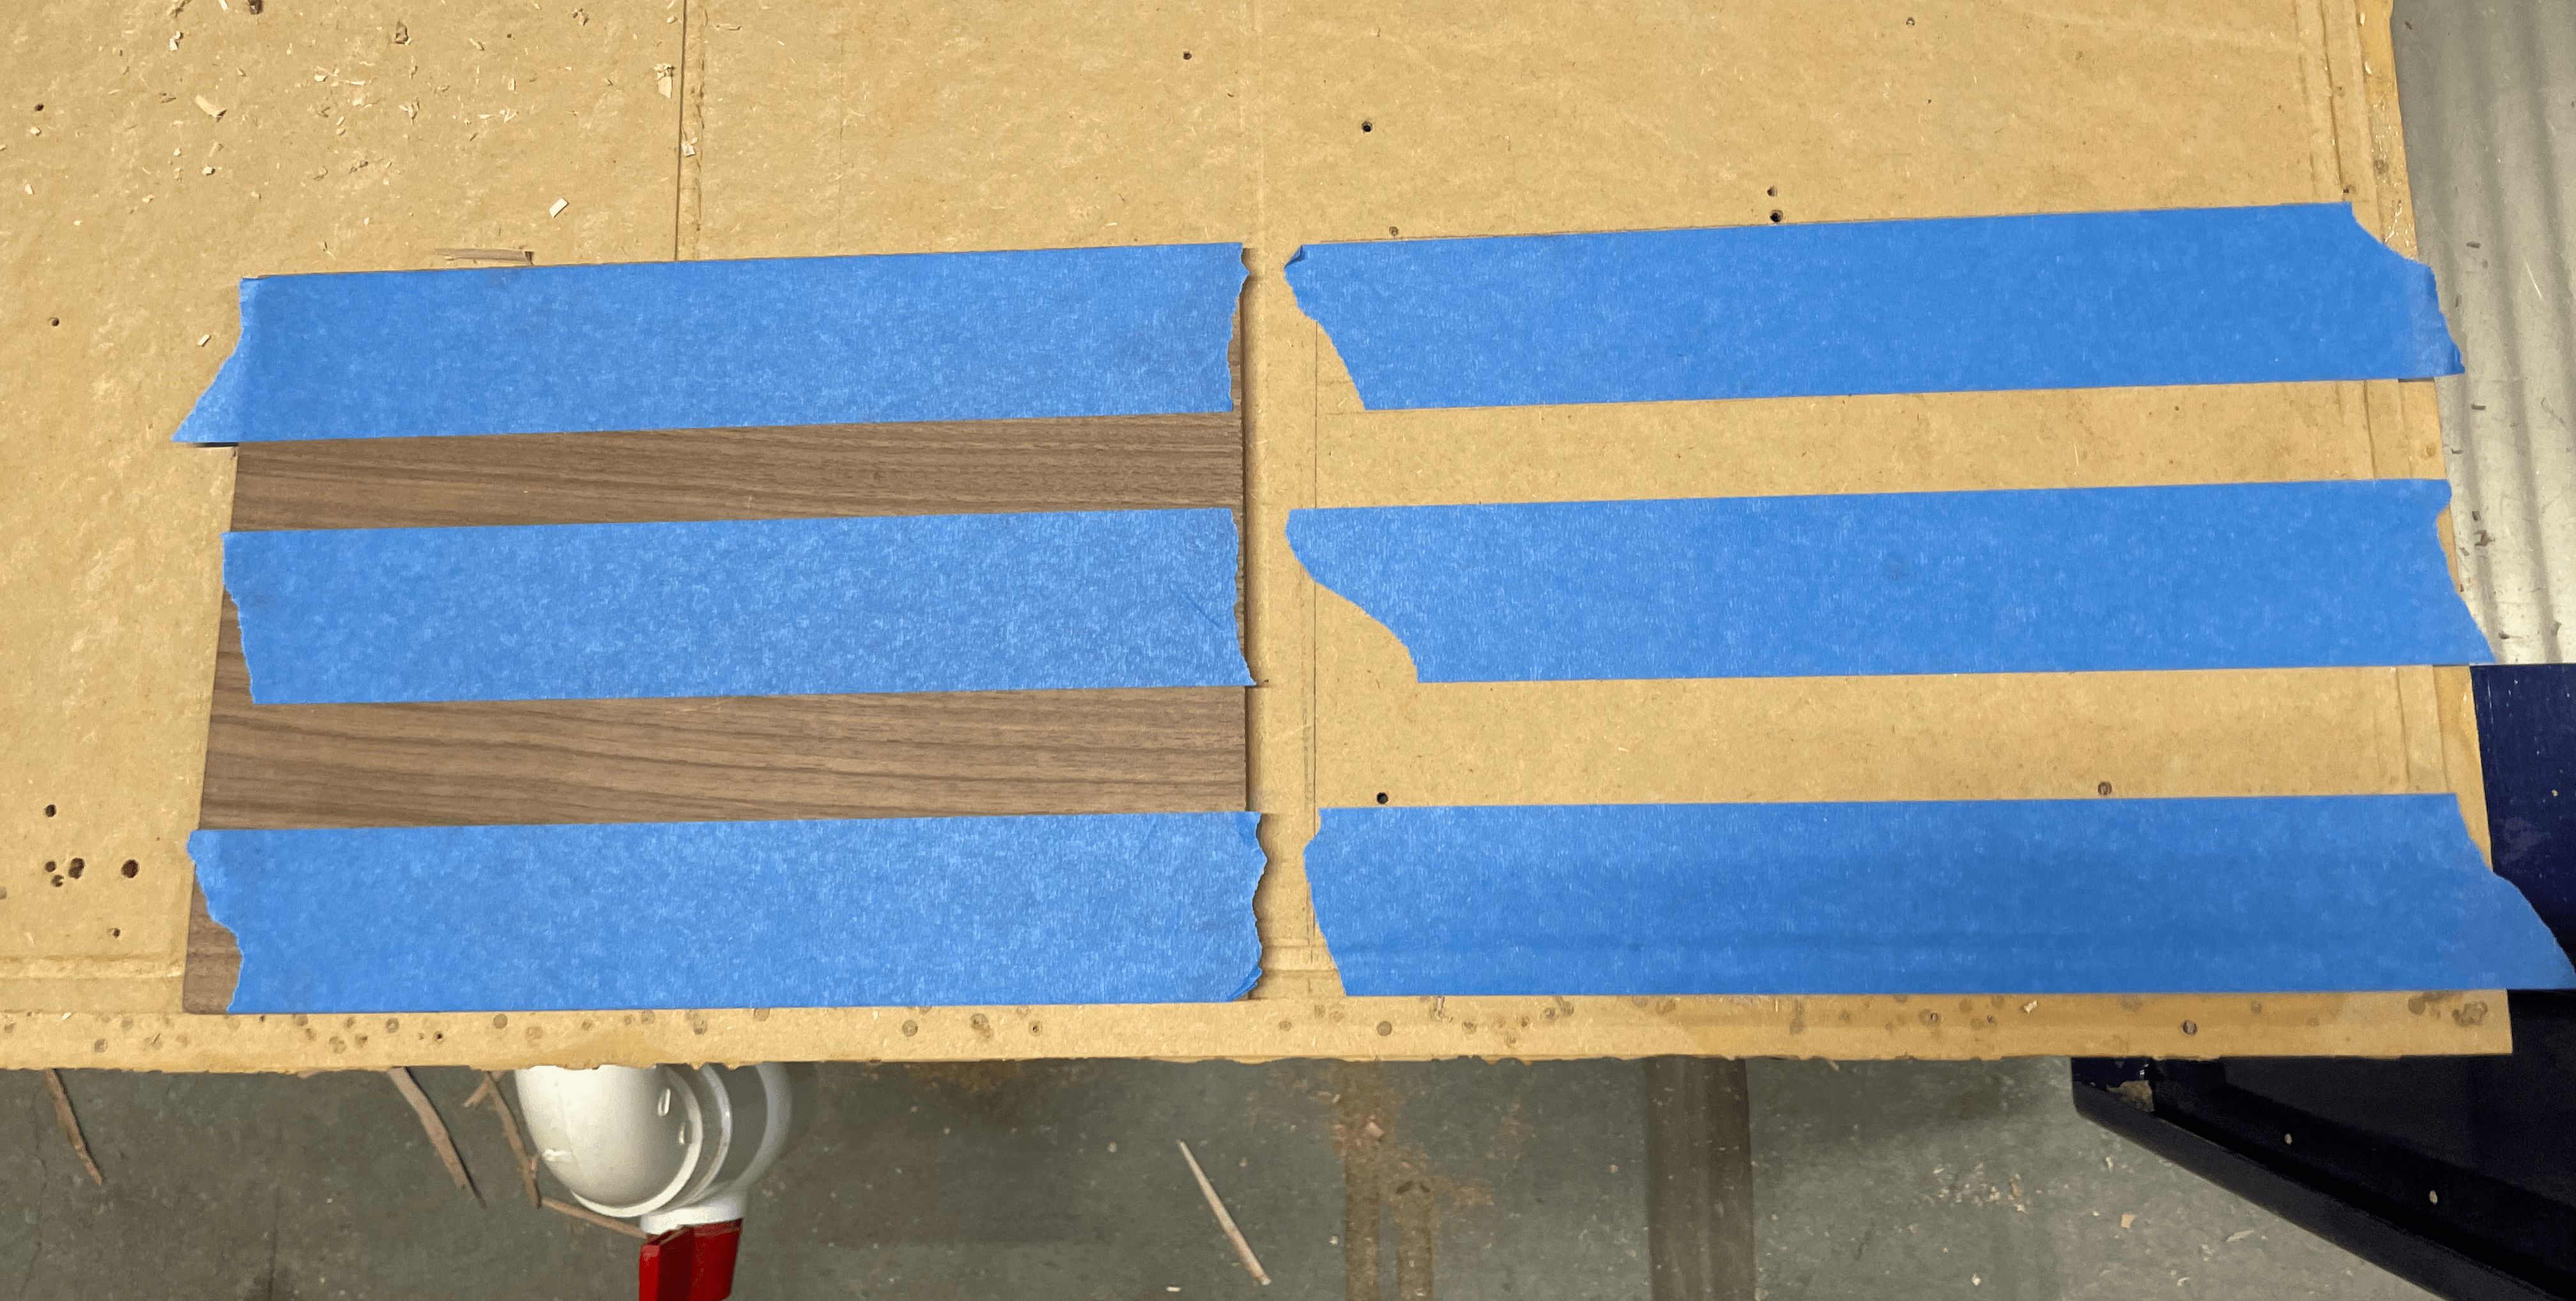
Lay down painters tape on the table and the stock so that the tape aligns when the stock is placed on top. Think ahead to how the piece is going to be cut; make sure that every final seperate piece will still be glued down to the table.
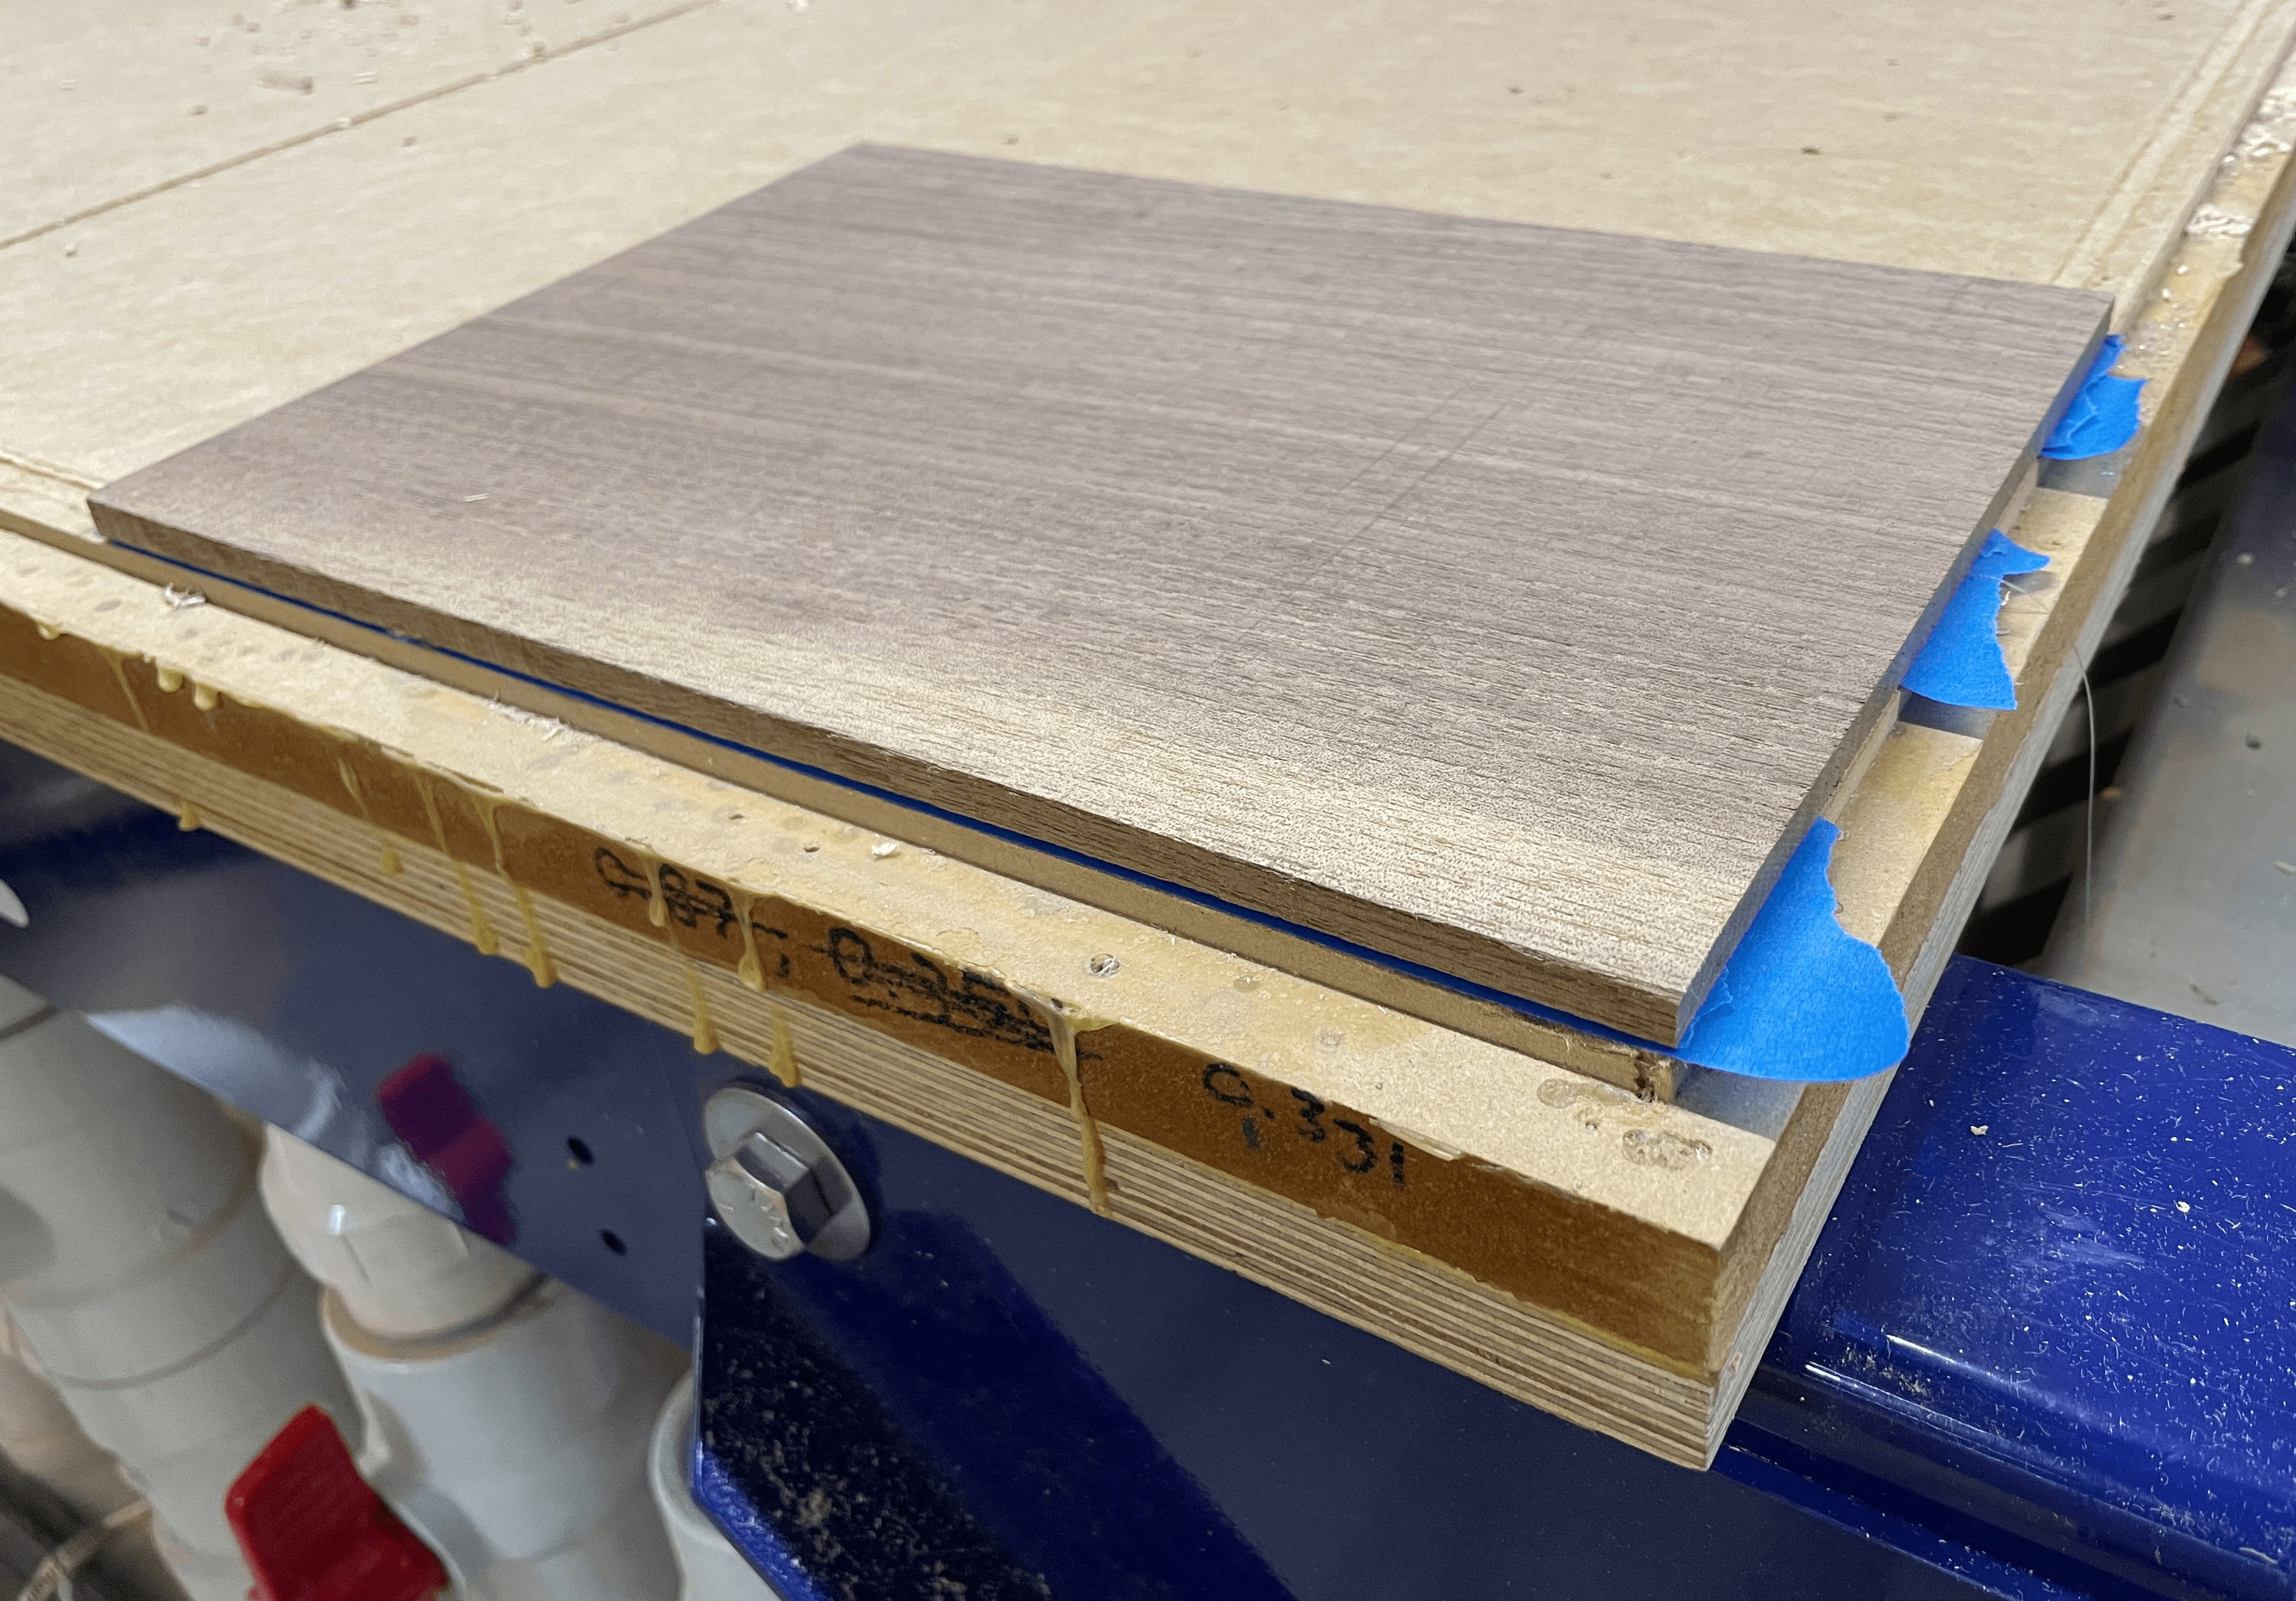
This next step needs to be done quickly. Place your piece on the ground near the glue gun. Apply lots of glue over all the taped areas and immediately stick it to the aligned tape areas on the table. Make sure the corner of the stock and the corners of the groove in the table align. Press down heavily and evenly to ensure the piece sticks. The glue should dry in around a minute. After the glue is dry, try shoving your piece horizontally, if you can move the piece now then the machine can too. If the glue didn’t stick the pieces well, you probably went too slow. Note: The tape and glue will raise your piece a fraction of a milimeter. If you need more precision than that, you’re probably designing wrong. If your stock is too large to feasibly apply enough glue in time before the glue dries, speak to a crew member about other fastening options.
Unplug the glue gun.
Run the machine
Turn on the spindle.
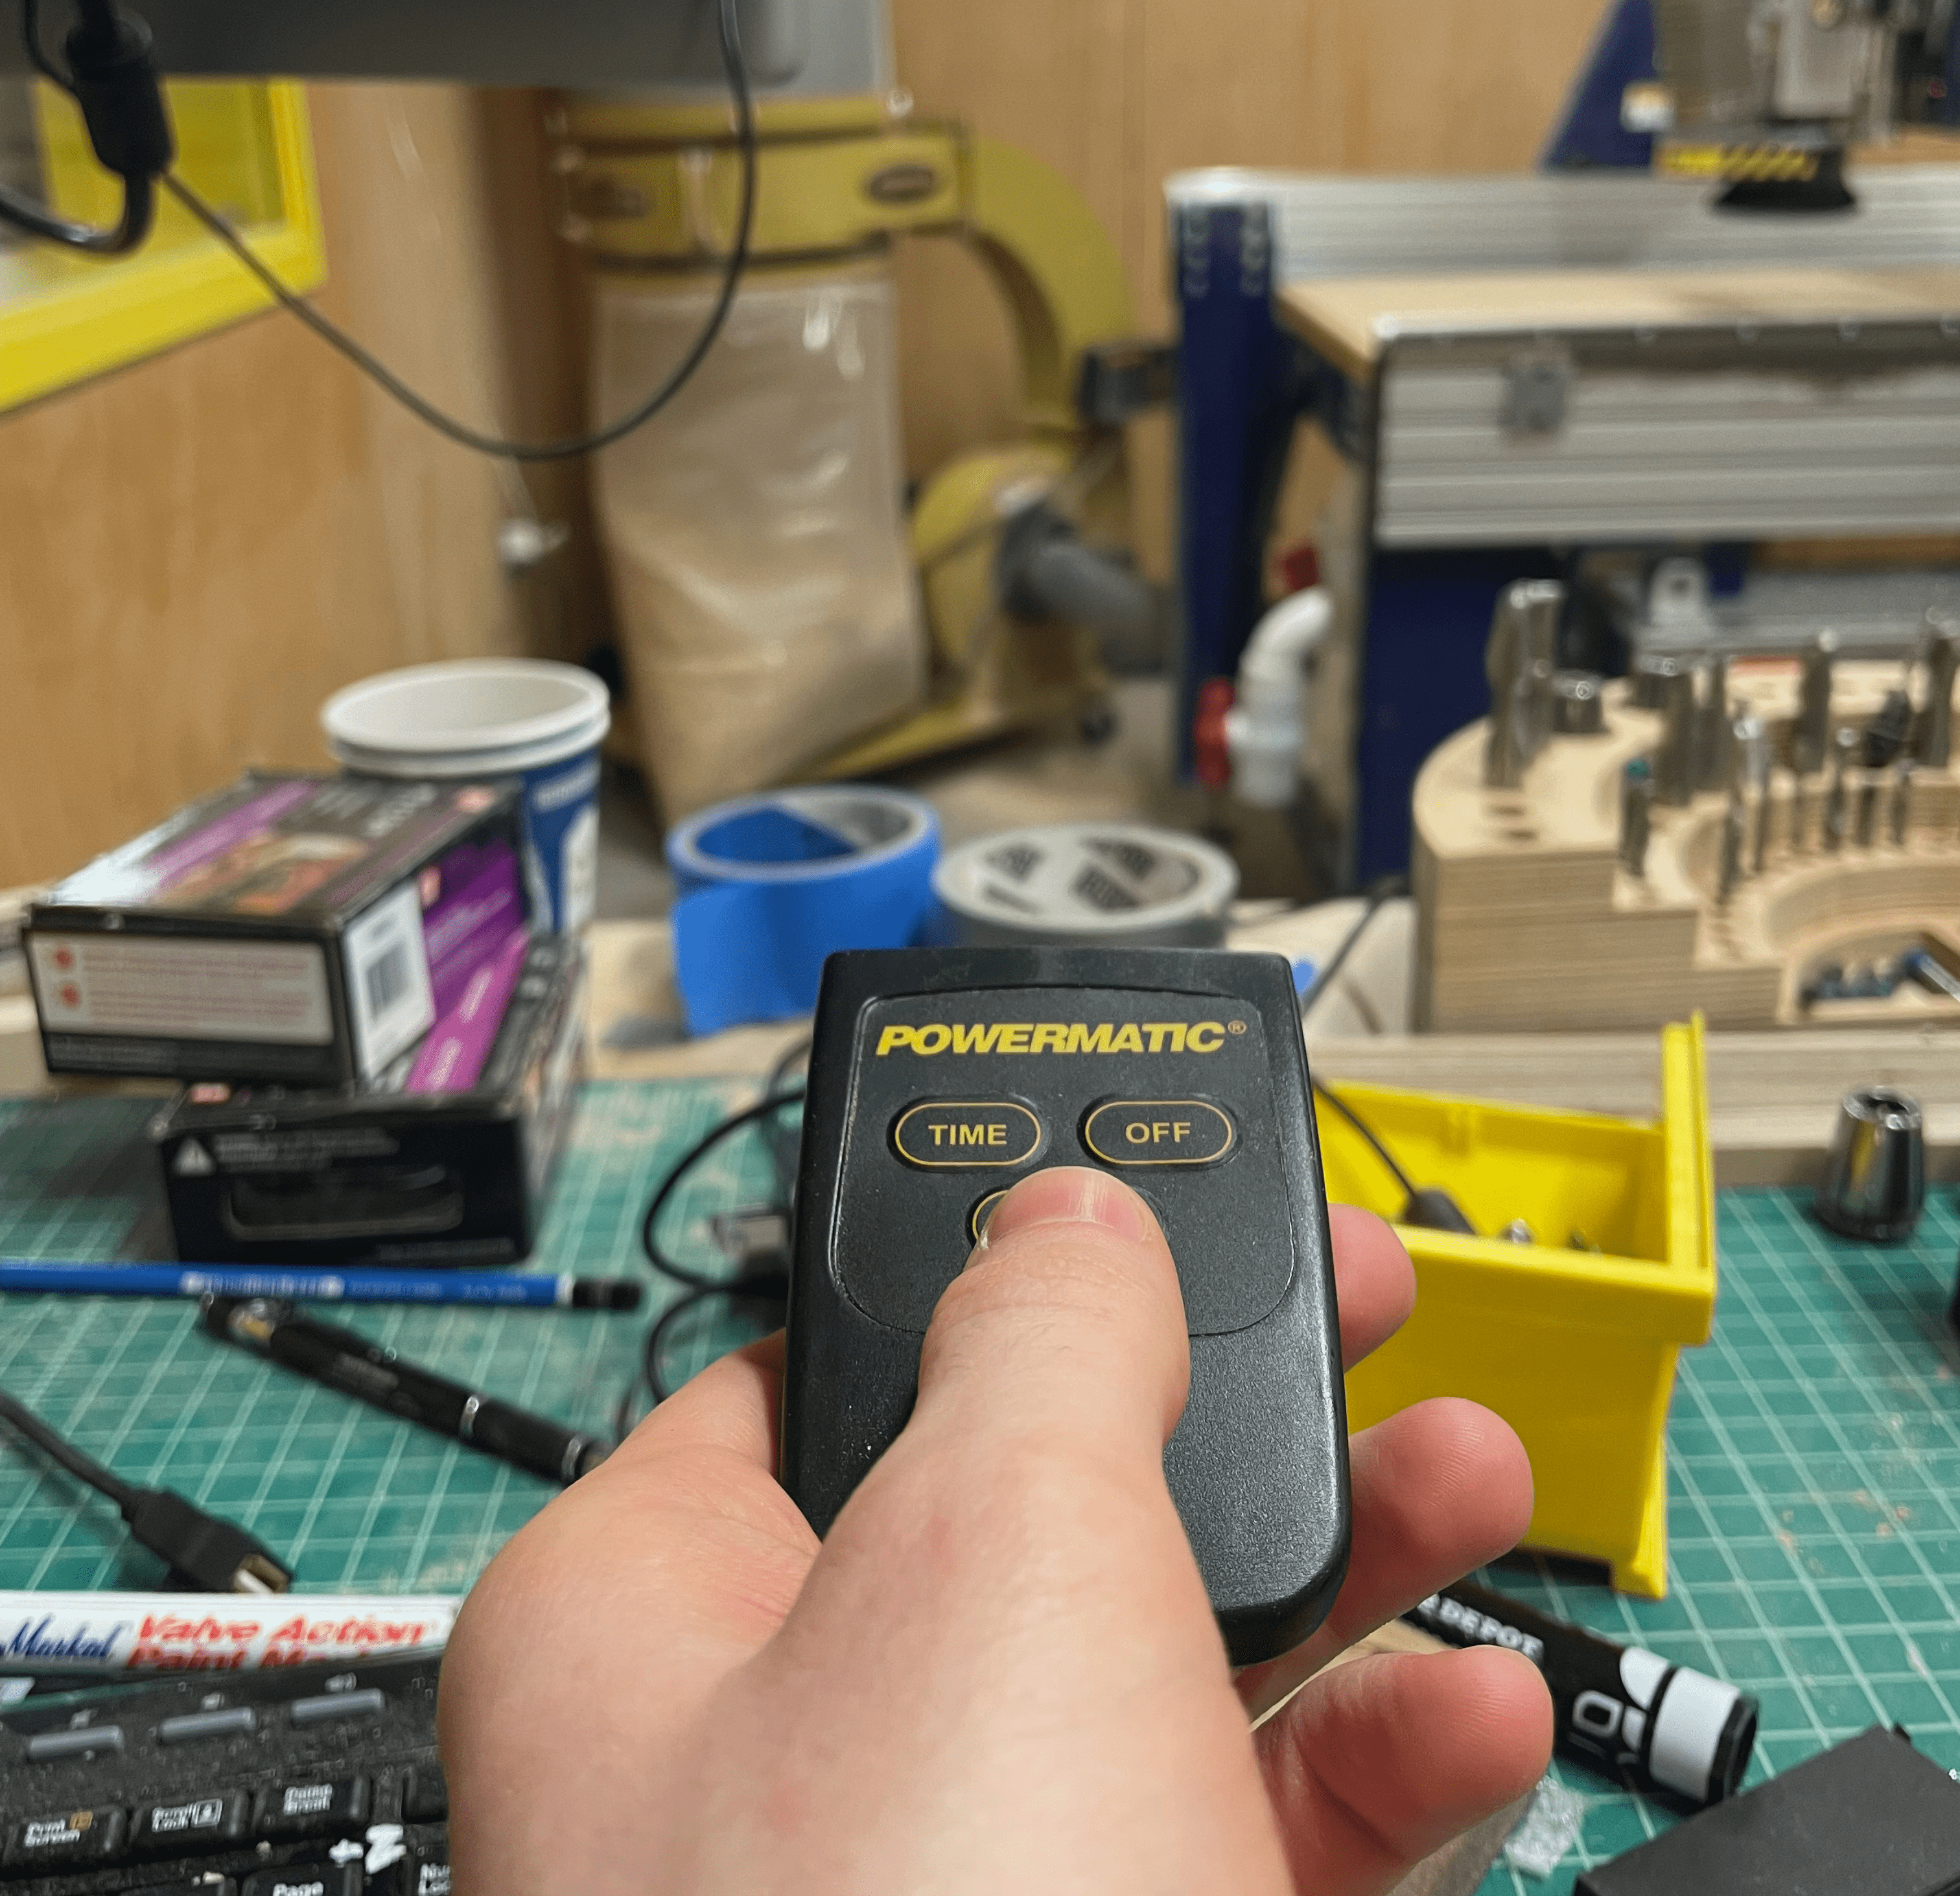
Use the ‘POWERMATIC’ remote control to turn on the dust vacuum. You will hear it when it is on. The remote needs to be pointed directly at the control panel without obstruction to work, you can also use the buttons on the machine.
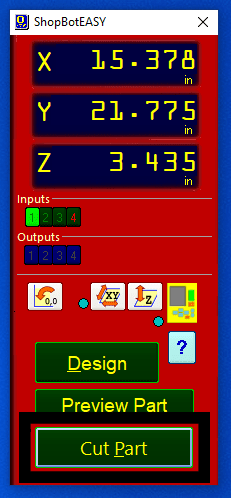
Once everything is prepared, press ‘Cut Part’.
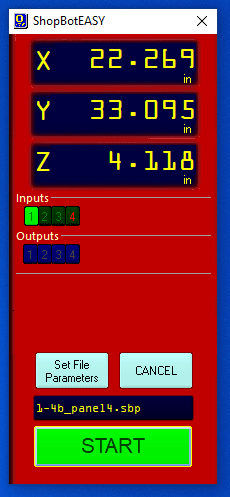
Select your file.
Put on your ear and eye protection.
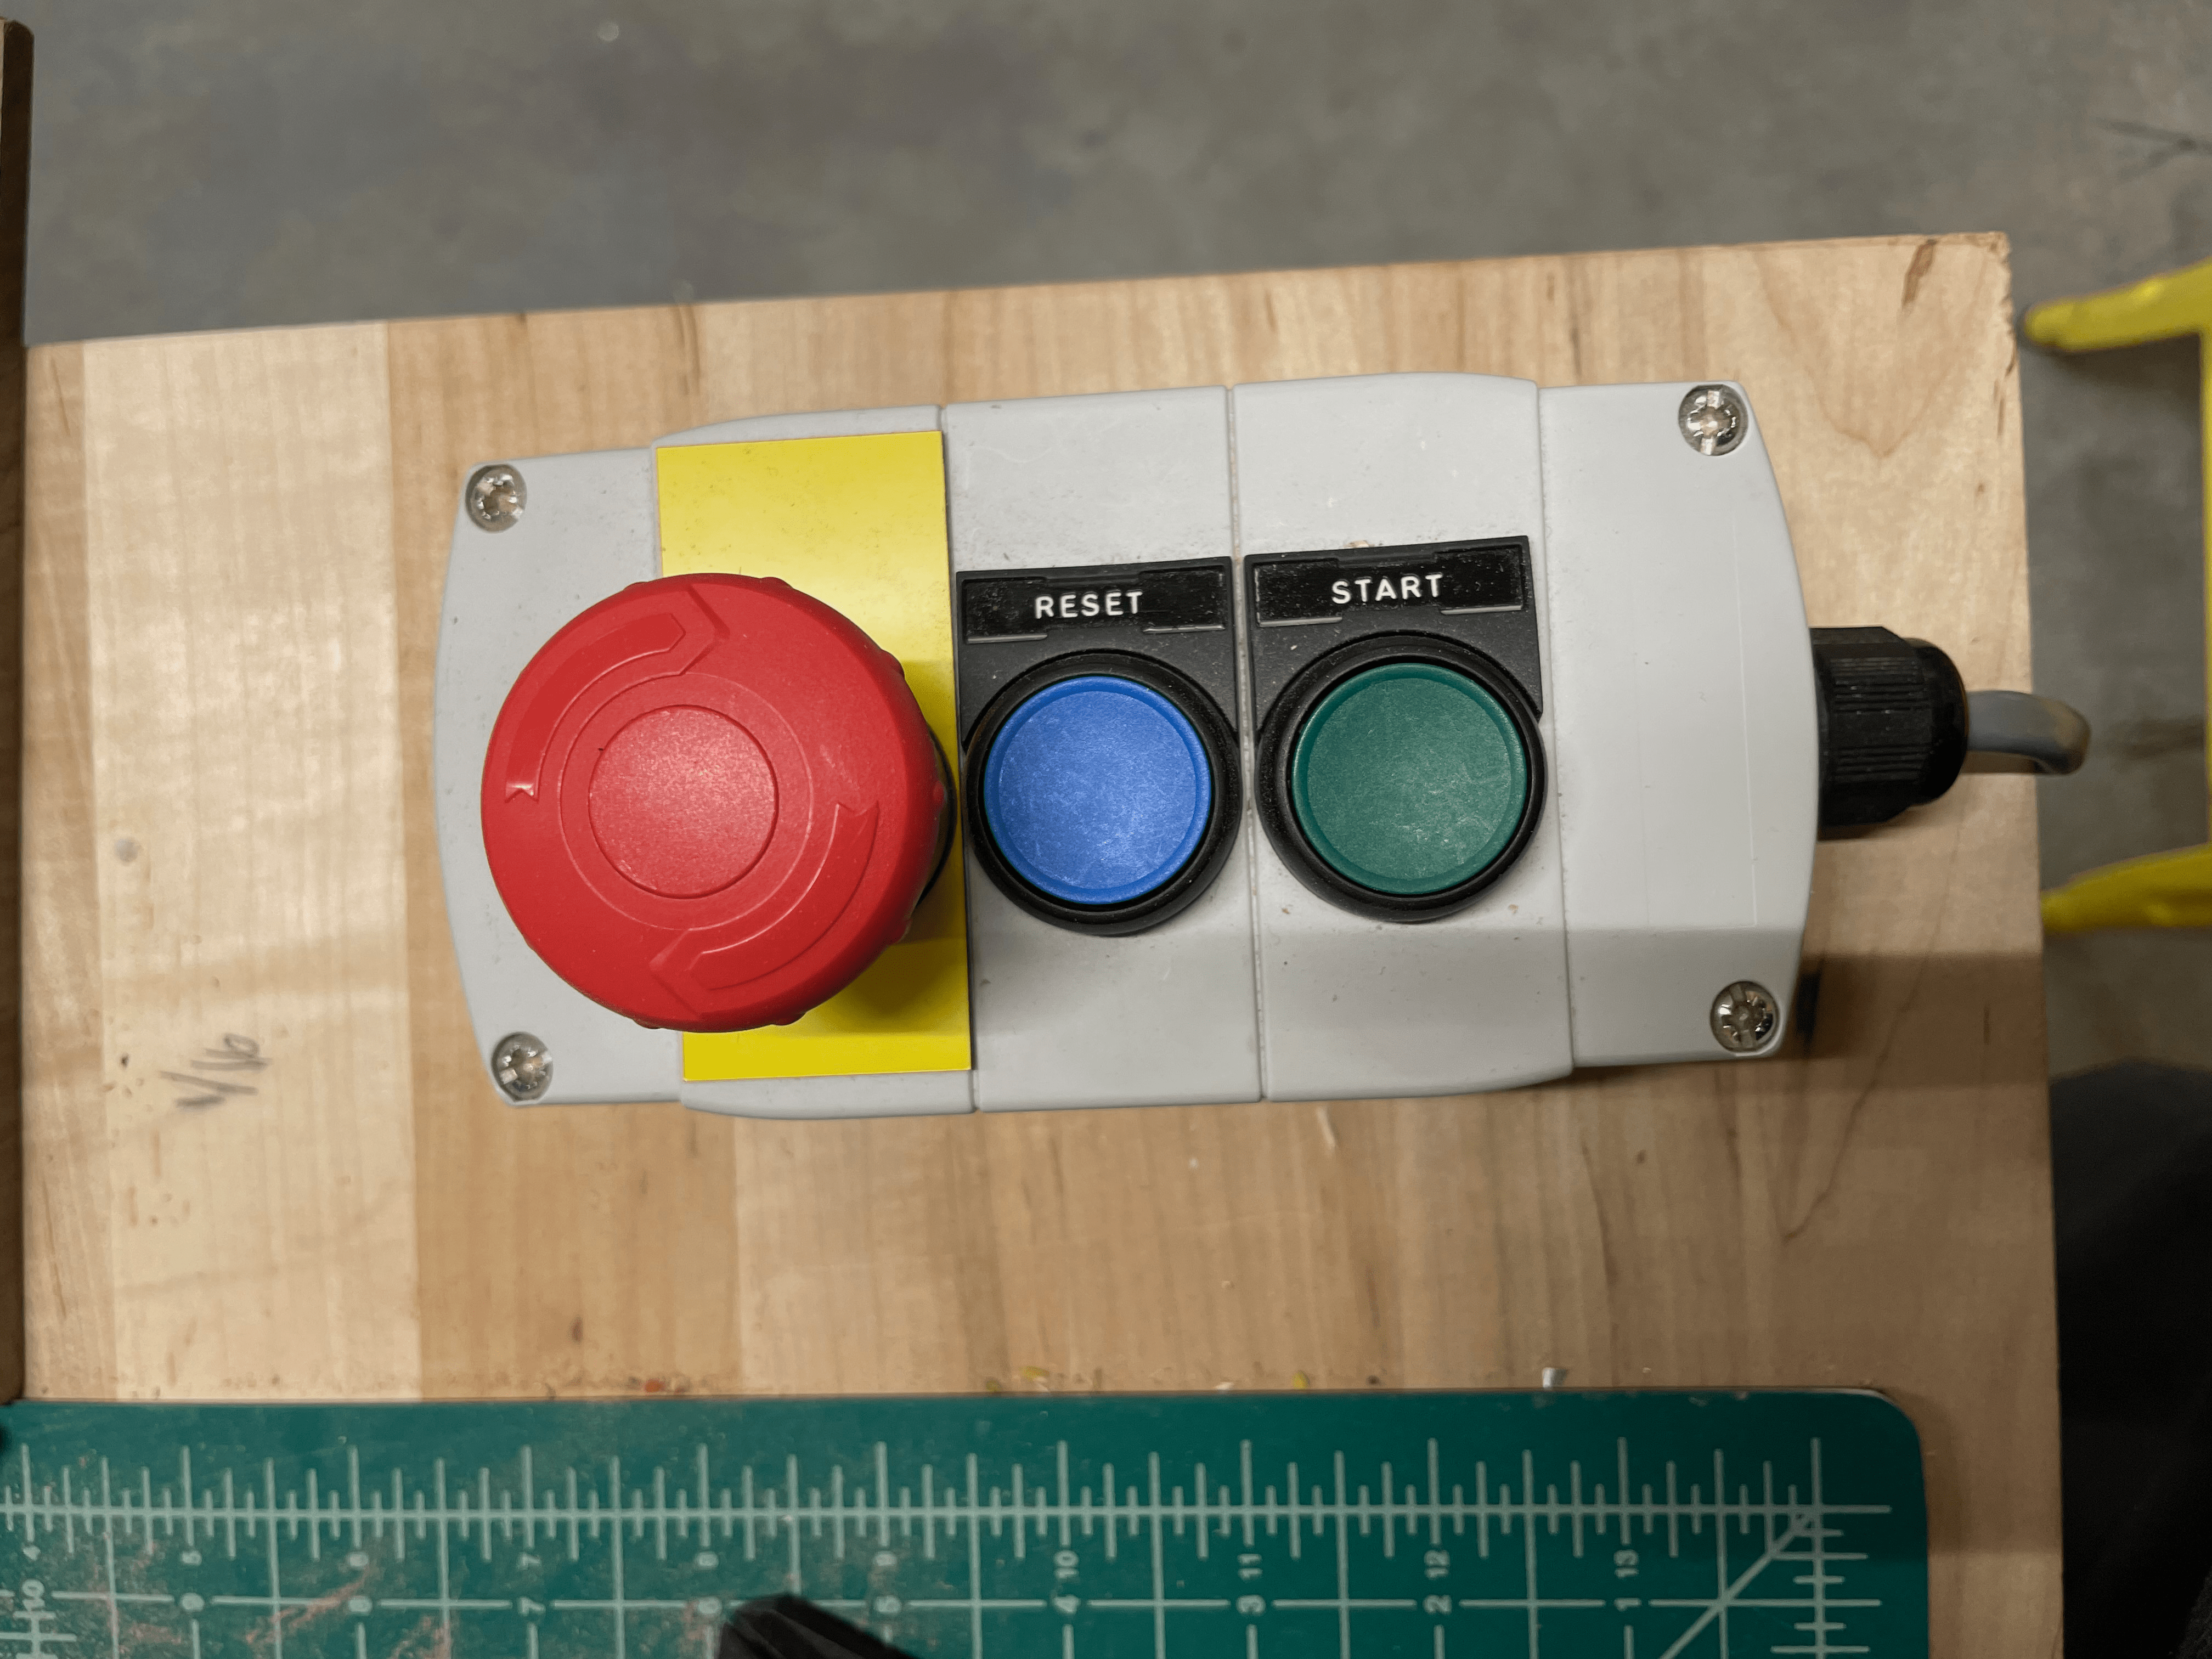
Press the big green ‘START’ button on the ShopBot3 menu.
Dont!!! Press OK yet! Follow the next Step
Before pressing ‘OK’ on the next pop-up menu, press the green start button on the CNC router remote.
If anything goes wrong during the cut, press ‘STOP’ on the computer or one of the big emergency stop buttons. Make sure there are no fires, then go find a crew member.
Post Cut
Congratulations! You have successfully run your first CNC milling cut.
Turn off the spindle and the machine.
Make sure to clean up everything and sign out of the computer before you leave.