Note: This page assumes that you are already familiar with the basic concepts and terminologies associated with laser cutting and have performed a cut on one of the Glowforges.
ULS
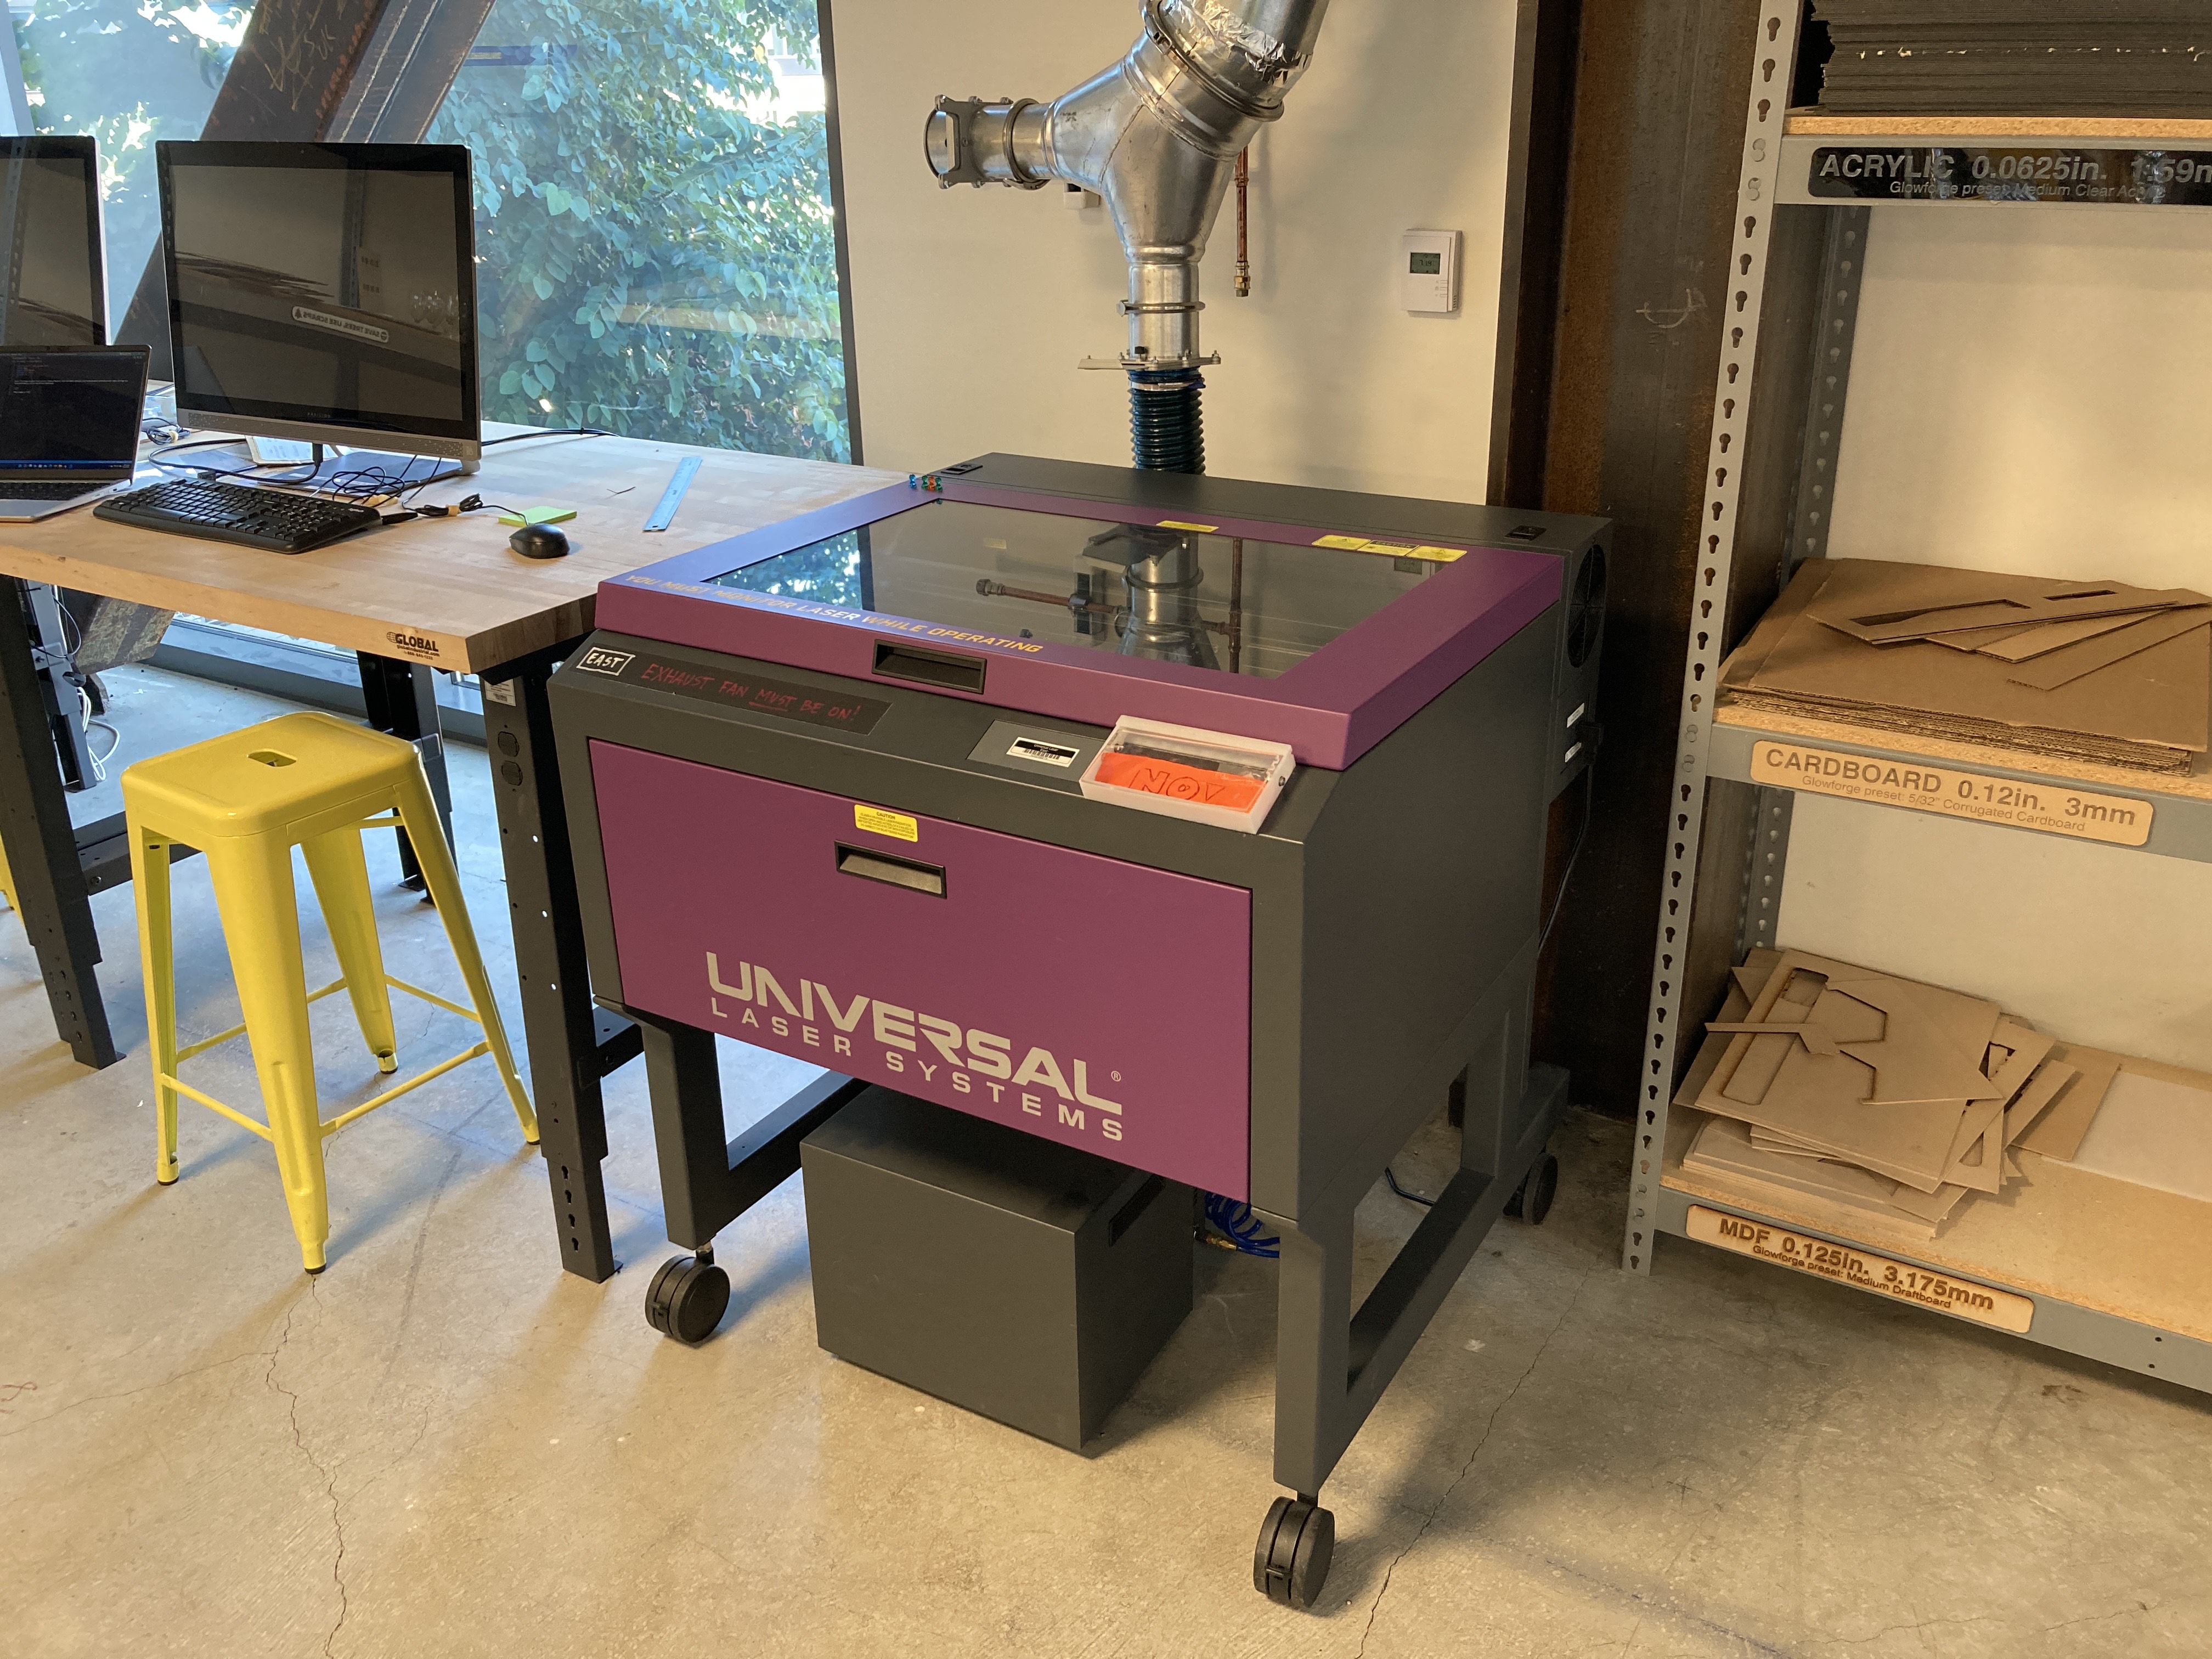
Compared to the Glowforges, the ULSs have more stringent requirements for your cut file but offer greater speed and power in return. They have a larger print bed, 18”x24” compared to the Glowforges’ 12”x20.4”. The basic steps for cutting with the ULS are:
- Properly format your SVG file (details below)
- “Print” the file from the dedicated ULS computers to the ULS software
- Configure your settings in the ULS software
- Turn on the dedicated ULS fume extraction
- Perform the cut
Formatting Your File
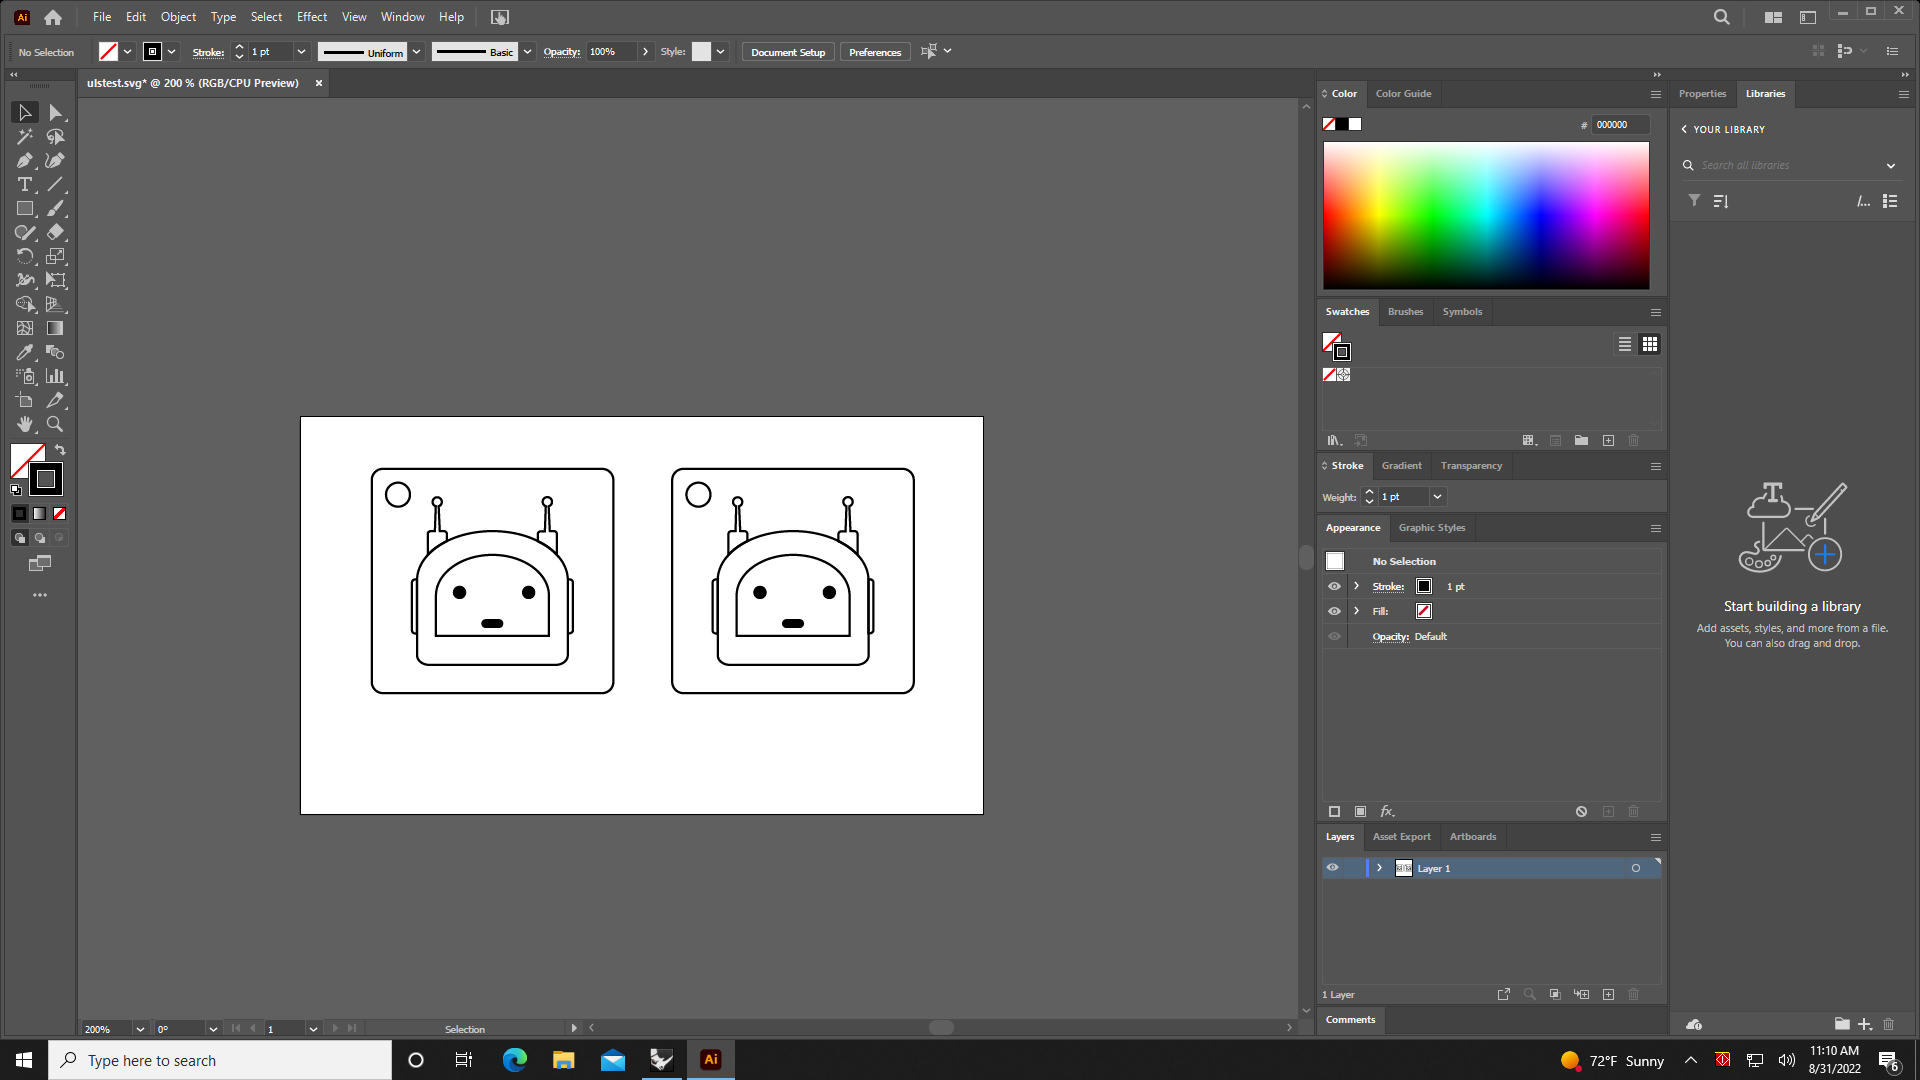
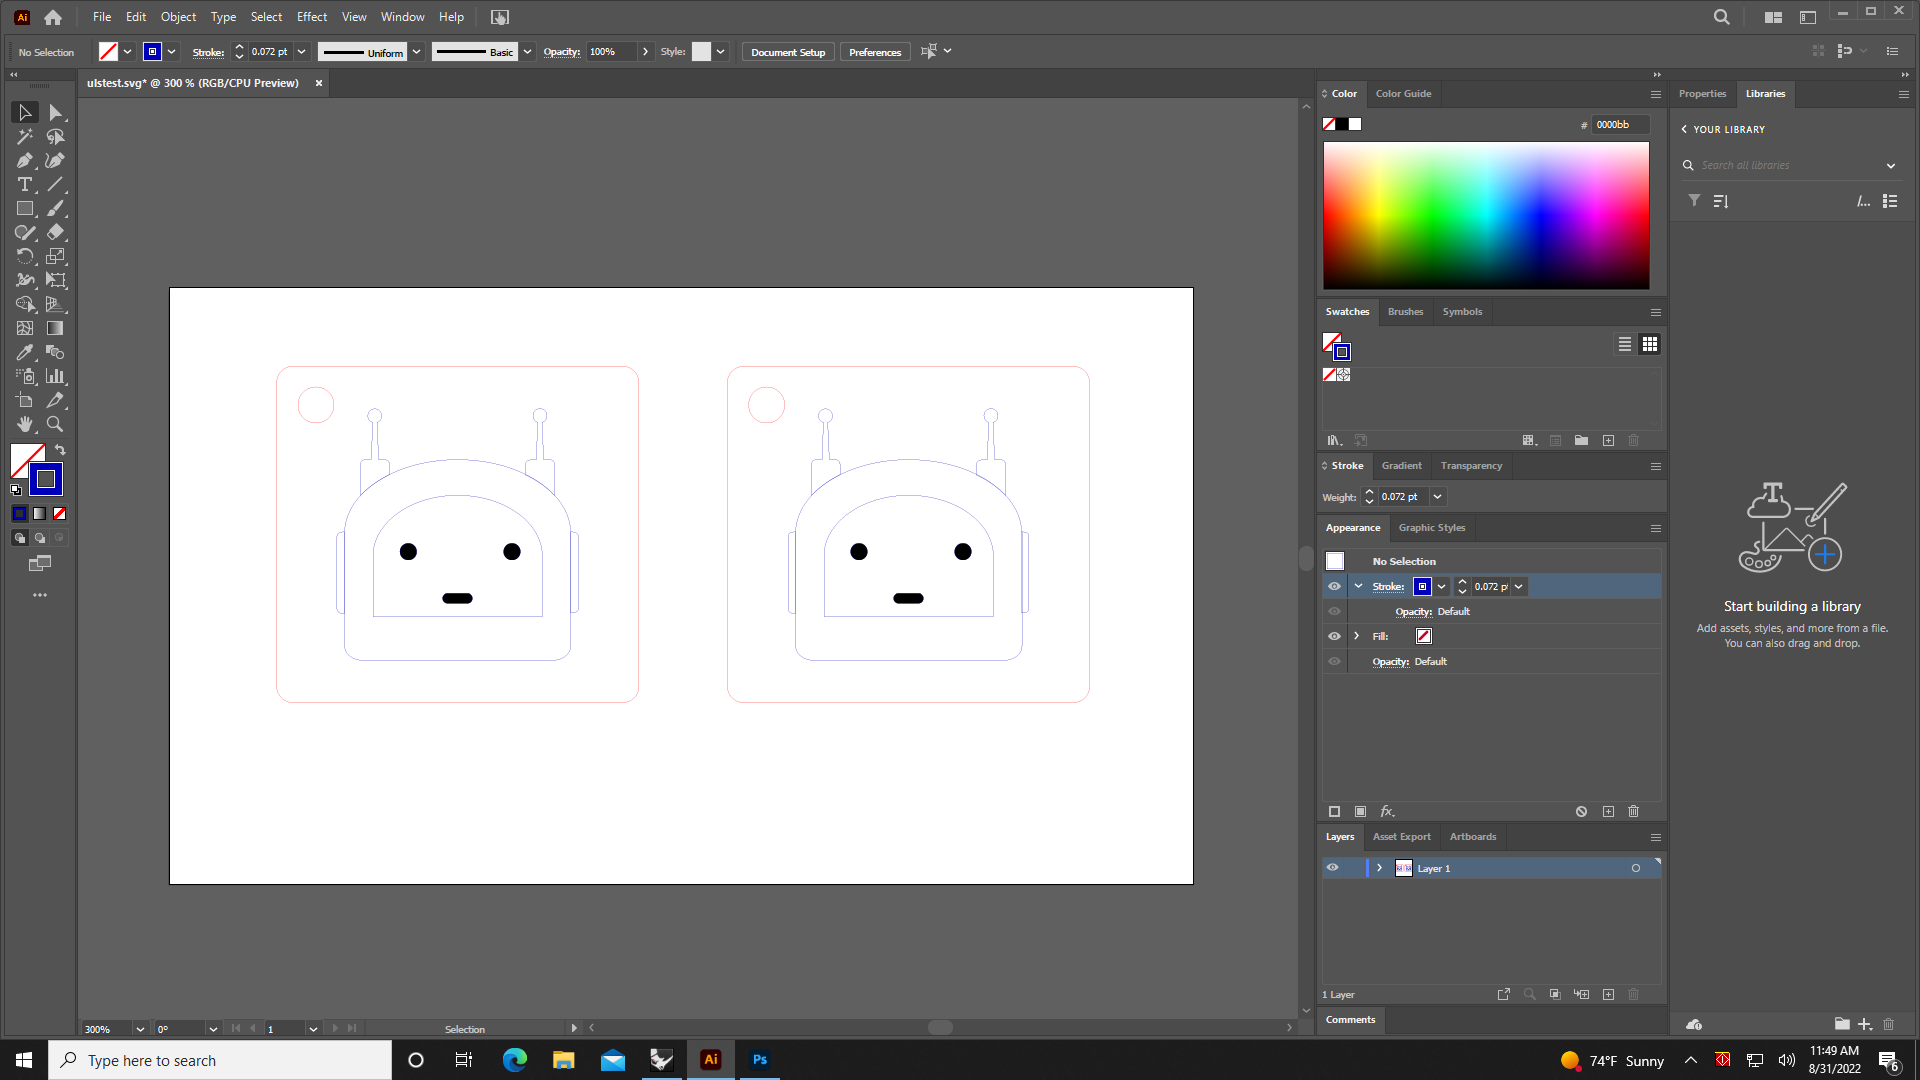
Let’s say that we’re making some keychain tags as shown in the image above. We’ll need to do two additional steps compared to a Glowforge before we can cut our files: specify our stroke colors and weights.
Stroke Colors
The stroke colors matter when cutting on the ULS. The software understands the following colors by default:
- Red is used to specify which lines are cuts.
- Blue is used to specify which lines are scores.
- Black is used to specify which fill areas are meant to be engraved.
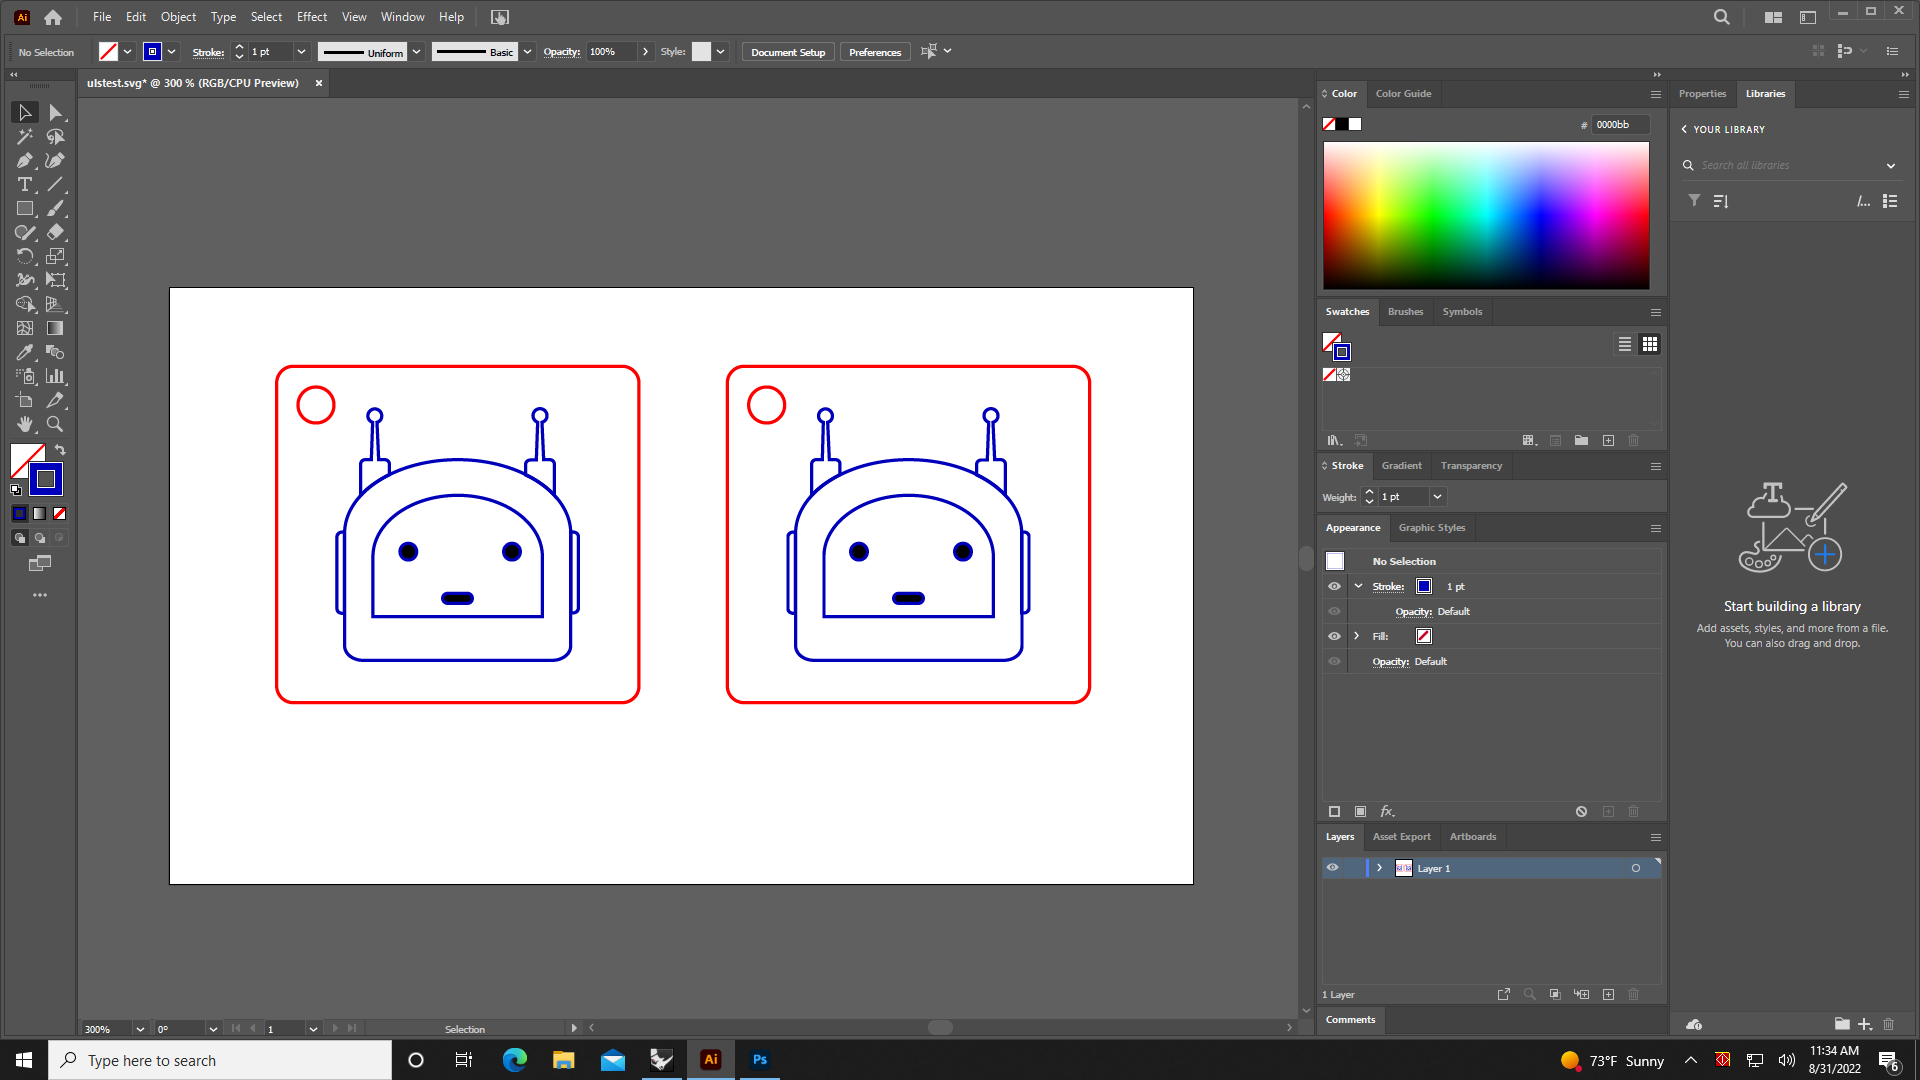
Note: The colors need to be pure red (#ff0000), blue (#0000ff), and black (#000000) for the forthcoming software to understand them.
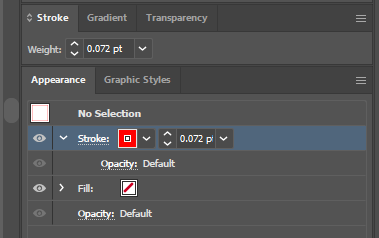
Stroke Weights
The ULS will interpret the stroke weight as the desired kerf width. We generally want the thinnest kerf width possible so change all stroke weights to .072 pt.
“Printing” the File
Each ULS has a dedicated computer located adjacent to it. These computers have their respective ULSs installed as printers. Open your SVG or Illustrator file in Illustrator on one of these computers. They should be logged in by default during Makerspace hours (Monday-Saturday 10-6) but any crew member can log you in if this not the case.
From Illustrator, print the file and select VLS4.60/75 as your printer. Leave the default settings as-is, making sure that scaling is set to “Do Not Scale”.
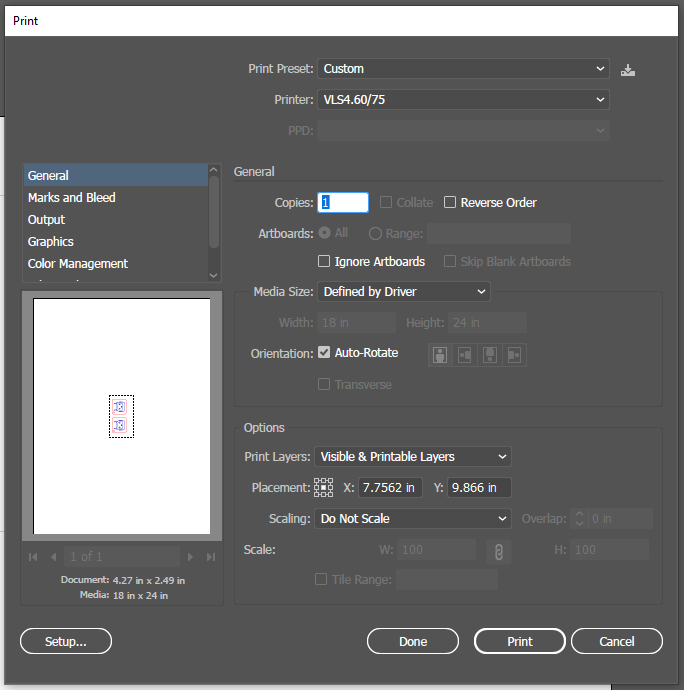
After you click print, the print dialogue will disappear but nothing will happen. Minimize your windows and open “UCP” from the desktop.

Here, you should see the image that you just printed from Illustrator.
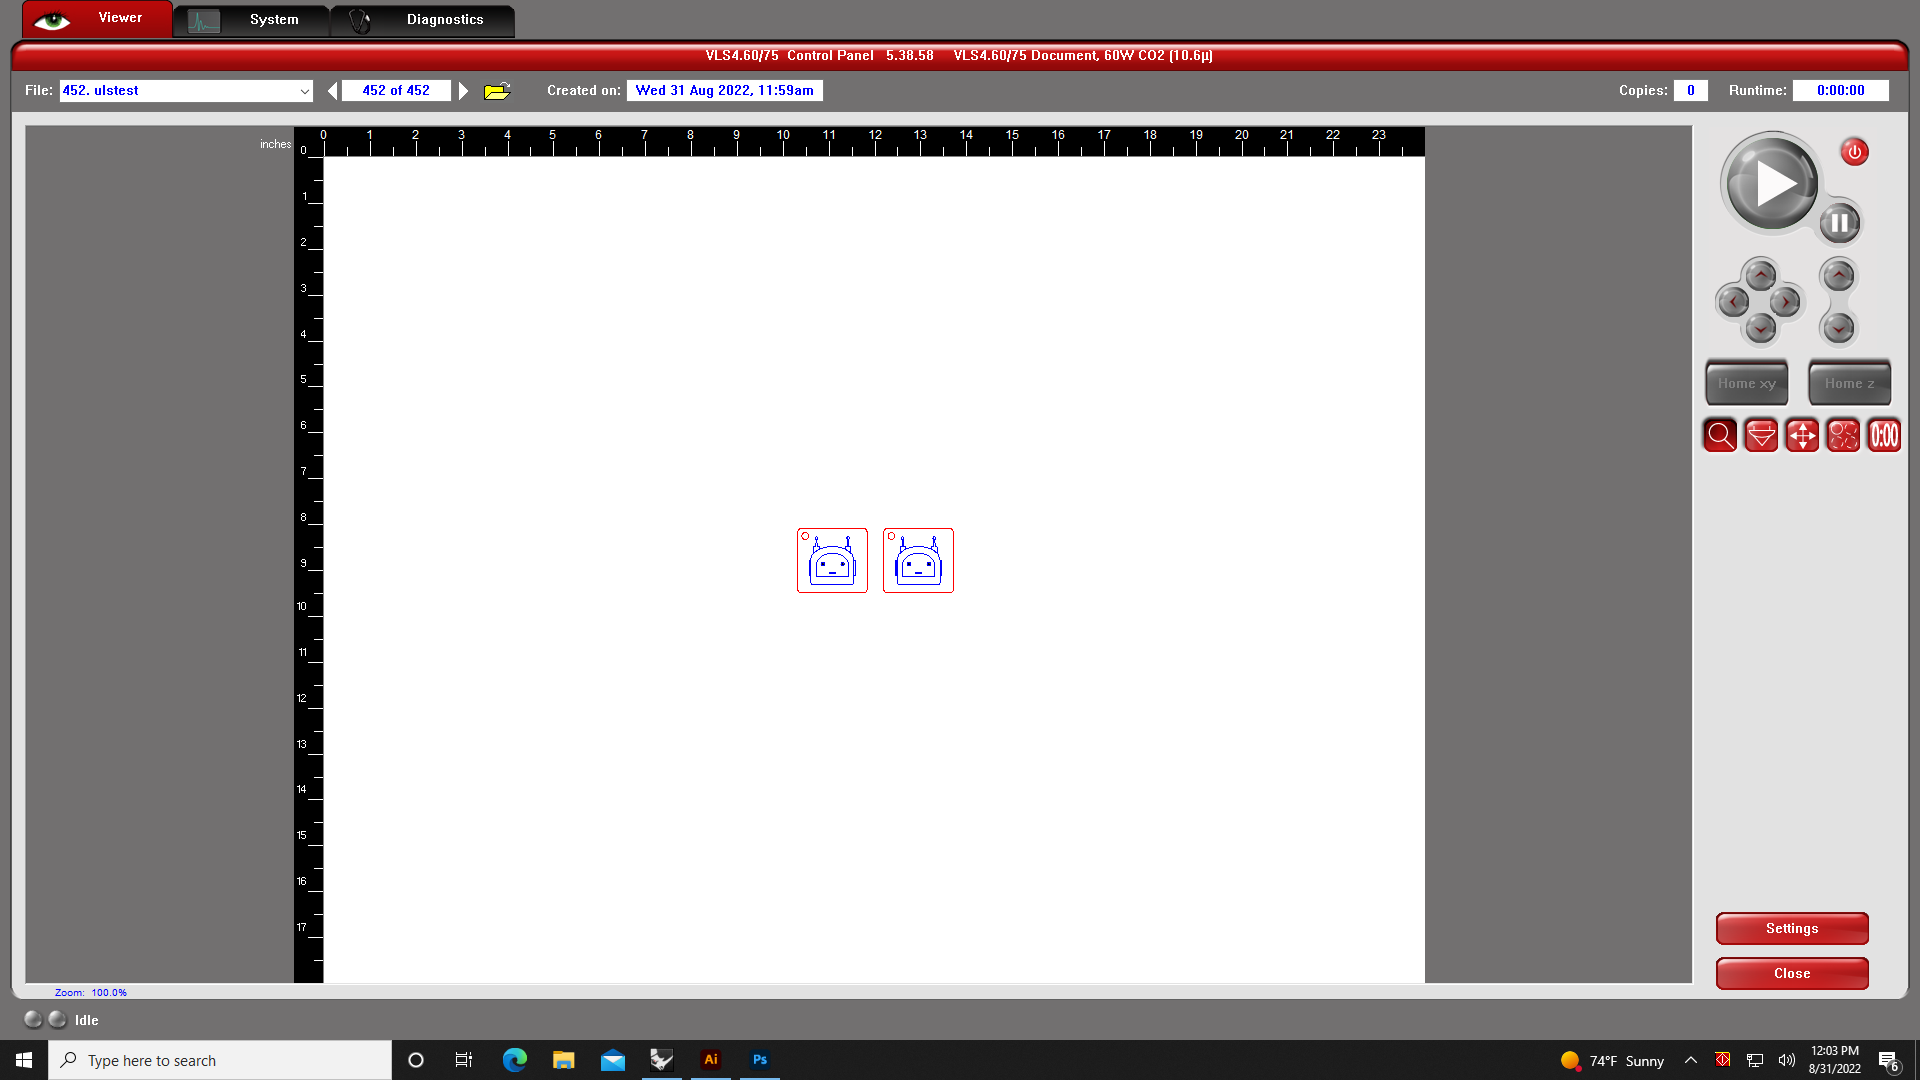
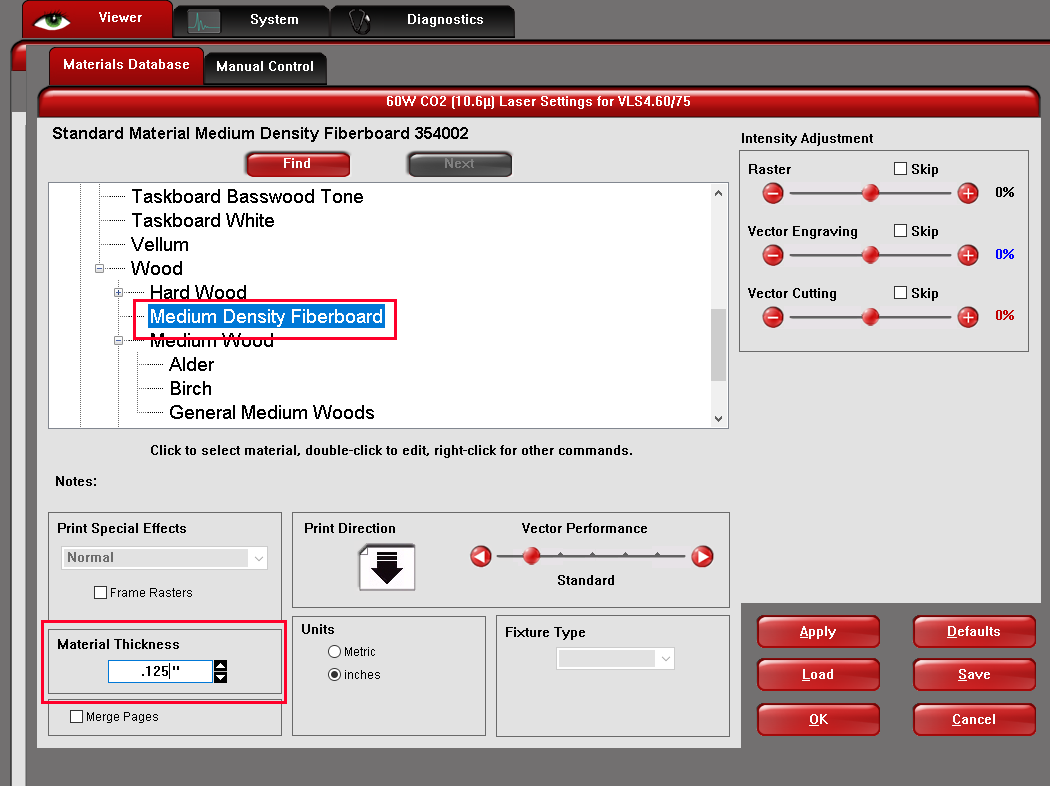
Configure Your Settings
Select “Settings” in the bottom right. Specify the material that you’re going to cut from as well as its thickness. For this example, I’ll be using MDF that is .125” thick. Select “Apply” and then “OK” after making these specifications.
The ULS does not have a live preview like the Glowforge does. Instead, it displays x and y rulers on its print preview that correspond to the rulers on the machine itself. It’s generally easiest to align your material in the top left corner and drag your file up to this location. Use the “Relocate” button on the right to drag your image to a spot that fits onto your material.

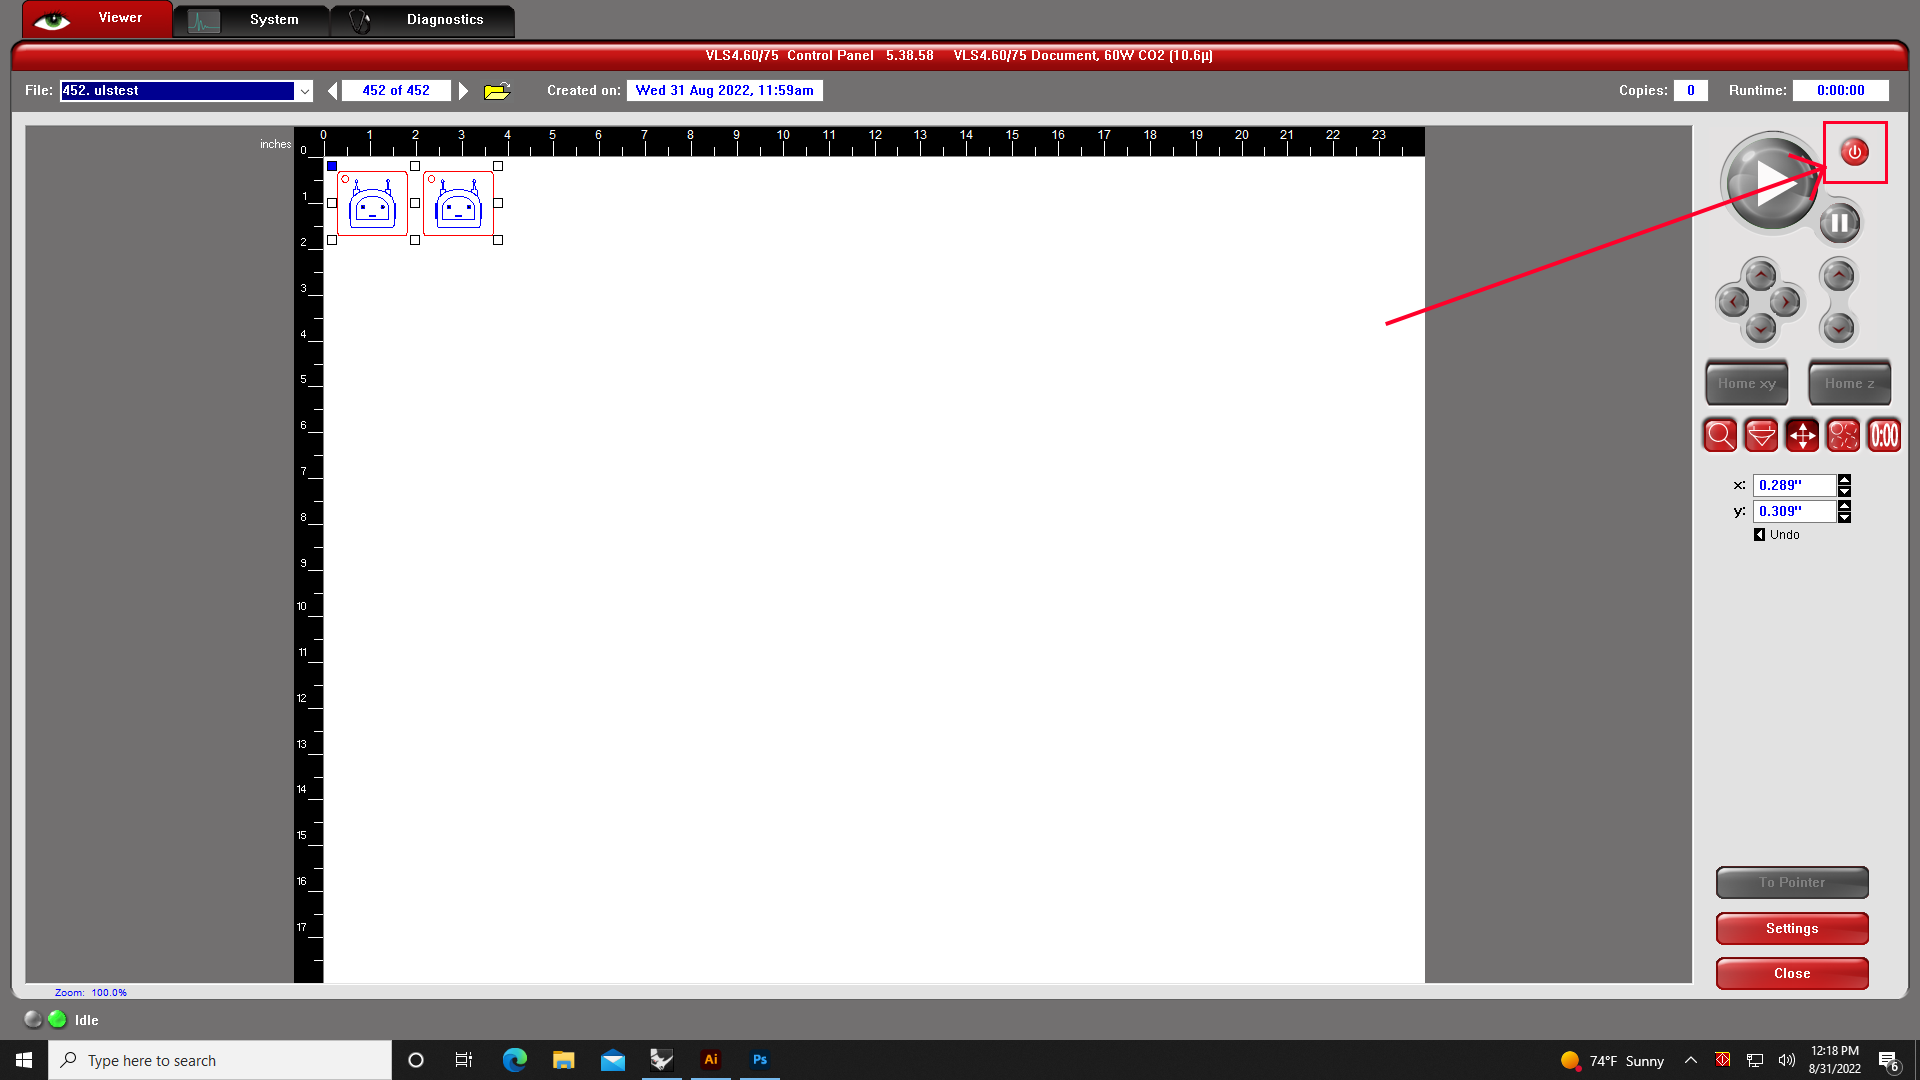
Turn on the ULS by pressing the power button at the top right of the UI.
Turn On Fume Extraction
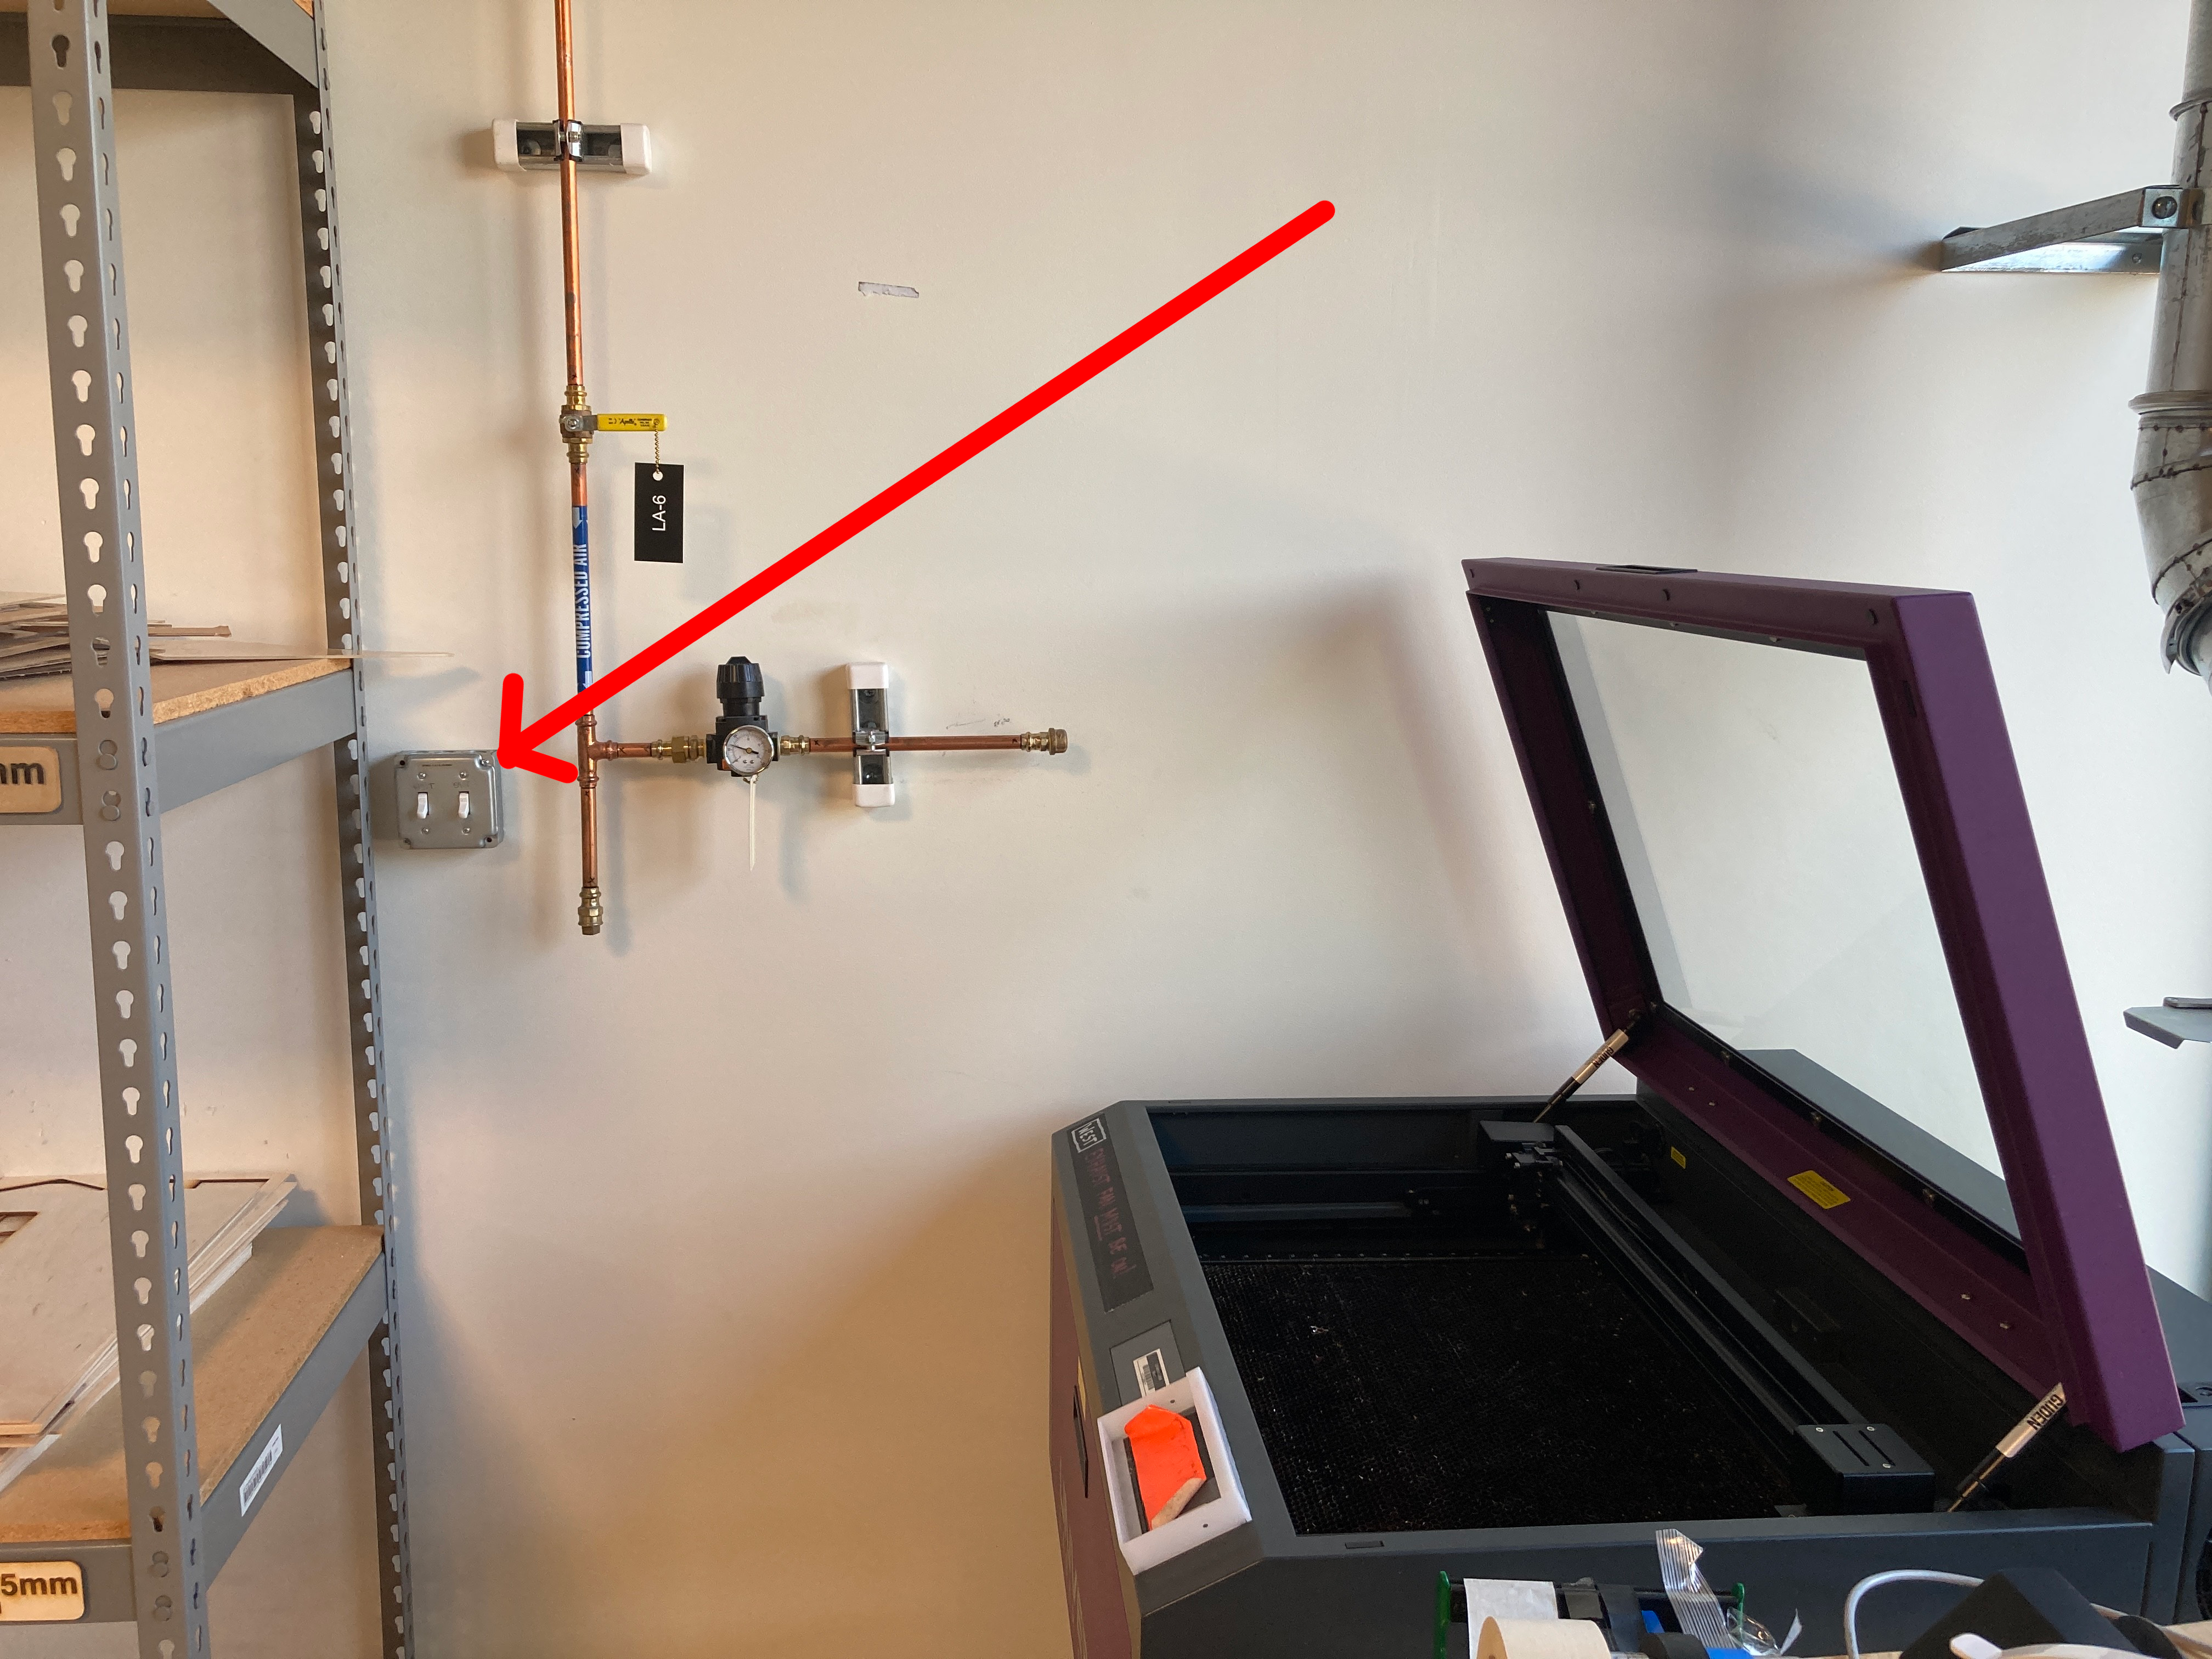
Each ULS has a dedicated fume extractor. The switches for both are located on the wall to the left of the West machine. The switches are labeled East and West and the machines are also labeled East and West accordingly. Turn on the switch corresponding to the machine you wish to use. It will take about minute to actually kick on. Do not start your cut until you hear the fan turn on. It will be loud.
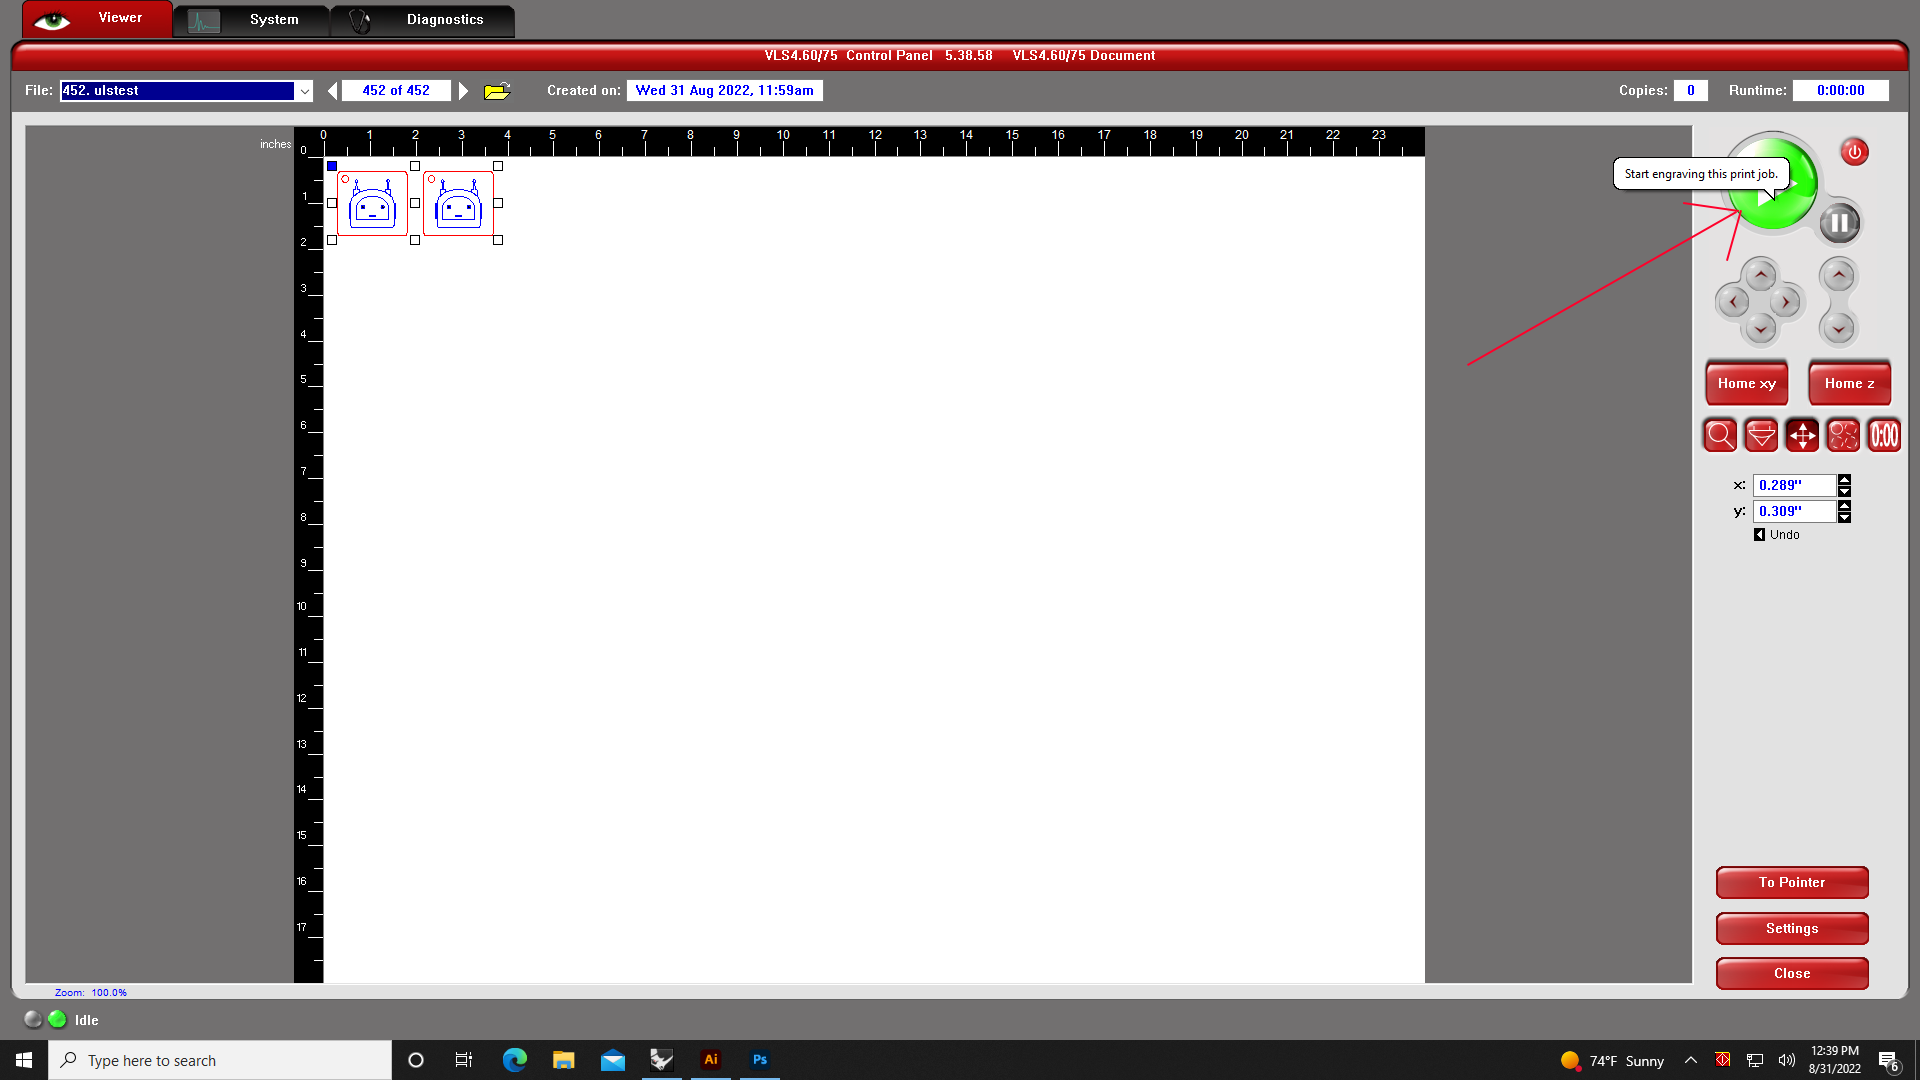
Perform the Cut
Press the play button to begin your cut. Just like the Glowforges, you must watch your cut for the entirety of its duration to ensure that there aren’t any flare ups.
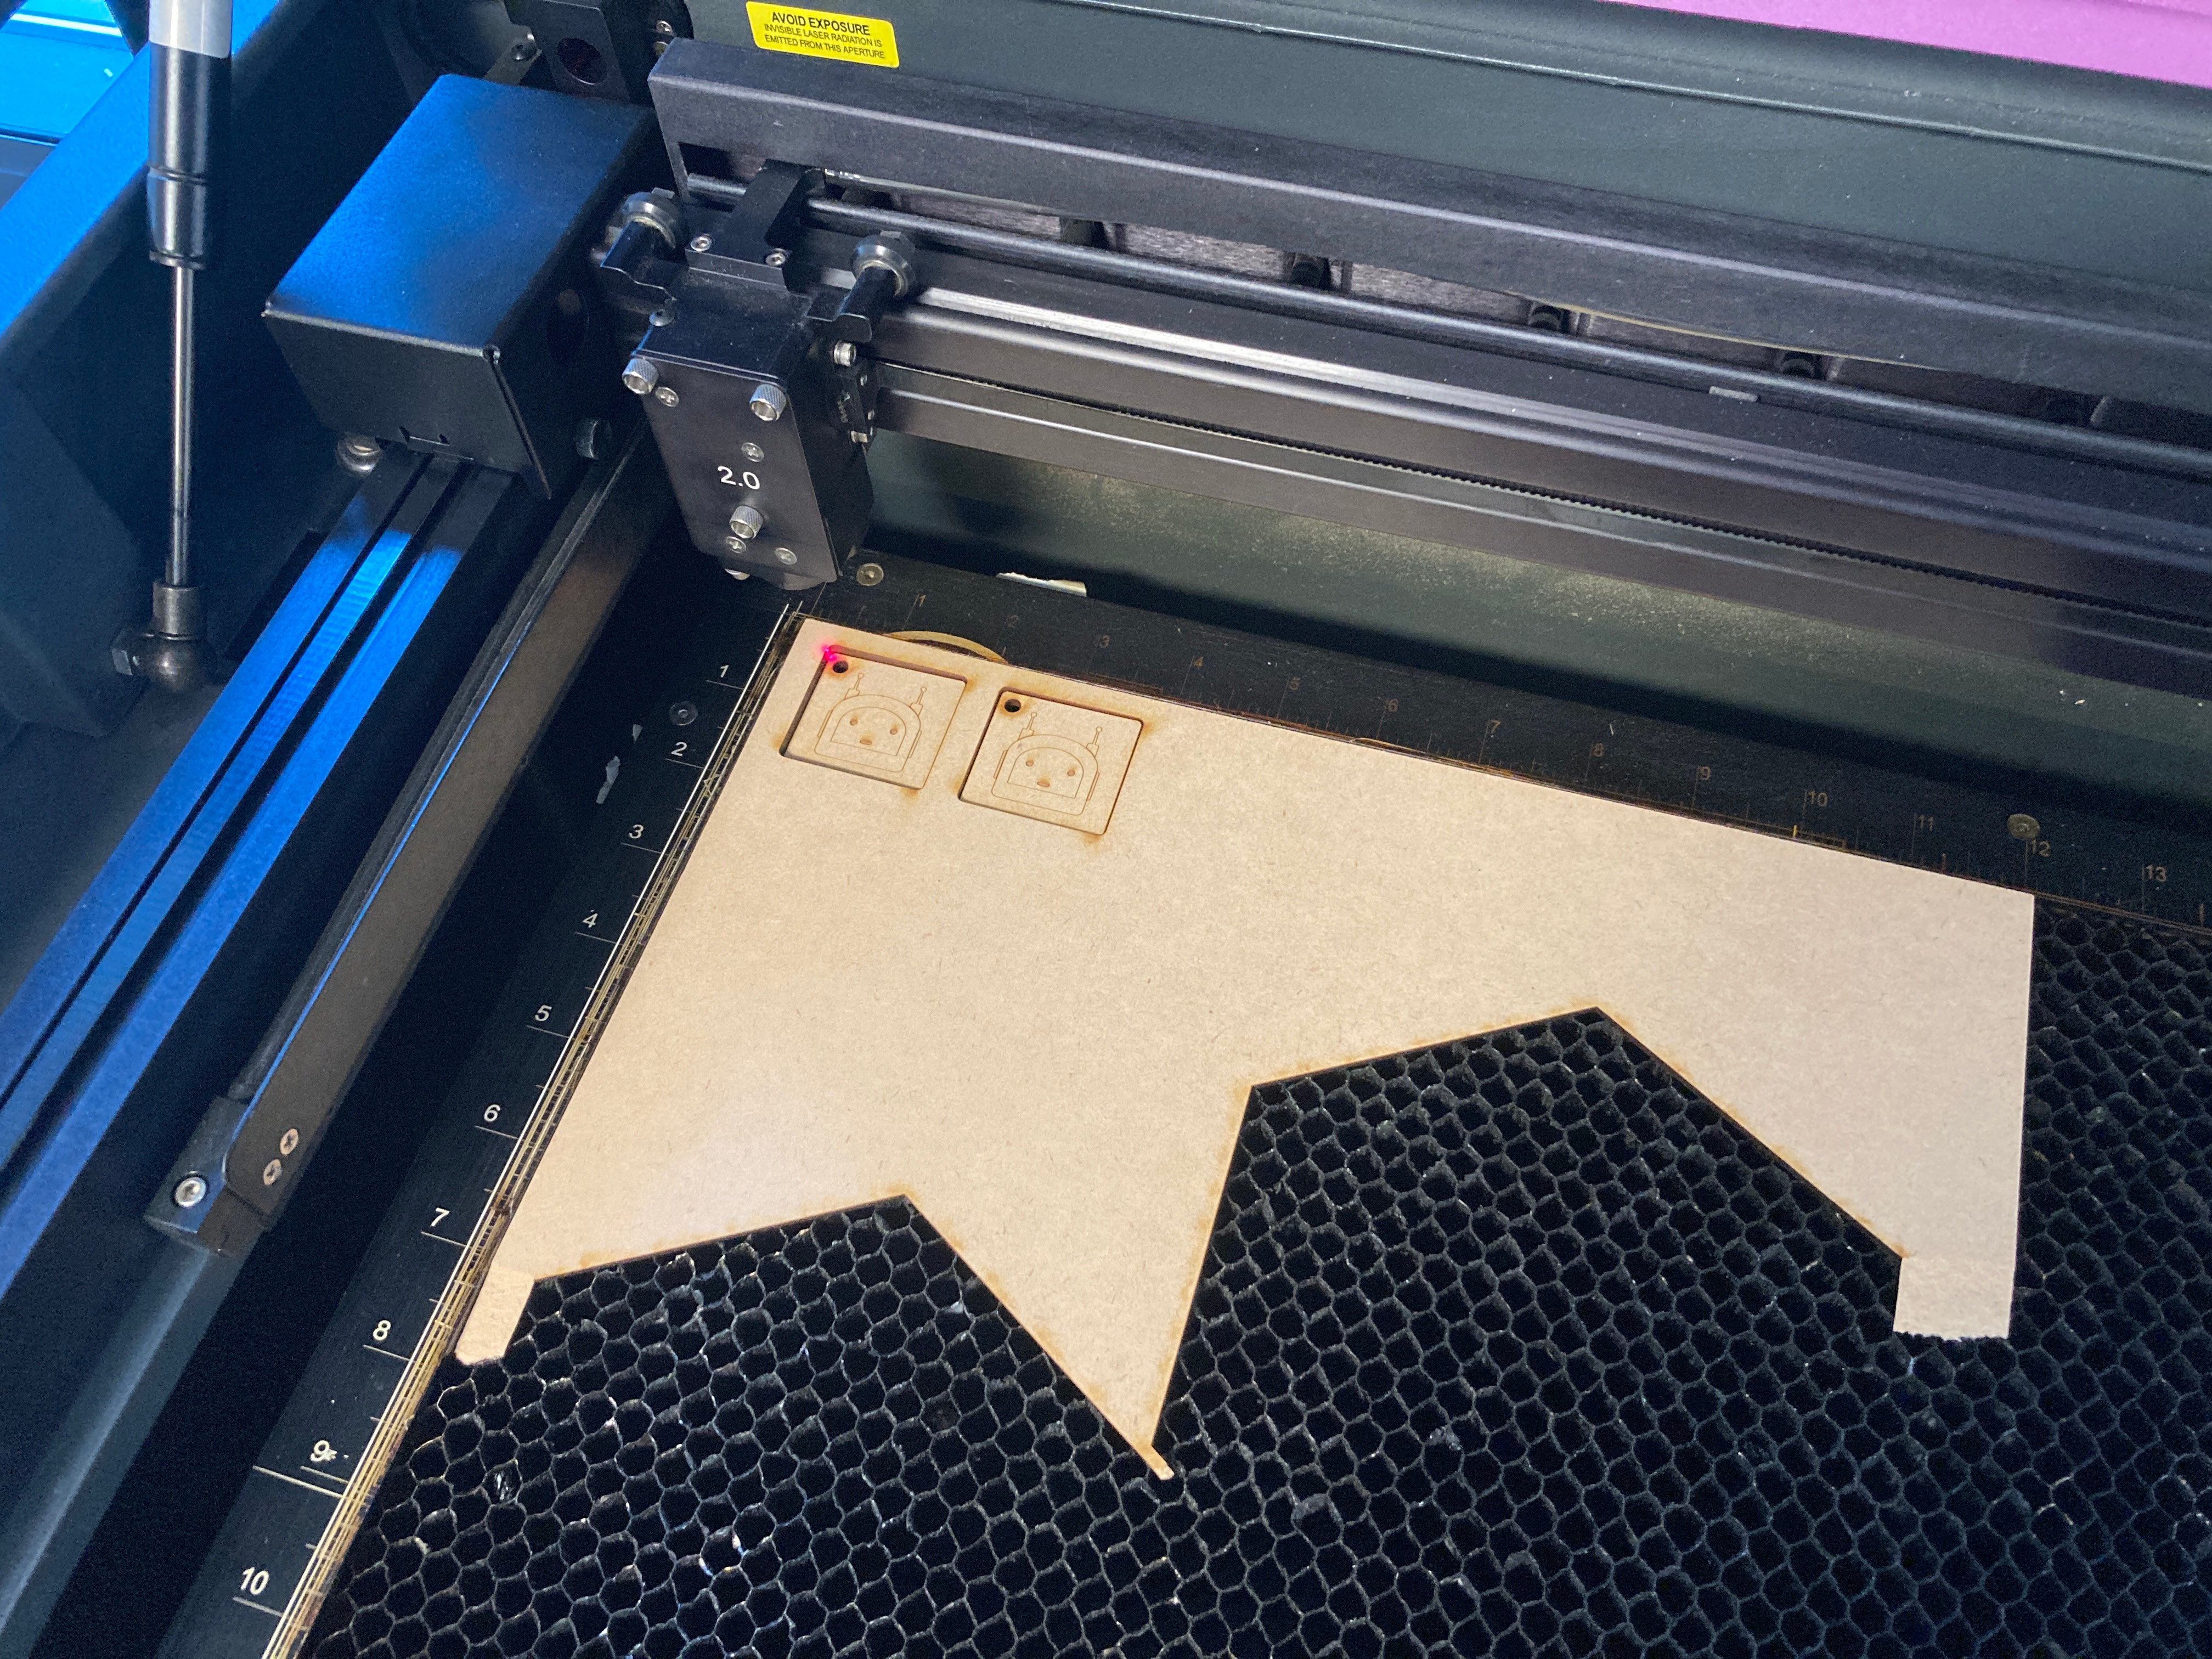
After a few minutes your cut should be ready! Once it’s complete, turn off the fume extraction via the wall switch and turn off the machine via the UCP UI. Congrats, you’re all done!
For standard operating procedures, please use our SOP file here.