Quick Reference
| Material | Thickness | Inches/second | Power | Frequency | Laser Start | Estimated Kerf |
|---|---|---|---|---|---|---|
| Mild Steel | .007” | 2 | 25% | 500 | 10% | ? |
| Mild Steel | .030” | 1.2 | 45% | 500 | 25% | ? |
Note: This page assumes that you are already familiar with the basic concepts and terminologies associated with laser cutting and have performed at least one cut on both a Glowforge and a ULS.
Kern Laser Cutter with J5 Coherent Laser

Of the laser cutters available in the makerspace, the Kern is the most powerful but has the longest setup time. It may be a good option if you wish you cut metals, thicker materials, or shapes that do not fit on the ULS. There are different nozzles for different materials. At the time of this writing, the laser is set up to cut metals. In order to cut non-metals, you would need to swap out the nozzle, turn off the automatic height follower, and calibrate the nozzle height manually. Manuals for the Kern LaserCELL can be found here and the Coherent Diamond J5 laser (which is mounted inside of the Kern) can be found here. If you wish to cut thicker non-metallic materials than the ULS can handle, it’s likely that the CNC router or other woodshop tools would be faster than doing this swap.
File Preparation
-
Export your file from Illustrator or Inkscape onto a USB. The Kern user manual states that it accept 3 different file formats, a PLT file which is used for cutting and scoring vectorized images, a TIF file which is used for engraving rasterized images, and an EMF file which can perform both operations in a single file. We’ve found that some small bugs pop up when actually using these formats and recommend to instead export your work as a PDF. Use a different color for any lines that you wish to cut with different settings. The colors accepted by the Kern’s software are black, red, green, yellow, blue, magenta, cyan, purple, and orange.
-
Insert the USB into the computer attached to the Kern and login. The login pin is labelled on the monitor. Open the KCam7 program.
-
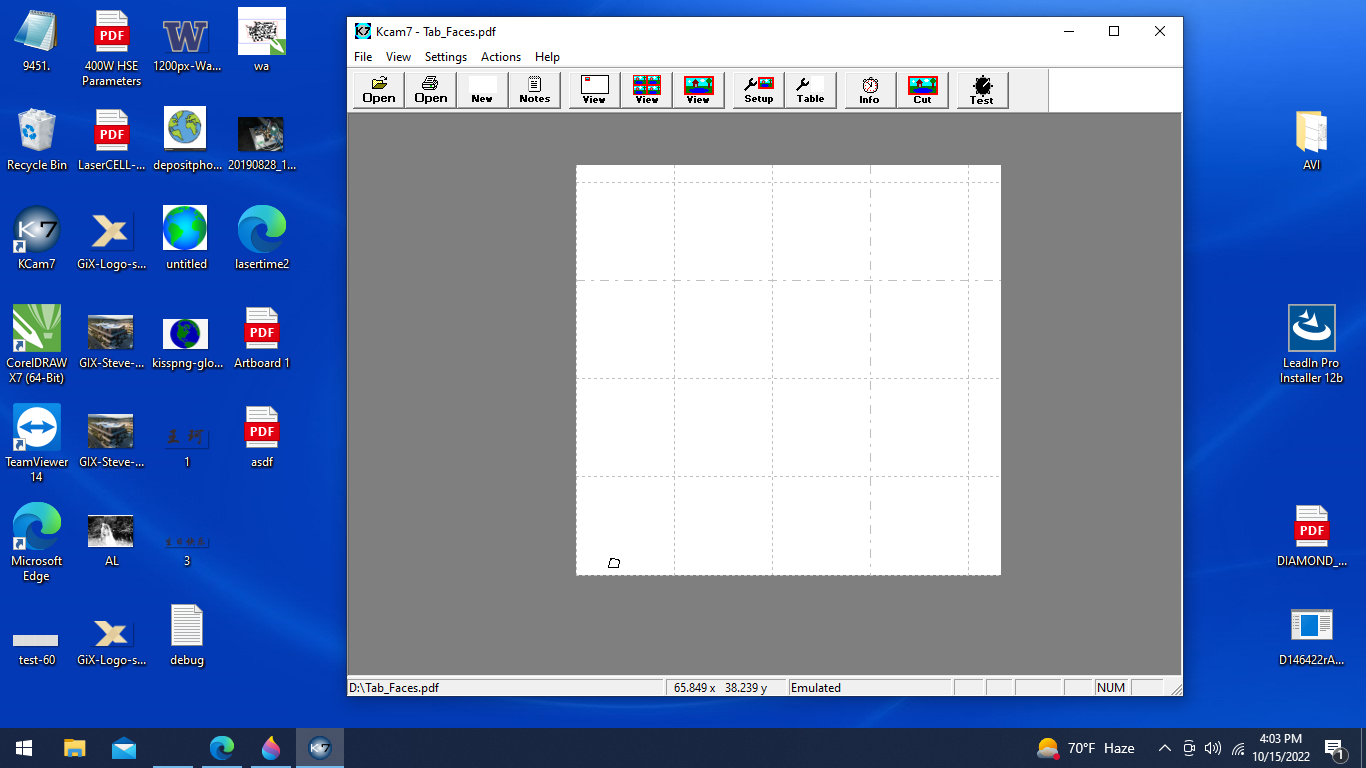
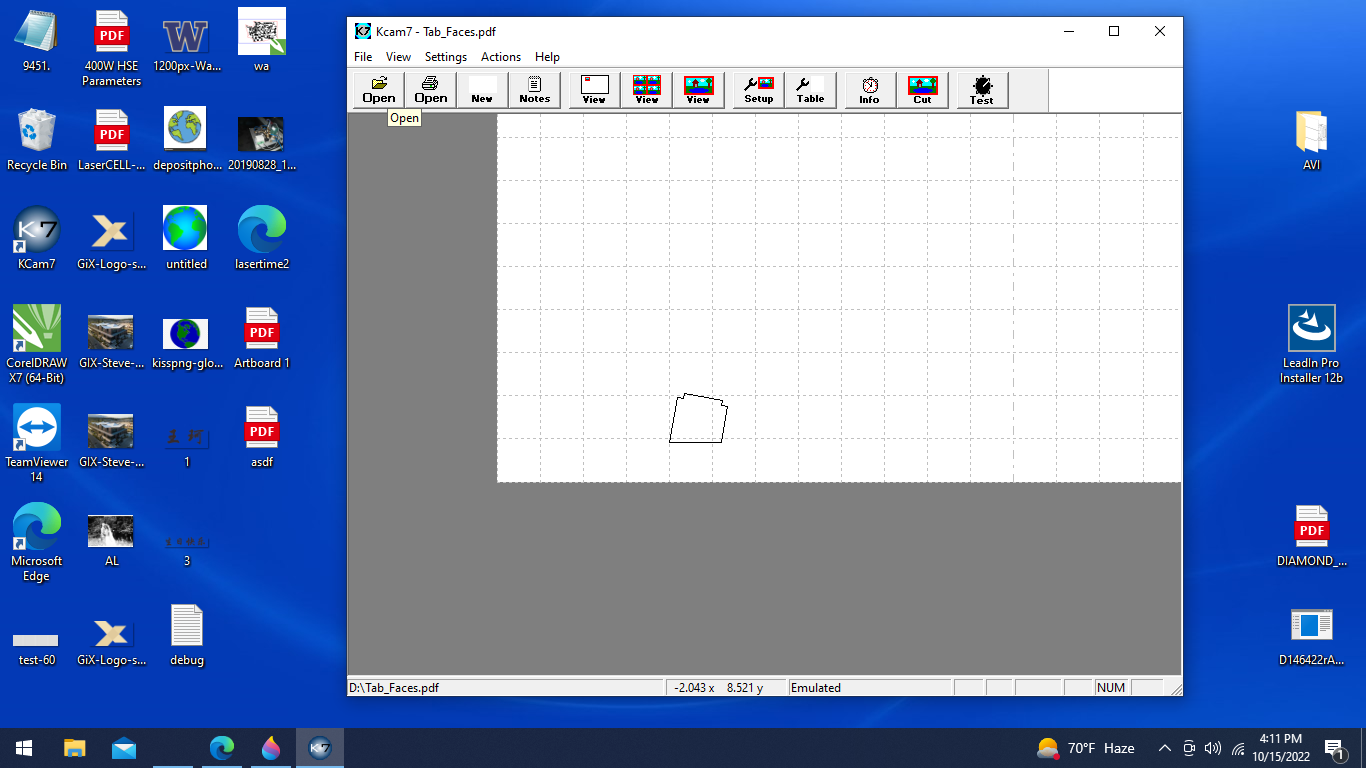
Click the leftmost open icon and navigate to your PDF. After taking a moment to import, you should now see your part on the GUI’s artboard.
-
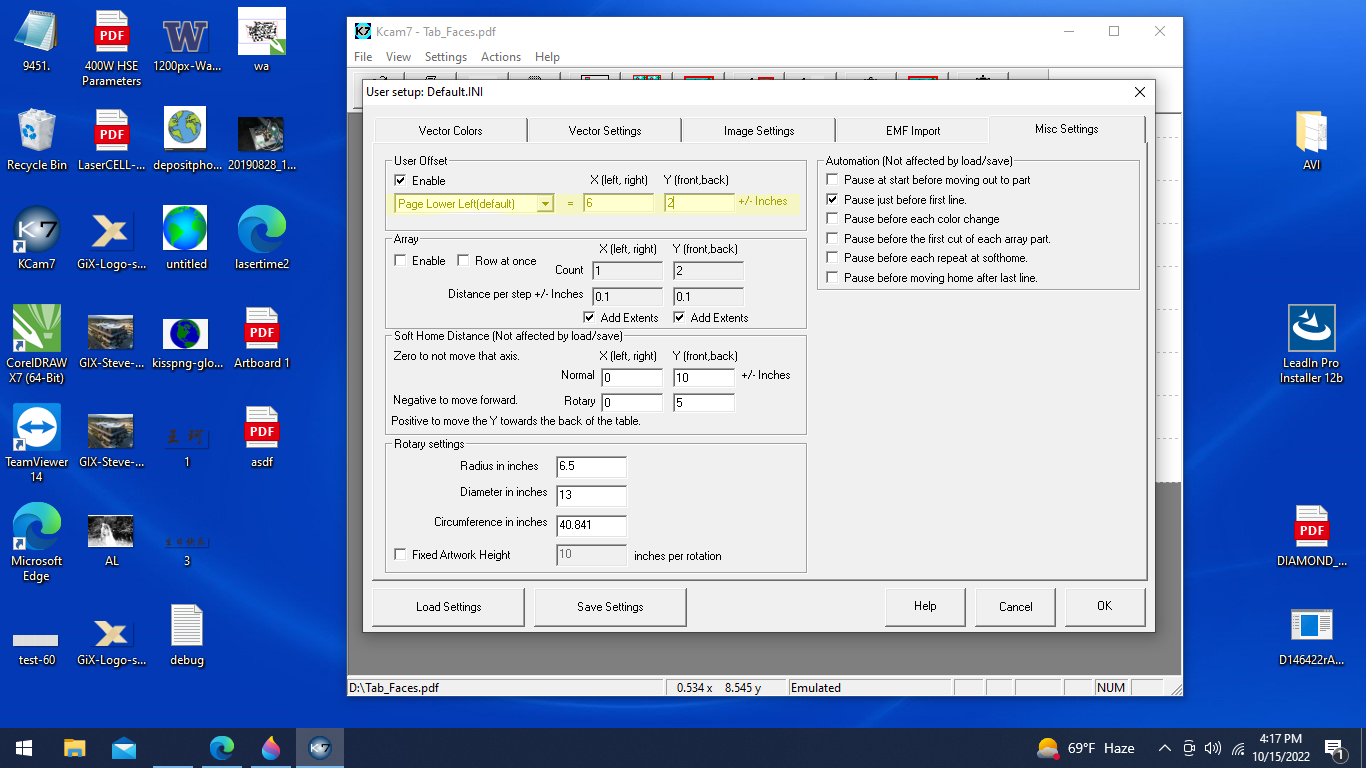
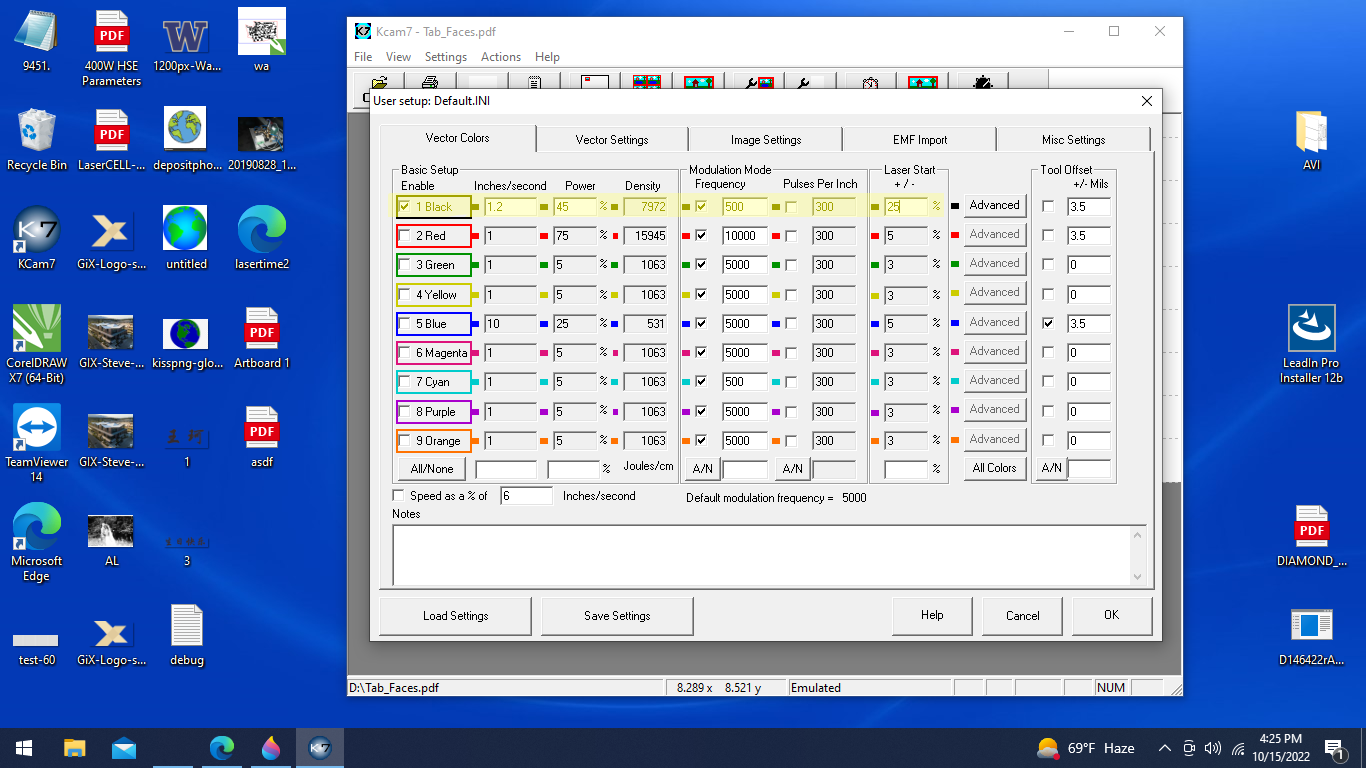
Position your artwork. The simplest way to do this is to go to select Setup from the toolbar, navigate to the Misc. Settings Tab, and select a User Offset. The bottom left corner is (1.0849, 0.9123) by default. I’m going to put my image at (6,2) to get away from the corner.
-
In the same Setup dialogue, navigate to the Vector Colors tab and input your cut settings. I’m going to be cutting 0.030” mild steel for this demo so I’ll grab my settings from the table above.
Laser Startup
-
Walk around the system and check for any obstacles in the way of the motion of the table or the motion of the laser.
-
Visually inspect the Lexan laser shield for any damage, which could permit a reflection of the beam to escape.
-
Press the START button on the electrical panel for the laser system and vacuum blower. The chiller should automatically turn on when you START the laser system.
-
Cycle the key switch on the KLMC from “OFF” to “ON”. There will be a 5-second delay before the laser will operate. All lights should turn green except for the Laser Enable and DSP Enable. The Laser Enable and DSP Enable will turn green once you have started cutting or engraving. If any of the lights are red, refrain from cutting and notify a crew member. (Crew: To troubleshoot a red light, refer to the KLMC section of the Troubleshooting chapter of the manual that lives in the Kern room.)
-
The laser system should now be ready to load a file and begin cutting and engraving.
Using the Laser
-
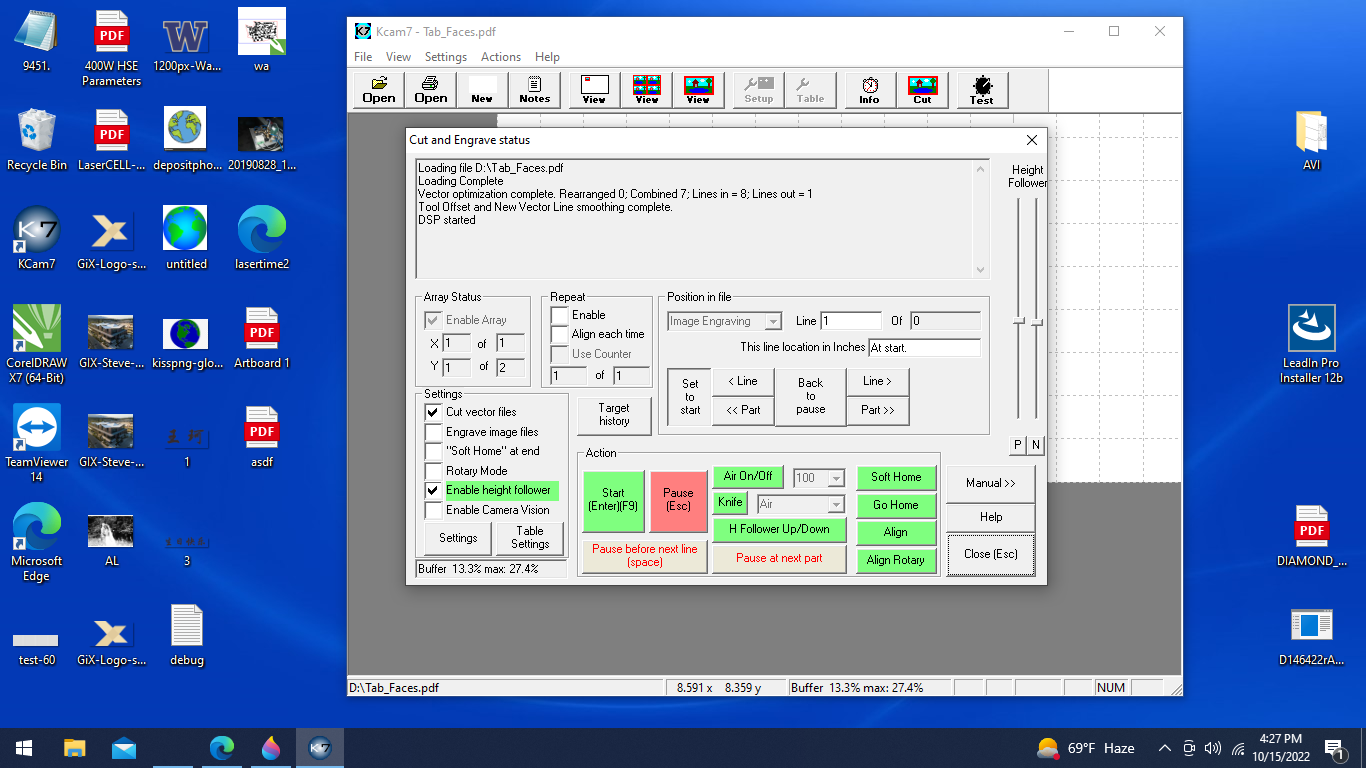
Select Cut from the toolbar. It should display the prompt below. Ensure that “Enable height follower” is selected. Press Start once. This won’t actually start the cut yet, just move the nozzle to the origin. Ensure that this origin is in the expected place. i.e. the nozzle is above your material.
-
Press Start again to actually geting the cut.
-
After the cut is finished, wait until the gantry returns to its home position before opening the Lexan cover. Be careful when grabbing your part to avoid any sharp corners or burrs.