Quick Reference
Vinyl Cutter
The Roland GS-24 is the vinyl cutter that the Lab uses.
The following guide explains how to use the vinyl cutter with the Roland GS-24, along with the relevant steps one has to take. The guide assumes one already has Adobe Illustrator installed.
Part 1: Installation
- Install the Illustrator plugin here.
- Click on install and it should automatically install to your Illustrator - you will need to restart Illustrator and verify that it is properly installed. (Window > Extentions > Roland CutStudio)
Part 2: Illustrator
These steps are to help you get started with the vinyl cutter by starting off with cutting text using the Roland GS-24.
The screenshots below are based on Essential Classics workspace.
- Open up the Roland CutStudio extension.
- Under model you want to select GS-24.
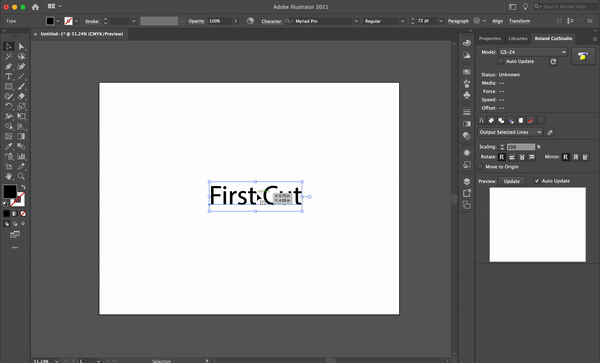
- Select the type tool and type in the text you want cut out.
- For existing image files and other graphics, they will need to be a vector format
- Once you have your text or other graphics, you will need to convert them to outlines or paths.
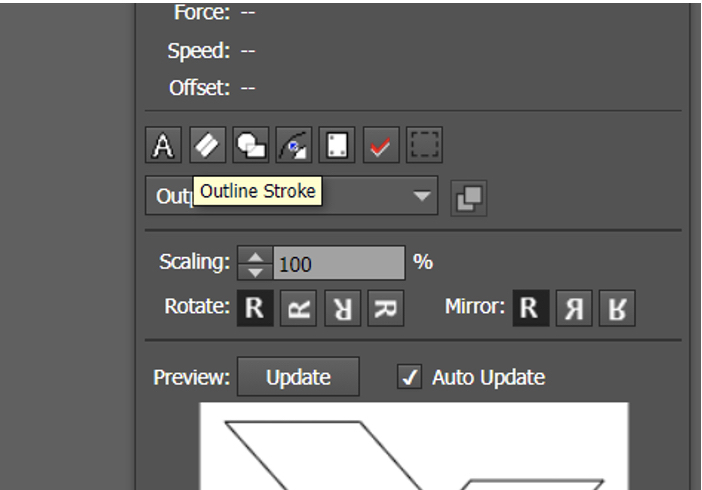
- You can do this in the cutstudio plugin by clicking on ‘outline text’ or ‘outline stroke’ if the image is not already saved as a path or outline.
- For many fonts, you may also need to click on ‘merge overlapping paths’.
-
You then want to leave the type tool and switch over to the selection tool to select the text and expand it. (Object > Expand) Once you have done that you can see on the CutStudio that the text has appeared.
Part 3: Loading the Vinyl
- You want to feed the vinyl into the cutter. Ensure that the edges on your roll or piece are straight and aligned with the guide lines on the front of the cutter.
- There is a tension lever where you want to lift up to secure your vinyl.
- Before lowering the tension lever, you can position the rollers on the edges of your material, but both rollers must be within the white bars on the cutter. You cannot position rollers outside of these white bars or the vinyl will not feed.

-
The machine will be able to tell that you have loaded a roll of vinyl, and it will prompt to ask if it is a roll (this can be seen on the screen on the machine). You can also load a square piece as long as the rollers can reach both edgers. The machine will measure the dimensions of the piece automatically. Press Enter
- The print head will then move and let you know how much cutting distance you have.
- Once that is all setup you can use the arrows on the machine to tell it where to start.
- Connect the Roland GS-24 to your computer.
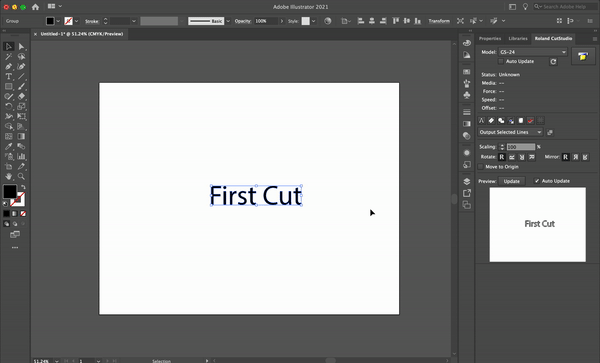
- You will then switch over back to Illustrator and on the Roland CutStudio, you want to click on Output to Path.
-
- For MacOS: This will then show you a prompt ensure that you choose GS-24 and then hit Cut.
- Windows: Select all of the image that you want to cut, and you should see it previewed in the CutStudio window plugin.
- go to ‘Print’, and select the GS-24.
- You should see a preview of the image in the print window – it may be centered on the roll, and you can change the position to one of the corners or edges so that you don’t waste too much vinyl. If the roll or piece does not seem to appear correctly in the print preview, go to ‘Print with system dialog’ and on this menu, you can click ‘get dimensions from printer’. This should update the print preview with the correct size of material.
- Go back to the AI print menu, and click ‘print’ to send it to the cutter.
💡TIPS: If you have a specific point on your piece or roll of vinyl that you want the cutter to consider the start point.
- Press Origin and hold it down (10secs) this will let the cutter know that it is ready to start cutting.
Part 4: Removing Unwanted Materials (Weeding)
There is no right way to remove the unwanted materials around the lettering. You are welcome to remove it any way you want it, but here are some helpful tips. You must remove all excess vinyl that you do not want to transfer to your final object.

- There are 2 main methods: ‘Peeling’ and ‘Picking’.
-
Peeling is the process of removing the outline or large chunks of material with little detail.
a. Pull the excess vinyl as close to the horizontal as you can when peeling; this will help the desired vinyl’s corners adhere to the surface. b. For most text, it is easiest to peel from left to right. You can also use a knife to make boxes around the text and cut it into boxes to make it easier to work with. Go slowly, and keep a knife handy to press out some pieces that may be stuck to the vinyl.
-
Picking uses a scalpel instead of your fingers for smaller, more detailed areas.
a. Stabbing small pieces of vinyl work if you are struggling to lift an edge away from the main viny.

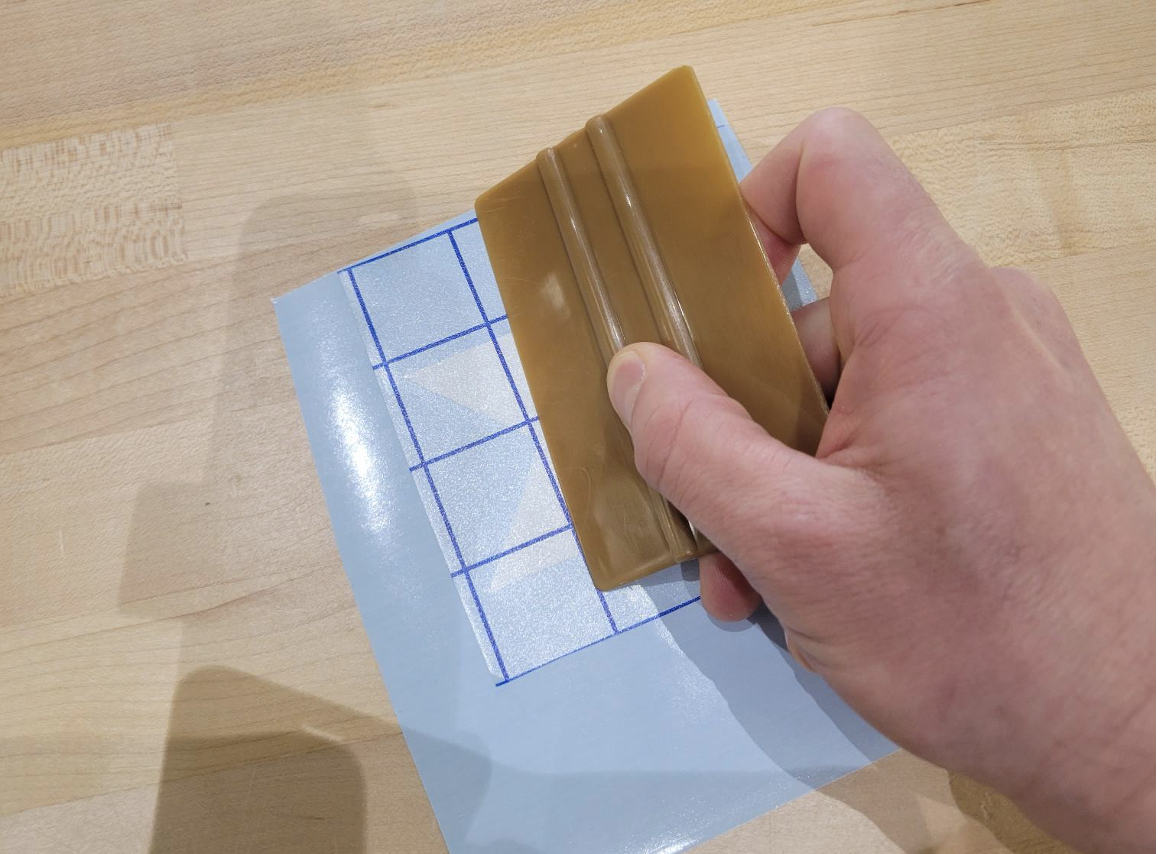
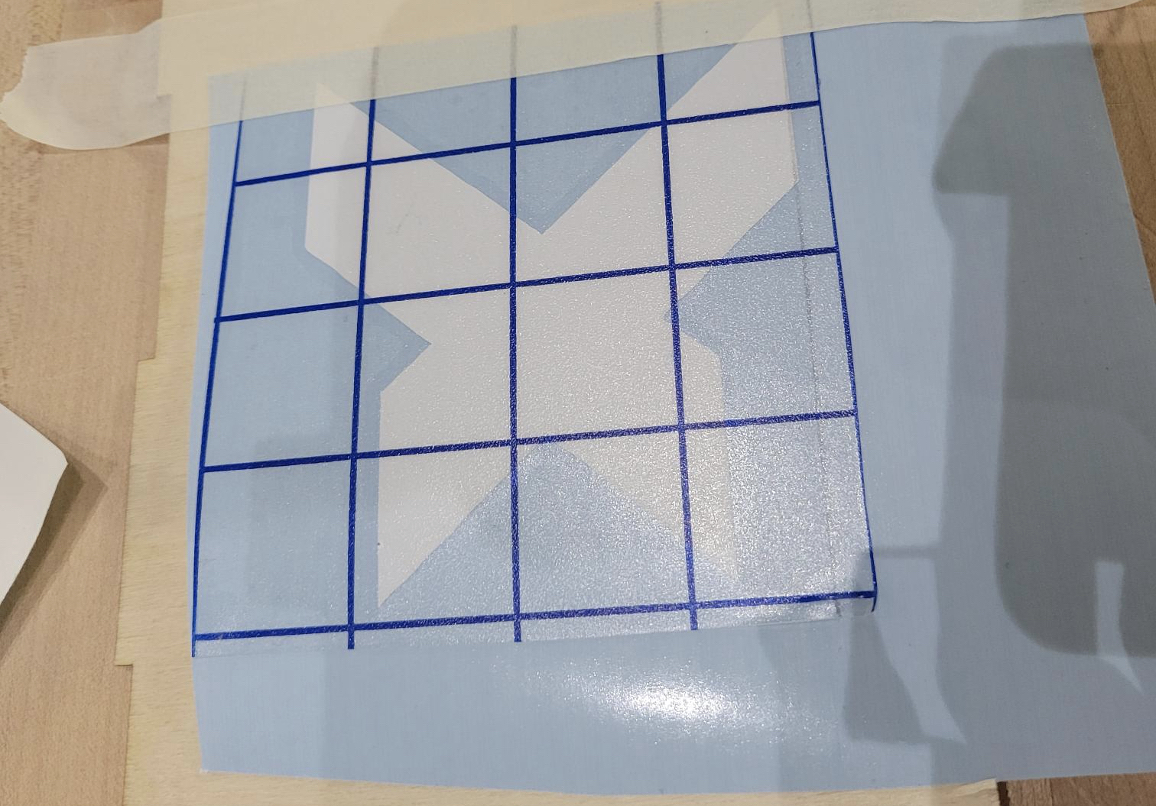
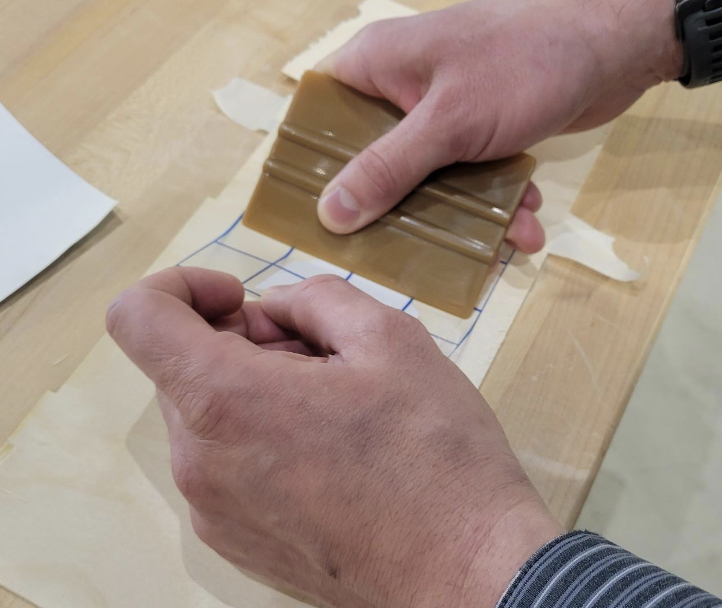
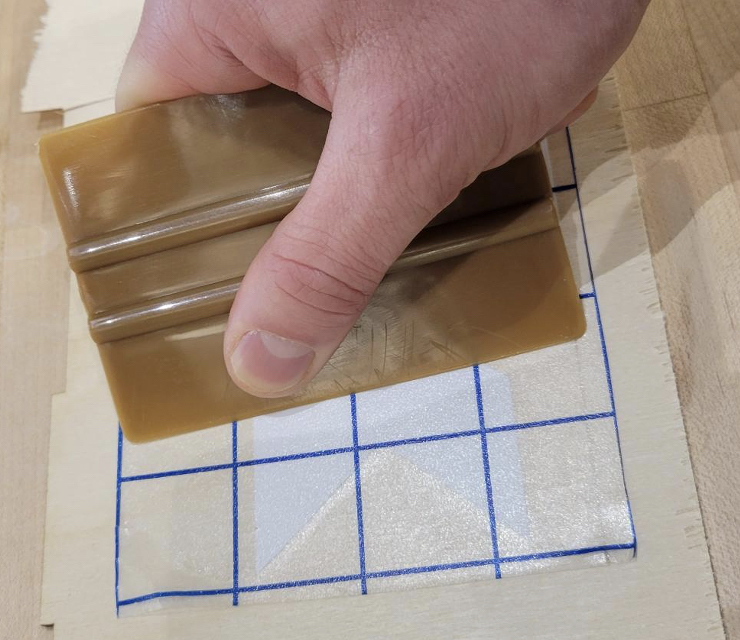
Part 5: Transferring Tape
- Cut off an appropriate size of transfer tape from the roll.
- Take your transfer tape and starting from one corner, slowly place your transfer down flat on the vinyl, ensuring no creases.
- For larger pieces, you can use masking tape to tape the vinyl to the table first so that it does not move.
- Use a squeegee to rub on top of the transfer tape to ensure that the vinyl is stuck to the tape.
![]()
![]()
Part 6: Application
- Take the decal to the surface you want to apply the decal on, and position it where you want it. Once the decal is in the right position, make a ‘hinge’ with masking tape.
- Fold the hinge over, and then peel off the back paper of the vinyl
- Use a squeegee to firmly press your decal onto the surface starting from the part closest to the hinge, until the entire decal is attached to the surface.

- Once the entire decal is attached, use the squeegee again to press the decal firmly onto the surface, and to remove any air bubbles.

💡TIPS: The dimensions of the Roland Vinyl Cutter
| Acceptable media | 50 - 700 mm (2 to 27.5 in.) |
|---|---|
| Max. cutting area | Width: 584 mm (22.9 in.) Length: 25 m (984 in.) |